How to Unlock a Folding Table
You’ve just pulled a folding table out of storage or the back of your van, but it won’t budge. You’re tugging at the hinge, poking at the sides—nothing works. Sound familiar? The frustration is real, but the solution is simpler than you think. How to unlock a folding table starts with one critical rule: find the finger gap. This small but essential feature is the key to safely and effectively opening any fold-in-half table. Whether you’re setting up for a family picnic, a classroom activity, or a banquet hall event, knowing where and how to apply force can save time, prevent damage, and avoid injury. In this guide, you’ll learn the universal principles of unlocking folding tables, identify your model’s locking system, and master the correct technique for smooth, reliable operation every time.
Find the Finger Gap
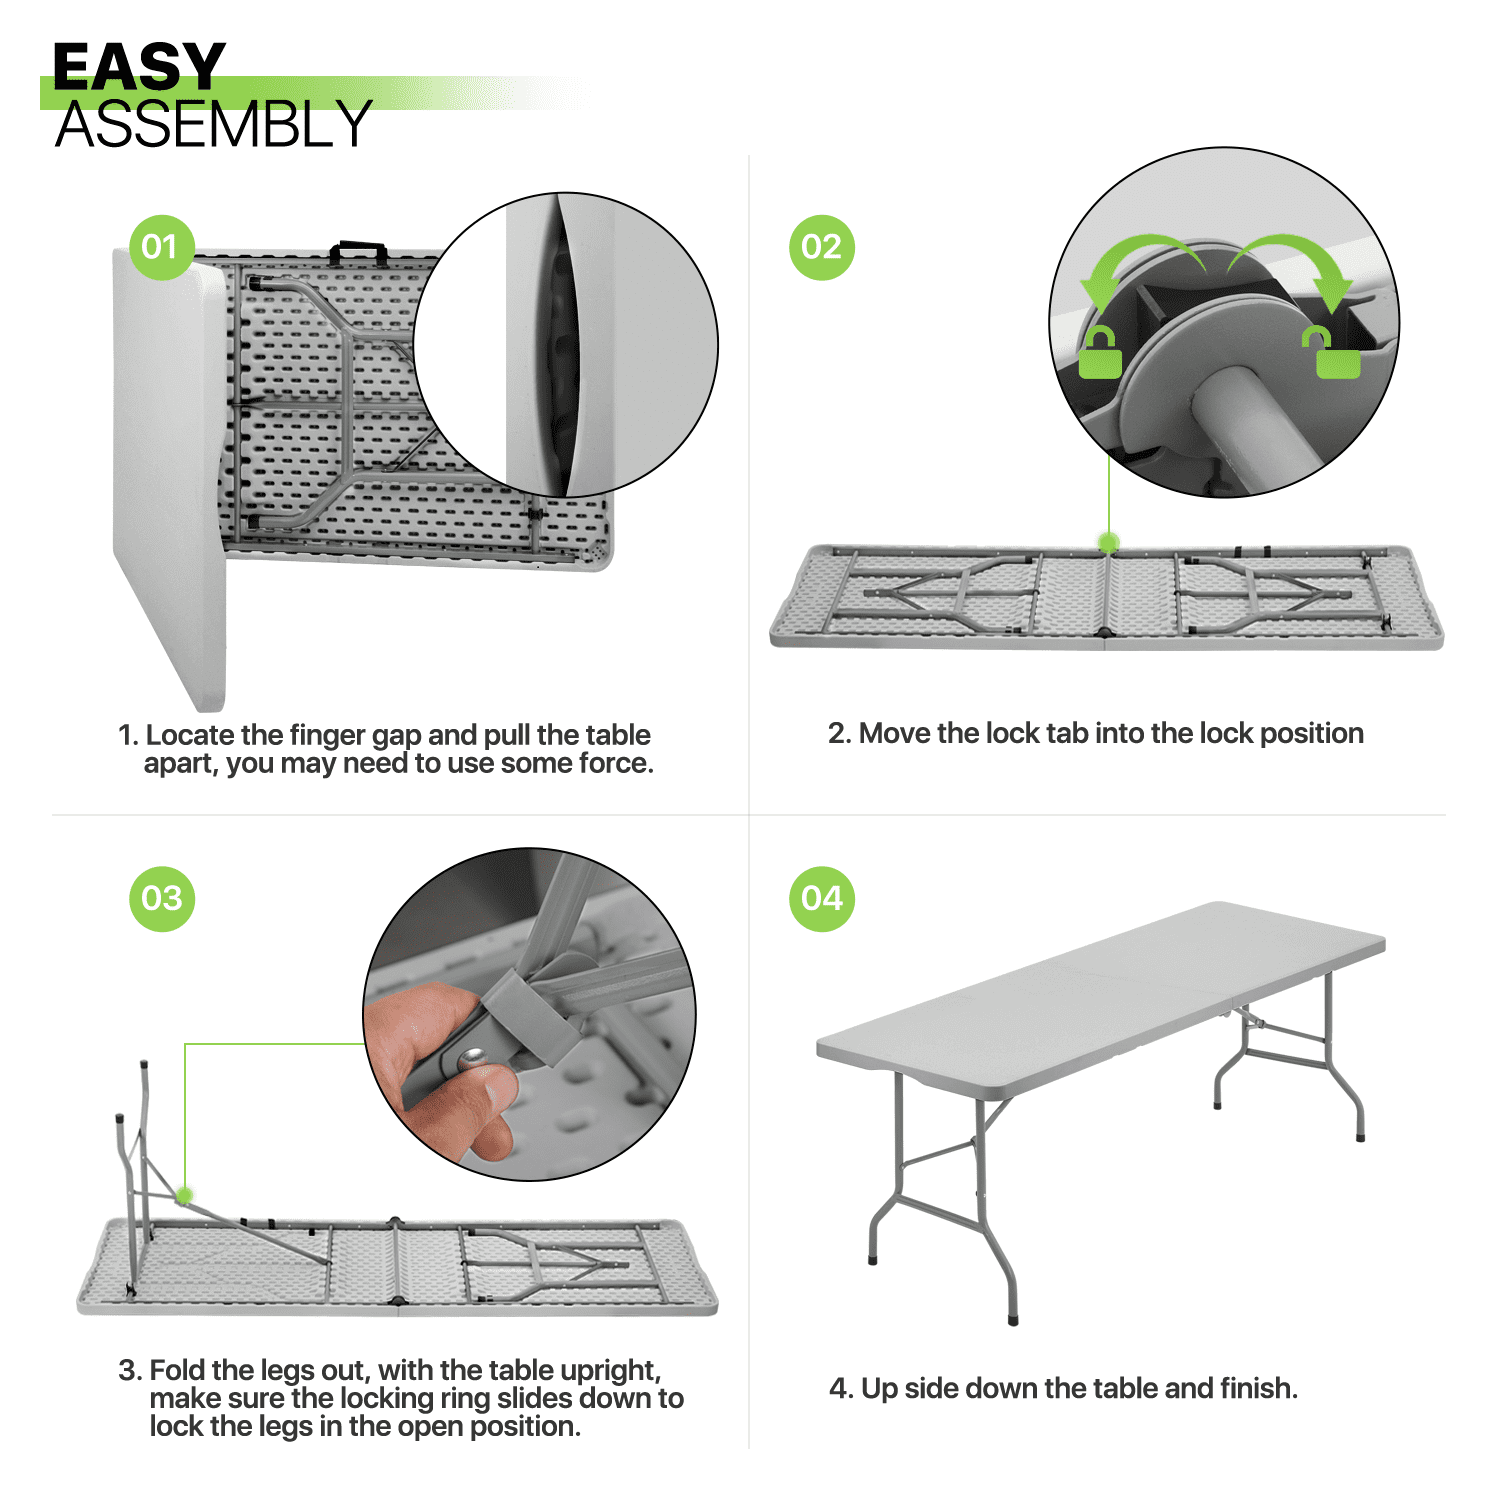
The finger gap is the only safe place to begin opening a folding table. It’s always on the side opposite the hinge. The hinge side is designed to stay closed and secure. Prying it open can damage the mechanism or pinch your fingers. Take a moment to locate the correct side before attempting to open the table.
Locate the Non-Hinge Side
Run your hand along both long edges of the folded table. One side will feel solid with no separation. The other will have a slight gap, molded slot, or plastic clip indicating where your fingers should go. Never attempt to open from the hinge side. This is a common mistake that leads to damaged tables and injured fingers.
Identify Visible or Hidden Gaps
On newer models, the gap may be a clearly defined groove or recessed handhold. On older or more streamlined designs, it could be a small, discreet notch along the edge. Look closely at the tabletop’s underside or side profile. Some models integrate the gap into a textured surface or hide it beneath a locking tab. If you see a red or gray switch on one side, that’s a clue. The finger gap is on the opposite end. Take a moment to inspect before forcing anything.
Apply Steady Outward Force
Once you’ve found the gap, grip both sides firmly inside the groove with both hands. Pull outward with steady, moderate-to-strong force. New tables often resist opening due to shipping clips or tight hinges. This is normal. Don’t yank or twist. Use smooth, even pressure. You may hear a slight pop or feel resistance give way. After the first few uses, the table will break in, and opening will require less effort.
Identify Your Lock Type

Folding tables generally utilize one of four distinct locking systems. Correct operation depends on identifying the specific mechanism installed on your unit. Knowing your lock type prevents frustration and potential damage.
Manual Lock Switch (Type A)
If your table has a red flip tab or a gray sliding bar under the center, it uses a manual lock. This mechanism must be engaged after the table is opened. After pulling the halves apart using the finger gap, extend the legs and then flip the red tab upward or slide the gray bar into place. A small amount of wobble is normal. To close, reverse the process. Flip or slide the lock to the unlocked position, align the halves, and press them together. Keep fingers clear of the joint to avoid pinching.
Automatic Leg-Extension Lock (Type B)
No central switch? You likely have an automatic leg-extension lock. These tables lock when the legs are fully opened. After separating the halves at the finger gap, extend the legs outward until they click into place. That leg movement triggers the internal pin to lock the tabletop. To close, fold the legs inward first. This action mechanically releases the central lock. Once the legs are tucked, the tabletop halves will come together easily.
Slide-to-Release Lock (Type C)
Some tables click shut automatically and require a push and slide motion to unlock. When fully opened, you’ll hear or feel a distinct click as the internal pin engages. To close, stabilize one half and push the lock mechanism to the right. Then slide one tabletop half inward. This disengages the pin. Only after this step can you fold the halves together. Skipping the slide step and trying to press the table closed will fail and may bend the locking components.
Hinge-Ring Lock (Type D)
Heavy-duty or older models may use steel locking rings on the leg hinges. These don’t lock the tabletop directly but secure the legs in place. To open, unfold the table, extend the legs fully, and slide the steel rings down the hinge posts to lock. To close, slide the rings up and away from the hinges, fold the legs inward, and then bring the tabletop halves together. These rings wear over time. Inspect them regularly for cracks or stiffness.
Open the Table Safely
Proper technique prevents damage and injury. Follow these steps every time you set up your folding table. Safety should always be your top priority.
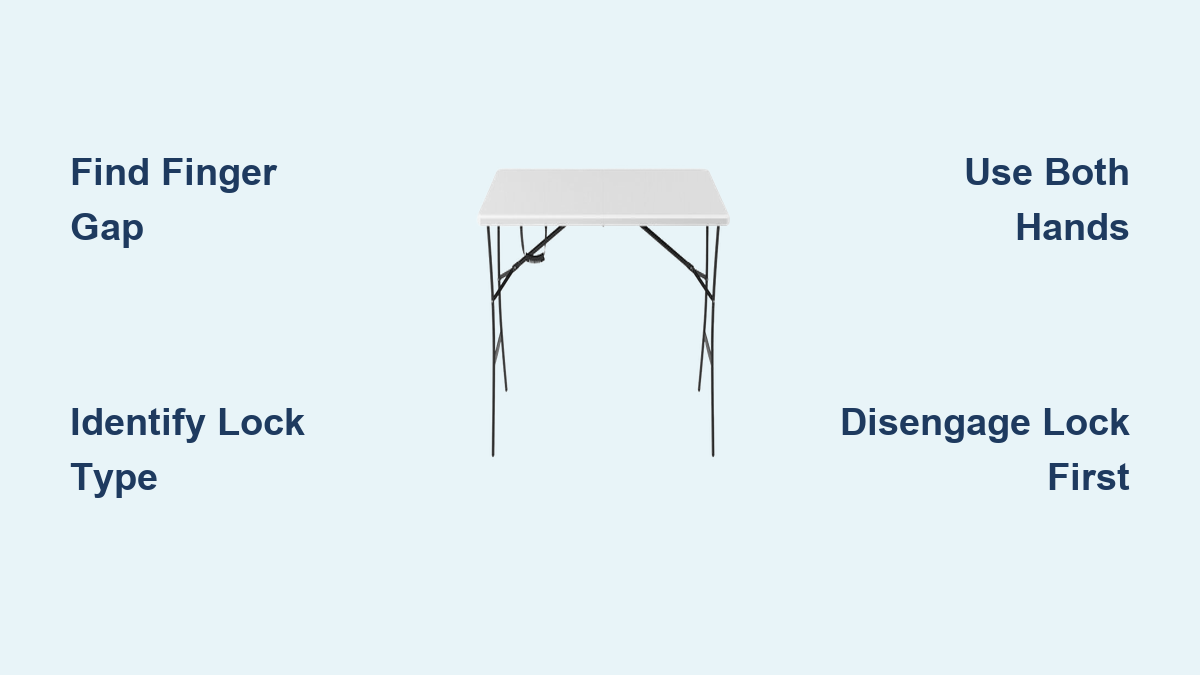
Use Both Hands in the Groove
Always use both hands inside the finger gap when opening. This ensures even force distribution and prevents twisting that could misalign the hinges. Position your thumbs on top and fingers below, gripping the lip of the groove. Pull straight outward. No jerking or upward lifting. If the table doesn’t budge, recheck your side. Pulling from the hinge or lock side will not work and risks breaking plastic tabs or bending metal pins.
Deploy Legs Only After Full Extension
Never extend the legs until the tabletop is fully separated and locked. Opening the legs too early can interfere with the locking mechanism, especially on automatic systems. For Type B tables, leg extension is the lock. So full table separation comes first, then leg deployment. On manual lock models, extending legs before locking the tabletop can cause instability or misalignment. Wait until the halves are fully apart and the central lock is engaged before touching the legs.
Check for Full Lock Engagement
After opening, verify the table is secure. For manual switches, ensure the red tab is fully flipped or the gray bar is fully extended. For automatic types, confirm the legs are completely open and the central pin has clicked. Try gently rocking the table side-to-side. A small amount of movement is acceptable, but excessive wobbling means the lock isn’t fully engaged. Reopen and retry if needed.
Close Without Damage

Closing a folding table requires just as much care as opening. Follow these steps to avoid damage and injury. Rushing through the closing process leads to broken locks and pinched fingers.
Disengage Lock Before Folding
This is the most common mistake. Trying to fold the table without unlocking it first will fail. Always disengage the lock before attempting to close. For manual switches, flip the tab down or slide the bar back. For automatic leg locks, fold the legs inward. They’ll release the tabletop lock. For slide-to-release models, perform the push-and-slide maneuver. Only when the lock is fully released should you attempt to press the halves together.
Align Halves Before Pressing
Before closing, align the two tabletop halves so their edges match perfectly. Misaligned halves won’t close smoothly and can jam. Hold one side steady and guide the other into position. Then apply even pressure with both hands to press them together. You should hear a soft click or feel them snap shut. If resistance occurs, stop. Don’t force it. Recheck the lock status and alignment.
Avoid Pinching Fingers
The joint between the two halves is a major pinch point. Keep fingers clear during the final closing phase. Use the sides of your palms or the heel of your hand to push the halves together. Teach children to stand back during setup and takedown. If a finger gets caught, it can result in bruising, cuts, or even broken nails.
Troubleshoot Common Issues

Even with proper technique, problems can occur. Here’s how to diagnose and fix the most common issues with folding tables. Understanding these solutions saves time and money.
Table Won’t Open
If the table won’t budge, you’re likely pulling from the wrong side. Double-check. The finger gap is opposite the hinge. If you’re on the correct side but still stuck, the table may be new or stored for a long time. Apply stronger, steady force. These units are built to handle it. If it still won’t open, inspect for debris or warping. Never use tools like screwdrivers to pry it open. This will damage the casing.
Table Won’t Close
A table that won’t close usually means the lock isn’t fully disengaged. Check the switch position. Ensure legs are folded for automatic types. Perform the slide maneuver if needed. Also look for obstructions in the hinge area. Dirt, carpet fibers, or bent components can block closure. Clean the joint with a dry cloth and inspect for damage. If the mechanism feels broken, stop using it and consider repair or replacement.
Table Feels Loose When Open
Some movement is normal, but excessive wobble indicates a problem. Inspect the locking tab, bar, or rings for wear. A cracked plastic tab or bent steel pin won’t hold securely. On adjustable tables, check the cross-bar and hinge points. If parts are damaged, replacement components are often available from the manufacturer. Never use a table that feels unstable. It’s a safety hazard.
Maintain Longevity
Regular maintenance extends the life of your folding tables. A few simple habits prevent premature wear and costly replacements. Investment in care pays off over years of use.
Clean After Every Use
Wipe the tabletop with a damp cloth after each use. Avoid harsh chemicals or abrasive scrubbers that can damage the laminate. Never place hot pans or dishes directly on the surface. This can cause warping or bubbling. For stubborn stains, use mild soap and water. Dry thoroughly before folding and storing.
Store Flat and Dry
Always store folding tables horizontally in a dry place. Stacking them vertically or leaning them against a wall can warp the tabletop or stress the hinges. Avoid damp basements or garages where moisture can lead to rust on metal components. Proper storage preserves the locking mechanism and prevents premature wear.
Inspect Locks Regularly
Before each use, take 10 seconds to inspect the lock. Is the tab cracked? Do the steel rings slide smoothly? Are the legs extending fully? Catching small issues early prevents bigger problems. A wobbly table isn’t just annoying. It’s dangerous. Replace worn parts promptly to maintain safety and performance.
Optimize for Different Models
Different table types require slightly different approaches. Understanding these variations ensures you get the most out of your equipment. The core principles remain the same.
Handle Adjustable Height Tables
Some folding tables allow height adjustment even when open. To raise or lower, place a foot on the cross-bar and gently lift or press one side at a time. This is useful for uneven floors or ergonomic needs. Always ensure both sides are at the same height before use. Never adjust while someone is leaning on the table.
Adapt for Round and Banquet Sizes
The finger gap principle applies to all fold-in-half tables, regardless of shape. Round, square, 4-foot, 6-foot, or 8-foot banquet tables all open the same way. Locate the non-hinge side, find the gap, and pull. Larger tables may require more force. Use your body weight if needed. For heavy-duty models, consider having two people assist during setup and takedown.
Frequently Asked Questions About Unlocking Folding Tables
Why won’t my folding table open even when I pull hard enough?
You’re probably pulling from the wrong side. The finger gap is always on the side opposite the hinge. Check both long edges of the folded table. One side will feel solid. The other will have a gap or notch where your fingers should go. If you’re on the correct side but still struggling, the table may be new. New tables have tight hinges and shipping clips. Apply steady, stronger force.
What is the red tab on my folding table for?
The red tab is a manual lock switch found on Type A folding tables. It locks the table in the open position after you’ve separated the halves using the finger gap. Flip it upward to lock. Flip it down to unlock before closing. This type of lock is common on tables manufactured after 2008.
How do I close a folding table that locks automatically?
For automatic leg-extension locks (Type B), fold the legs inward first. This action mechanically releases the central lock. Once the legs are tucked, the tabletop halves will come together easily. For slide-to-release locks (Type C), push the lock mechanism to the side and slide one half inward before folding.
Can I force my folding table open if it’s stuck?
No. Forcing a stuck table risks breaking plastic tabs or bending metal pins. If the table won’t open from the correct side, inspect for debris, warping, or damage. Apply steady force rather than sudden jerks. If it still won’t budge, consider professional repair rather than risking damage.
Why does my folding table wobble after I lock it?
A small amount of movement is normal. However, excessive wobble indicates the lock isn’t fully engaged or the locking components are worn. Check that the lock tab is fully flipped or the legs are fully extended. Inspect the locking mechanism for cracks or damage. Replace worn parts promptly.
Key Takeaways for Unlocking Your Folding Table

Mastering how to unlock a folding table comes down to three core principles. First, always locate and use the finger gap on the non-hinge side. Never attempt to pry open from the hinge or lock side. Second, identify your specific lock type. Manual switches, automatic leg locks, slide-to-release mechanisms, and hinge-ring locks each require different procedures. Third, apply steady outward force from the finger gap. New tables require more force due to tight hinges and shipping clips. This is normal and improves after the first few uses.
Regular maintenance extends the life of your folding tables significantly. Clean surfaces after each use, store tables flat in dry locations, and inspect locks before every deployment. Catching wear early prevents accidents and costly replacements. Whether you’re using a red-tab Lifetime model or a steel-ring industrial unit, these principles apply universally. Now that you know how to unlock a folding table the right way, setup and takedown will be faster, safer, and frustration-free.