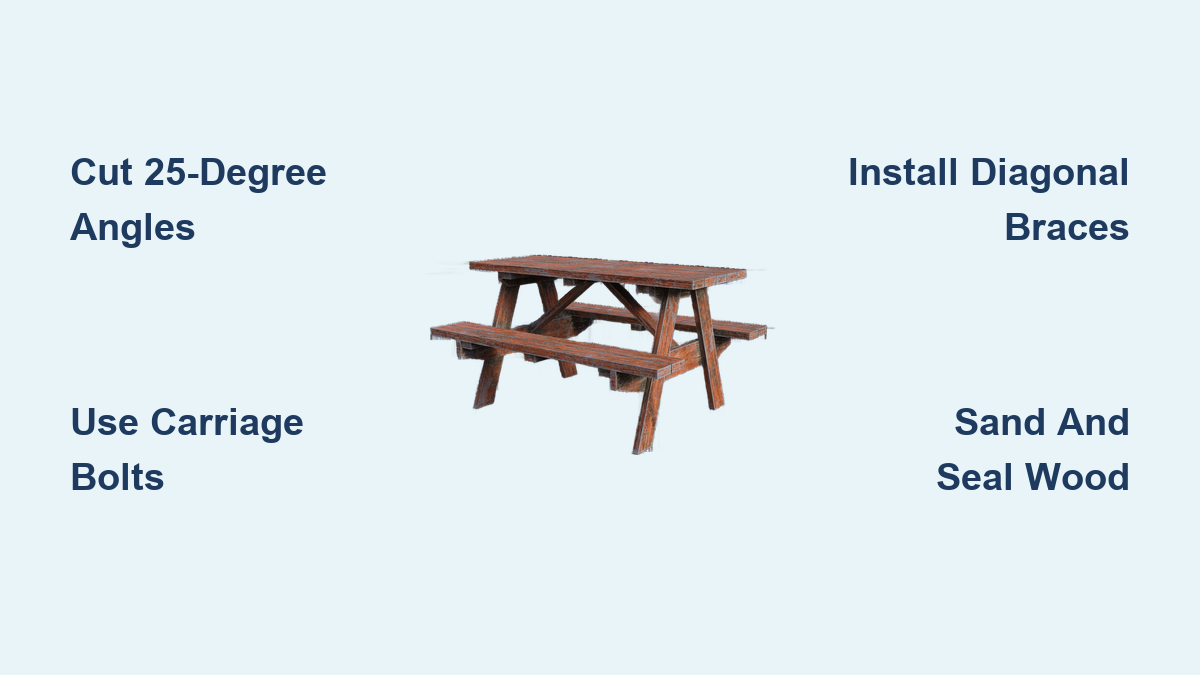
How to Build a Picnic Table: Quick Steps
Nothing says summer like gathering around a sturdy picnic table for food, laughter, and sunshine. But buying one can cost hundreds of dollars, and cheap options often wobble after one season. Learning how to build a picnic table yourself gives you a durable, custom-fit outdoor centerpiece for a fraction of the retail price. With basic tools, quality lumber, and this step-by-step guide, you can create a wobble-free table that seats six to eight comfortably and lasts over 15 years.
This guide walks you through every phase of the build, from selecting the right lumber and cutting precise angles to assembling a rock-solid frame and applying a weather-resistant finish. Whether you are a beginner or a weekend warrior, you will find clear instructions, expert tips, and troubleshooting advice to ensure your DIY picnic table becomes a backyard favorite.
Choose the Right Lumber for Your Picnic Table
Selecting the correct wood is the foundation of a durable picnic table. The right lumber resists rot, insects, and weather damage while providing structural strength.
Pressure-Treated Pine vs. Cedar
Pressure-treated (PT) pine is the top choice for longevity and value, especially for legs and supports that touch the ground. The chemical treatment resists rot and insects, making it ideal for outdoor use. However, PT pine is heavier and requires safety precautions. Wear a dust mask when cutting, and avoid indoor storage. Let the wood dry one to two months before sealing.
Cedar offers natural decay resistance and a rich, attractive grain. It is lighter and safer for immediate handling but costs more. If your budget allows, use cedar for tabletops and benches where appearance matters most.
Avoid untreated pine or Douglas fir unless you are prepared for frequent maintenance and finishing.
Pick Grade #2 or Better
Always inspect boards before purchase. Look for straight, flat pieces without large knots, cracks, or warping. Test them on a concrete floor to check for twists. Grade #2 lumber balances cost and quality well. It is strong enough for structural use and clean enough for visible surfaces.
Gather Essential Tools for Picnic Table Building
You do not need a full workshop to build a picnic table. Here is what you actually need to get the job done accurately.
Must-Have Tools for Accuracy
A miter saw delivers the best results for precise angled cuts. It handles 30-degree, 25-degree, and 45-degree cuts with ease. A circular saw with a speed square works as an acceptable alternative if guided carefully. You will also need a power drill for pilot holes and driving screws. Drill bits should include a 3/8-inch bit for carriage bolts and a Forstner bit recommended for clean bolt holes.
Measurement tools are critical. A tape measure and speed square handle layout and angle marking. A framing square ensures 90-degree corners during assembly. A random orbital sander smooths edges and prevents splinters. Clamps in 6-inch and 12-inch sizes help hold joints during gluing.
Safety Gear You Cannot Skip
Safety glasses protect your eyes from sawdust and debris. Ear protection is mandatory because power tools are loud. A dust mask is required when sanding PT wood to avoid inhaling treated particles.
Cut Lumber to Exact Dimensions
A standard picnic table is 72 inches long, 30 inches wide, and 30 inches high. This size seats six to eight adults comfortably.
Tabletop and Bench Boards
You need six boards for the tabletop and four for the benches (two per side). Use 2×6 or 2×8 lumber at 72 inches long. Cut all boards to the same length using the shortest one as a template.
Legs
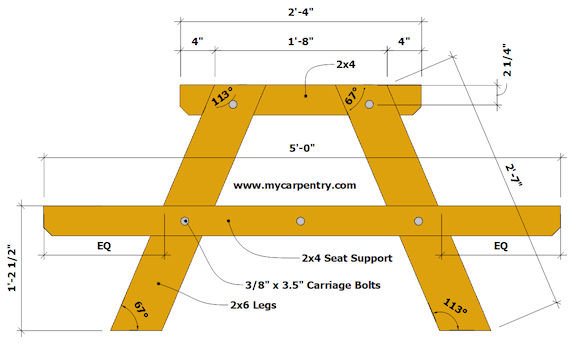
Cut four legs from 2×6 or 2×8 lumber. The raw length should be 30¼ to 32 inches. Each leg needs dual 22.5-degree miter cuts forming a parallelogram shape, or a single 65-degree cut per end.
Horizontal Support Braces
Two 2×8 boards at 60 inches form the A-frame braces. Cut 45-degree miters, removing 3½ inches from each end. Position these 16½ inches up from the bottom of the legs.
Tabletop Cleats, Seat Supports, and Diagonal Braces
Three 2×4 cleats (about 30½ inches each) support the tabletop. Place the center cleat at midpoint and outer cleats 13½ inches from table edges. For bench supports, cut two 2x4s per bench at about 11 inches with 45-degree opposite-angle cuts. Diagonal braces require two 2x4s cut to fit at 45 degrees on both ends.
Master the Key Angles for Stability

The strength of a picnic table comes from properly angled legs. Precise angles resist tipping and distribute weight evenly.
25-Degree Leg Angle
A 25-degree cut at the bottom of each leg creates a balanced stance. Less than 20 degrees reduces stability. Wider than 28 degrees looks bulky. The 25-degree angle gives optimal spread.
22.5-Degree Miter Cut for A-Frame Style
Cut both ends of each leg in the same direction at 22.5 degrees. This forms a parallelogram shape that allows the horizontal brace to sit flush while maintaining the correct slope.
65-Degree Cut Alternative
Some plans call for 65-degree cuts on each end of a 32-inch leg to achieve approximately 30-inch finished height. Ensure consistency across all four legs.
30-Degree Miter Trick for Uniform Look
Cut all tabletop and bench boards at a 30-degree angle on both ends so they meet seamlessly at the corners. This creates a clean, professional edge.
45-Degree Diagonal Braces
Cut 2x4s at 45 degrees to install under the table between frames. These prevent racking and eliminate wobble.
Assemble the A-Frame Legs
Build one frame at a time to ensure accuracy.
- Lay two leg pieces parallel on a flat surface.
- Insert nails or screws at the base as temporary stops to maintain spacing.
- Use a speed square to verify that 25-degree or 22.5-degree angles are accurate.
- Position the 60-inch 2×8 horizontal brace between the legs, 16½ inches from the bottom.
- Ensure equal overhang (about 10 inches) on both sides.
- Temporarily secure with one to two screws per side.
Check for Squareness
Measure diagonally from corner to corner. Both measurements must be equal. If they are not, gently adjust until the frame is perfectly square. Once aligned, drive screws fully to lock the joint. Repeat for the second A-frame.
Attach Tabletop and Bench Boards
Build the surface first before attaching the legs.
Lay all six tabletop boards face down on a clean, flat surface. Place the best-looking side down if you plan to flip later.
Add Spacing for Expansion
Use ½-inch spacers (scrap wood or nails) between boards to allow for seasonal swelling and shrinking.
Install Cleats with Glue and Screws
Position three 2×4 cleats underneath the tabletop. One goes in the center, two near the ends. Apply exterior-grade construction adhesive to cleat surfaces. Secure each cleat with two 2½-inch deck screws per board. Stagger screws to prevent splitting. Keep screw heads below the surface.
Repeat this process for the two bench seats using shorter 2×4 supports (11 inches long).
Join Frames to the Tabletop
Flip and mount the table assembly.
- Turn the tabletop assembly upside down.
- Position the two A-frames under the table, aligning the outer edge of each leg with the outer cleat.
- Temporarily attach with three screws per side through the cleat into the leg frame.
Attach the Benches
Position each bench so the front edge is set back approximately four inches from the tabletop edge. This creates comfortable legroom and easy access. Secure benches to their supports using screws and construction adhesive.
Install Carriage Bolts for Strength

Carriage bolts prevent wobble and add long-term rigidity. Screws alone can loosen over time due to wood movement.
Hardware Specifications
Use 3/8-inch diameter bolts, 3½ to 4 inches long (four-inch preferred). You will need eight to 16 bolts depending on your design. Include galvanized washers and nuts.
Installation Steps
Mark bolt locations where cleats meet leg frames. Use a Forstner bit to drill a clean, flat-bottomed hole for the bolt head. Follow with a standard bit to penetrate fully. Insert the bolt, add washer and nut, then tighten securely. Use a wood block when hammering to protect the galvanized finish. Two bolts per connection point work best, one near the top and one near the bottom.
Add Diagonal Braces to Stop Wobble

If your table wobbles, it is likely due to uneven legs or missing diagonal bracing.
Cut and Fit 45-Degree Braces
Take a 2×4 and cut both ends at 45 degrees. Test-fit diagonally between the two A-frames under the table. Trim in 1/8-inch increments until the fit is snug. Secure with construction adhesive and screws. Start with a 90-degree pilot hole, then angle the screw slightly for better grip.
Optional Reinforcements
Add tie plates at brace ends for extra strength. Install cross bracing (X-frame) under the tabletop, joined in the center with a screw to prevent racking.
Sand and Finish for Longevity
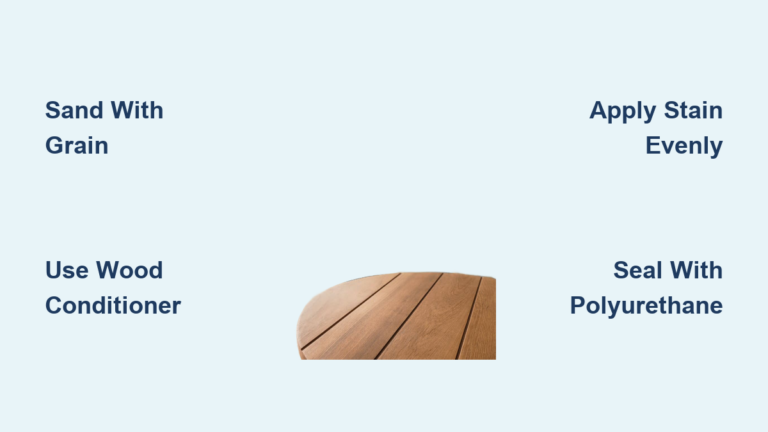
Before finishing, sand every surface with medium-grit paper (80 to 100 grit), then fine grit (150 to 220). Focus on edges, corners, and seat areas to prevent splinters. A random orbital sander speeds this up, but hand sanding works.
Apply Protective Finish
For maximum durability, use spar urethane. It resists UV rays, moisture, and temperature swings. Apply two to three coats with a brush or rag. Lightly sand between coats. Let dry fully before use.
Alternatively, use exterior stain or paint. Reapply every five years depending on sun exposure.
Wait one to two months before sealing pressure-treated wood to allow moisture to escape.
Customize With Smart Upgrades
Build a Drink Trough (Cooler Hack)
Turn your table into a party centerpiece with a built-in cooler.
You will need 1×8 and 1×4 boards, roof flashing (waterproof liner), pan-head screws, and a removable drain plug.
Remove two center tabletop boards. Build a shallow box (about four inches deep) from 1×8 sides and 1×4 bottom. Line the interior with roof flashing, sealed at seams. Attach the box to the underside of the table. Add outer 1×4 supports to reinforce. Install a threaded drain plug at the lowest point.
Note that this is not ideal for rainy climates unless covered. Always use a lid.
Other Popular Mods
Wider benches use two 2x8s side-by-side for extra comfort. Detachable benches build separate seats for flexible layout. Half-lap joints offer advanced but stronger leg-to-brace connections.
Ensure Safety and Durability
Handle Pressure-Treated Wood Safely
Fresh PT wood contains chemicals that can be harmful. Never place food directly on the surface. Use tablecloths or trays. Wash hands after handling. Do not burn scraps. Store outdoors or in a garage, not inside living spaces.
Prevent Common Failures
Wobble comes from uneven legs or no diagonal bracing. Level legs and install 45-degree braces to fix it. Splitting occurs when screws are too close to the edge. Pre-drill holes and keep screws one inch from ends. Warping results from poor cleat adhesion or wet wood. Use construction glue and clamp during drying.
Maintain Your Table for Years
Expected Lifespan
Unfinished PT wood lasts 15 to 17 years, turning silver-gray over time. Finished wood needs resealing every five years. Use galvanized or stainless fasteners to avoid rust stains.
Yearly Maintenance Tips
Inspect bolts and tighten as needed. Check for loose screws or protruding tips. Clean with mild soap and water. Reapply finish if water no longer beads on the surface.
Key Takeaways for Building Your Own Picnic Table
Learning how to build a picnic table pays off in savings, satisfaction, and customization. For about $50 to $120 (versus $300 or more for store-bought), you get a stronger, better-fitting table made from quality materials. With precise angles, solid joinery, and weather-resistant finishes, your DIY build will stand up to seasons of meals, games, and memories.
Now that you know the full process, from cutting 25-degree leg angles to installing carriage bolts and adding a drink trough, you are ready to start. Pick your lumber, set your miter saw, and build a backyard classic that lasts decades.
Frequently Asked Questions About Building a Picnic Table
How long does it take to build a picnic table?
Most builds take about six hours from start to finish. Experienced builders can complete one in under two hours. Plan for a full day if you include finishing time.
How much does it cost to build a picnic table yourself?
A standard build costs approximately $120 for pressure-treated lumber, glue, and hardware. Budget options can run as low as $50 using optimized cut lists. This compares favorably to commercial tables costing $300 or more.
Can a beginner build a picnic table?
Yes. Standard A-frame designs require no complex joinery. Basic tools and following precise angle measurements are the keys to success. Start with a simple design before attempting advanced features like half-lap joints.
What is the best wood for outdoor picnic tables?
Pressure-treated pine offers the best value for longevity. Cedar provides natural beauty and rot resistance at a higher cost. Avoid untreated pine or Douglas fir unless you plan to refinish frequently.
How do I stop my picnic table from wobbling?
Wobble typically comes from uneven leg lengths or missing diagonal bracing. Check that all legs contact the ground evenly. Install 45-degree diagonal braces between the leg frames. Tighten all carriage bolts and screws.
Should I seal pressure-treated wood immediately?
No. Wait one to two months after construction before applying sealer. This allows moisture to escape from the treatment. Sealing too early traps moisture and causes problems.