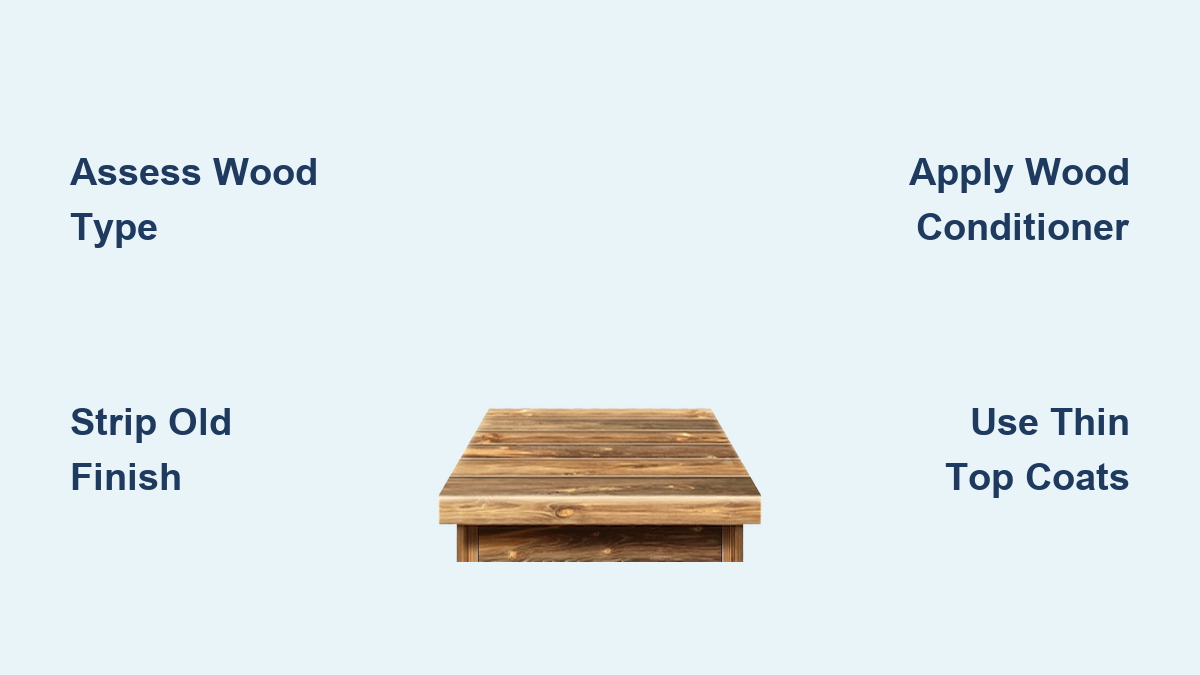
How to Refinish a Wood Table: Quick Steps
Is your family heirloom table looking worn, scratched, or outdated? A dull finish, water rings, or uneven coloring can make even the finest wood furniture feel tired. Refinishing a wood table breathes new life into it, restoring its beauty, protecting it for years, and saving hundreds compared to buying new. This guide walks you through every stage, from assessing your table’s condition and safely stripping the old finish to staining, sealing, and adding professional touches.
You’ll learn how to avoid common mistakes, choose the best products, and achieve a smooth, durable result that looks like it came from a workshop, not your garage.
Assess Your Table’s Condition Before Refinishing

Before picking up sandpaper or stripper, examine your table closely. The approach depends entirely on what kind of wood and finish you’re dealing with.
Identify Wood Type and Construction
Know whether you’re working with solid wood, veneer, or laminate, because this determines how aggressive you can be with refinishing. Solid wood can handle full stripping and multiple sandings, making it ideal for refinishing. Veneer is a thin layer of real wood glued over particleboard or MDF, and over-sanding will burn through it, exposing the substrate. Look for repeating grain patterns across wide surfaces, which is a sign of veneer. Laminate is a plastic-like coating that won’t accept stain or stripper and can only be painted with proper adhesion primer.
Some tables combine materials, like a red oak top with poplar legs and veneered aprons. Each wood absorbs stain differently, so expect variations and plan for color balancing.
Check for Damage and Stability
Inspect every inch of your table for deep scratches, water stains, or cloudy white rings. Test joints by gently twisting the table to check for wobbling. Loose joints must be reglued before refinishing. Look for dents or gouges, which can often be repaired or left as character marks.
If the table has structural issues, fix them first. Use Titebond III wood glue for loose joints and clamp until dry. For deep damage, fill with epoxy putty and sand flush when cured.
Prepare Your Workspace and Safety Gear
Refinishing involves harsh chemicals and fine dust. Protect yourself and your space to avoid injury and messy cleanup.
Wear Proper Safety Equipment
Always use a respirator mask when using chemical strippers, not just a dust mask. Wear safety goggles to prevent chemical splashes. Use nitrile gloves, since latex won’t block solvents. Wear long sleeves, closed-toe shoes, and an apron.
Work in a well-ventilated area, ideally outdoors or in a garage with doors open. Keep kids and pets far away from the workspace.
Set Up a Clean, Protected Area
Cover the floor with drop cloths or cardboard. Use metal pans or disposable trays to catch goopy stripper waste. Have trash bags ready for used rags, steel wool, and scrapers.
Organize your tools within reach, including brushes, scrapers, rags, mineral spirits, and a spray bottle. A clean workspace prevents contamination and speeds up the job.
Strip the Old Finish Completely
Removing the existing finish is essential. If you skip this step, new stain and top coats won’t adhere evenly, leading to a patchy, unprofessional look.
Choose Between Chemical Stripper and Sanding
For full tables, chemical stripping is faster and safer for veneer. Sanding alone takes hours and risks uneven results or wood damage.
Use Chemical Stripper for Full Tables
Best products include methylen chloride-free formulas like Klean Strip or QCS Strip Weld, which are effective and less toxic.
Tools needed include a natural bristle brush, plastic or rounded putty knife, steel wool, lint-free rags, and mineral spirits or lacquer thinner.
Apply a thick, even coat of stripper with a brush, working in small sections like half the tabletop. Let it sit for 5 to 30 minutes, watching for the finish to bubble and lift. Scrape off softened finish with a plastic scraper at a shallow angle, following the grain. For carvings and crevices, use steel wool dipped in stripper. Wipe residue with mineral spirits or water to neutralize the surface. Let dry for 24 hours before sanding.
Never let stripper sit too long, because it can re-harden or damage the wood. Always neutralize the surface, because leftover chemicals block stain absorption.
Sand Only When Necessary
Use sanding to remove leftover finish after stripping, to work on small areas, or to avoid chemicals. Start with 80 to 120 grit for heavy removal, then move to 150 to 220 grit for smooth prep. Stop at 220 to 320 grit before staining, because finer grits reduce stain penetration.
Always sand with the grain. Use an orbital sander on flat surfaces and hand-sand curves and edges. After sanding, wipe the surface with a tack cloth to remove dust.
Repair and Prepare the Bare Wood Surface
A flawless finish starts with a flawless surface. Clean, repair, and condition the wood before staining.
Clean Thoroughly
Even bare wood can hold grime, wax, or oil. Wipe with a damp sponge and mild cleaner. Rinse with clean water and dry completely. Finish with a final wipe using mineral spirits on a lint-free cloth to remove oily residues.
Fix Dents, Gouges, and Joints
For dents, hold a hot iron one-quarter inch above the dent. The steam will swell compressed fibers. For gouges, fill with epoxy putty or wood filler and sand smooth when dry. For loose joints, reglue with Titebond III, clamp, and let cure for 24 hours. For squeaky legs, tighten screws or add wood shims.
Balance Color on Mixed Woods
If your table has different wood types like oak top and poplar legs, they’ll absorb stain unevenly. Test stains on scrap pieces first. Use a gel stain mix to unify tone. Apply a color-correcting tint, because green-based stains cancel red tones in oak.
Apply Wood Conditioner If Needed
Wood conditioner is critical for softwoods like pine and poplar, as well as veneers, to prevent blotchy staining. Apply with a brush or rag. Wait 5 to 15 minutes per product instructions. Wipe off excess before staining.
Apply Stain for Rich, Even Color

Staining enhances grain and sets the tone. Done right, it transforms tired wood into something stunning.
Test Stain Colors First
Never skip this step, because wood species change stain results significantly. Red oak pulls warm, red tones. White oak is cooler and more neutral. Pine can look orange or pinkish.
Try samples of Minwax Provincial for warm brown, Weathered Oak for grey undertone, Early American for reddish tones, and Aged Barrel for green and grey tones that are great for neutralizing red.
Use a baby syringe to mix stains precisely if matching an original color.
Apply Stain Like a Pro
Use a natural bristle brush, foam brush, or lint-free rag. Stir the stain without shaking. Apply with the grain in long, even strokes. Work in small sections to avoid lap marks. Let sit for 5 to 15 minutes, checking the product label. Wipe off excess with a clean cloth. Let dry for 24 hours before the next coat.
For deeper color, apply 2 to 3 coats, lightly sanding with 360-grit paper between coats to remove raised grain.
Fix Common Stain Mistakes
If the stain looks too red or orange, apply a green or grey-based stain over it if still workable, or strip and restart. If the stain looks blotchy, you likely skipped conditioner or sanded unevenly. Sand down and recondition. It’s easier to fix stain mistakes now than after top coating.
Seal with Protective Top Coats
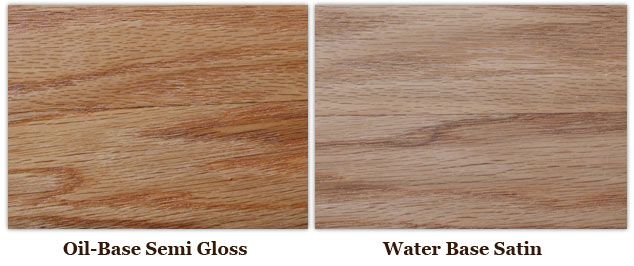
A strong top coat makes your table usable, not just pretty. It resists spills, scratches, and daily wear.
Choose the Right Finish
Oil-based polyurethane is best for dining tables where durability matters. It offers a tough, amber-rich glow but has strong odor and long dry time. Water-based polyurethane is best for light woods and indoor air quality. It provides a clear finish and fast drying but is slightly less durable. Wiping oils like tung or Danish oil offer a natural feel and easy refresh with enhanced grain, but less protection.
Match finish type to stain, using oil with oil and water with water, unless the product says otherwise.
Apply Thin, Even Coats
The key rule is that thin coats beat thick ones. Thick applications cause bubbles, drips, and long drying times.
Pour finish into a clean container and don’t dip from the main can. Use a natural bristle brush for oil or foam brush for water-based. Apply with the grain, maintaining a wet edge. Let dry for 24 hours for oil or per label for water-based. Lightly sand with 220 to 320 grit between coats. Wipe with tack cloth before the next coat. Apply 2 to 3 coats total.
Avoid bubbles by stirring, not shaking, the can.
Add Final Touches and Reassembly
:max_bytes(150000):strip_icc()/102777962-b181268e1d564e7babcf7c420171ac4f.jpg)
The final steps add polish, protection, and readiness for daily use.
Seal with Paste Wax
After the last top coat has fully cured for 48 or more hours, apply paste finishing wax. Use 0000 steel wool to buff it in. Wait 5 to 10 minutes, then buff with a soft cloth until shiny. Wax fills micro-scratches and adds a silky feel. Reapply every 6 to 12 months for maintenance.
Reattach Hardware and Legs
Reinstall cleaned or new knobs, glides, or feet. Use extendo slider feet to protect floors. Reattach legs only after full cure, because moving a wet table causes smudges.
Maintain Your Refinished Table for Years
A well-finished table is built for life. Here’s how to keep it looking great.
Daily Use and Cleaning
Wipe spills immediately, because water beads up on good polyurethane. Use mild soap and water or furniture cleaner. Avoid bleach, ammonia, or abrasive pads.
Long-Term Care
Refresh with light wax every 6 to 12 months. Touch up scratches with a matching marker or spot refinishing. Re-coat every 5 to 10 years if wear appears.
Unlike new furniture, your refinished piece has character. Scuffs tell a story, so embrace them.
Troubleshoot Common Refinishing Problems
| Issue | Cause | Fix |
|---|---|---|
| Patchy finish | Residual old finish | Re-strip and clean with mineral spirits |
| Blotchy stain | No conditioner, uneven sanding | Sand down, recondition, re-stain |
| Bubbles in coat | Shaken can, thick application | Sand smooth, reapply thin coat |
| Orange tone in oak | Wrong stain choice | Use grey or green undertone stain to neutralize |
| Clogged sandpaper | Leftover stripper | Wipe with mineral spirits, dry fully |
Pro Tips for Professional Results
Work in sections, labeling parts if disassembled. Don’t rush drying times, because patience prevents sticky finishes. Use steel wool for detail cleaning, especially in carvings. For mismatched woods, blend stains to unify tone, a technique called Frankenstein finishing. On veneer, never sand below 220 grit, strip gently, and finish lightly.
Refinishing isn’t just about looks. It’s about respect for craftsmanship. That mid-century joinery or solid wood core is worth saving. With the right prep, tools, and care, your table can last another generation.
Frequently Asked Questions About Refinishing a Wood Table
Can I refinish a veneer table?
Yes, but with caution. Veneer is only one-sixteenth inch thick, so avoid heavy sanding. Use chemical strippers instead of aggressive sanding, and finish with 220-grit paper or higher. Over-sanding will burn through the veneer and expose the substrate underneath.
How long does it take to refinish a wood table?
The process takes several days to a few weeks, depending on the table size and drying times between coats. Plan for at least 3 to 5 days for stripping and cleaning, 1 to 2 days for staining, and 3 to 7 days for top coats to fully cure before use.
What is the best finish for a dining table?
Oil-based polyurethane offers the best durability for dining tables. It resists spills, scratches, and daily wear while adding a warm, amber glow. Water-based polyurethane is better if you want to maintain a light, natural color without yellowing.
Should I use wood conditioner before staining?
Yes, especially for softwoods like pine and poplar, or if you’re working with veneer. Wood conditioner prevents blotchy staining by ensuring even absorption. Apply it 5 to 15 minutes before staining, then wipe off the excess.
How do I fix a stain that’s too dark?
If the stain is still workable, apply a lighter stain or mineral spirits to lighten it. If it’s fully dried, sand the surface lightly and apply a new coat of stain. For stubborn cases, you may need to strip and restart to achieve the desired color.
Can I paint instead of staining my wood table?
Yes, but paint is less durable than oil finishes for high-traffic dining tables. If painting, use a high-adhesion primer like Zinsser Bulls Eye Shellac, then apply your chosen paint. Oil-based paints offer more durability for legs and bases.
Key Takeaways for Refinishing Your Wood Table
Successful refinishing starts with proper assessment. Identify whether you have solid wood, veneer, or laminate before choosing your approach. Never skip the assessment step, because using the wrong technique can permanently damage your table.
Safety matters throughout the process. Always work in ventilated areas and wear proper protective gear, including a respirator mask, safety goggles, and nitrile gloves. Chemical strippers emit harmful fumes that require adequate protection.
Patience produces professional results. Rushing drying times between coats leads to sticky, uneven finishes. Apply thin coats, sand lightly between layers, and allow full curing time. The extra time investment ensures your table looks stunning and lasts for decades.