How to Fix a Glass Table
A glass table adds elegance and light to any room, but when it starts wobbling, sliding, chipping, or cracking, that sleek design quickly becomes a safety hazard. Whether you’re dealing with a loose leg, a scratched surface, or a completely shattered top, knowing how to fix a glass table properly is essential for both safety and longevity. This guide delivers precise, step-by-step solutions backed by material science and real-world repair data.
You’ll discover how to reinforce weak factory joints with industrial-strength epoxy, stop dangerous sliding with simple bumpers, and assess when replacement is the only safe option. Let’s get your glass table stable, secure, and looking like new.
Reinforce Loose Legs with Epoxy

The most common failure in glass tables is not the glass itself but the joint where the metal leg attaches to the top. Factory adhesives are often weak, leading to wobbling or sudden detachment under stress. The solution is a structural epoxy fix that outperforms the original design.
Use JB Weld for the Strongest Bond
JB Weld two-part epoxy is the top choice for reattaching metal legs to glass. Unlike weak super glues or flexible silicones, it cures into a rigid, heat-resistant bond with metal-reinforced strength. It costs under $10 and is available at most hardware stores.
Why it works: The epoxy creates a mechanical flange that resists shear and twisting forces, something the original adhesive rarely does. This turns a weak pivot point into a durable, load-bearing joint.
Remove Old Adhesive with Acetone
Before applying new epoxy, remove all traces of the old bond. Apply acetone to the metal stud and let it sit for 1 to 2 minutes. Gently peel off residue with a cloth or your fingers. Continue until the metal is shiny and bare.
Note: Acetone dissolves UV-cured resin, which is common in factory bonds, but it does not dissolve silicone.
Prepare Glass with 200-Grit Sanding
Smooth glass does not hold adhesives well. To create mechanical grip, sand the underside of the glass where the leg attaches. Use 200-grit sandpaper in a circular motion. Wipe clean with isopropyl alcohol to remove dust and oils. This roughened surface dramatically improves epoxy adhesion.
Apply Epoxy and Form a Reinforcing Flange
- Mix equal parts JB Weld resin and hardener in a disposable container.
- Let the mixture sit for 1 minute to blend fully.
- Apply small dots, smaller than a pea, around the metal stud.
- Carefully lower the glass onto the stud and let its weight spread the epoxy evenly.
- Allow excess to flow slightly beyond the stud to form a flange, a thickened edge that acts as a mechanical stop.
Cure 24 Hours Without Disturbance
Tape the joint lightly to prevent shifting. Keep the table completely undisturbed for 24 hours. Do not test or use the table during cure time. After curing, the flange will be solid and seamless, stronger than the original factory bond.
Replace Cracked or Broken Glass Tops
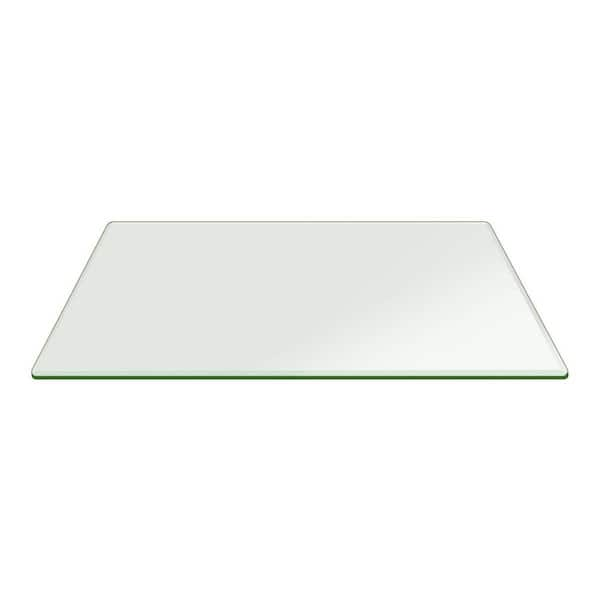
If your glass is cracked through, shattered, or broken in half, do not attempt to repair it. Structural integrity is compromised, and the risk of sudden failure is high, especially under load from holiday dishes or heavy decor.
Choose Tempered Glass for Safety
Only use tempered glass for replacements. It is heat-treated to break into small, granular pieces instead of sharp shards. Standard annealed glass is unsafe for tabletops and scratches more easily.
Critical rule: Tempered glass cannot be cut or drilled after production. Measurements must be exact when ordering.
Select Proper Thickness
• 1/2 inch is standard for most dining tables.
• 3/4 to 1 inch is recommended for heavy use, large spans like 48 by 96 inches, or added impact resistance.
• Thicker glass resists thermal stress from hot pots and mechanical flexing.
Order Custom from a Glass Shop
Visit a local glass shop or service like Glass Doctor. They measure on-site to ensure accuracy. They offer edgework options including polished, beveled, or rounded. They provide finishes including tinted, frosted, laminated, or mirrored. They handle delivery and installation, which is critical for large, heavy tops.
Cost tip: Replacing just the top is often cheaper than buying a new table. Discounted tinted or surplus glass may be available.
Repair Chips and Scratches Safely
Minor surface damage can be fixed without replacement. But depth matters, so know when to repair and when to replace.
Fix Chips with Epoxy and Polishing
For small chips or edge nicks, clean the area with isopropyl alcohol. Apply metal tape around the chip to contain epoxy. Use a 3-millimeter syringe to inject 1.5 milliliters of clear epoxy. Fill completely, avoiding air bubbles. Let cure for 24 hours in a dust-free area. Remove tape and lightly sand with 1500 or higher grit paper. Polish with glass compound for a seamless finish.
Pro tip: A polished repair is nearly invisible and restores surface smoothness.
Remove Superficial Scratches with Toothpaste
For light, surface-level scratches, mix equal parts non-gel toothpaste and baking soda. Add a few drops of water to form a paste. Apply with a soft cloth and rub in circles for 1 to 2 minutes. Wipe clean with a damp cloth, then dry. Repeat if needed.
Why it works: Mild abrasives in toothpaste gently polish the glass surface.
Treat Deep Scratches with Vinegar and Compound
For scratches you can feel deeply, mix equal parts white vinegar and water. Apply to the scratch and rub gently with a soft cloth. Wipe clean. Apply a glass polishing compound and buff in circular motions. Avoid heavy pressure to prevent cracking.
Warning: If the scratch is deep or compromises strength, replace the glass. Deep flaws can propagate under stress.
Stop Sliding with Rubber Bumpers
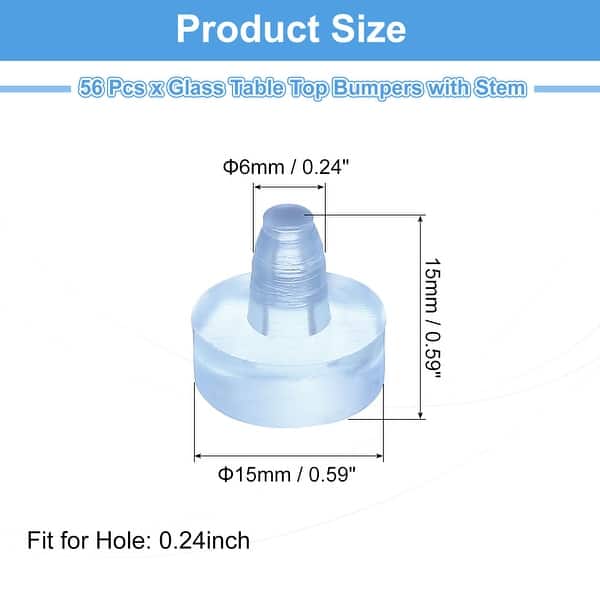
An unsecured glass top is a major hazard, especially around children. It can slide off with minimal force, leading to breakage or injury. Most manufacturers do not secure the top, so it is your responsibility.
Install Clear Rubber Bumpers
This is the fastest, safest, and most reversible fix. Remove the glass top and lean it vertically. Clean the underside with vinegar or glass cleaner. Clean the table base with a lint-free cloth. Temporarily place the glass back and mark contact points on the base. Lift the glass and stick clear rubber bumpers on the marked spots. Set the glass down gently. Bumpers create friction to prevent sliding.
Cost: Under $10 for a pack. Universal and non-damaging.
Use Adapters for Metal Bases
For metal or steel frames, attach glass top adapters to the underside with super glue. These have threaded inserts that bolt into the metal base. This provides a firm, elegant hold with no sliding. Ideal for modern, minimalist designs.
Avoid Permanent Adhesives on Wood
Silicone or polyurethane can bond glass to wood, but they are extremely difficult to remove. Spills can ruin floors. These are not recommended unless you are committed to permanence.
Better option: Use bumpers or Velcro tape for a secure yet removable hold.
Restore Rusted Bases and Chipped Edges
When the glass is intact but the base is rusted or edges are chipped, upcycling beats replacement. You can refresh the look and hide damage with simple upgrades.
Sand and Paint Rusted Metal Bases
For rusted steel or iron frames, use wet sandpaper to remove rust. Wipe clean and dry thoroughly. Spray with rust-inhibiting paint like silver or matte black. Let dry completely before reassembly.
Pro tip: Apply two light coats for even coverage without drips.
Frame the Table to Hide Damage
For chipped edges or cosmetic flaws, buy vinyl framing for approximately $16. Cut pieces at 45-degree angles to fit the glass perimeter. Spray paint the frame to match the base. Attach to the glass edge with strong epoxy glue. Let cure for 24 hours.
Result: A clean, finished look that conceals chips and adds style.
Know When to Replace vs. Repair

Not every issue can be fixed. Safety must come first.
| Issue | Action |
|---|---|
| Loose metal leg | Clean, sand, re-bond with JB Weld |
| Cracked or shattered glass | Replace immediately with tempered glass |
| Small chip | Fill with epoxy, sand, and polish |
| Surface scratch | Use toothpaste or polishing compound |
| Deep scratch | Buff with compound; replace if structural |
| Sliding top | Install rubber bumpers or adapters |
| Rusted base | Sand and repaint |
| Broken glass leg | Epoxy and clamp for 24 to 48 hours; replace if shattered |
Critical rule: Never use a table with taped or poorly repaired glass, especially in homes with children. Temporary fixes fail.
Safety First: Moving and Maintaining Glass Tables
Glass tables demand careful handling. One wrong move can lead to injury or breakage.
Always Lift by the Base
Never lift by the glass edges. This strains the joint. Always lift by the metal or wood base. Gravity keeps the top stable when lifted correctly.
Check Bumpers Regularly
Inspect rubber bumpers every 3 to 6 months. Replace if cracked, flattened, or loose. Clean with vinegar to maintain grip.
Prevent Thermal Shock
Avoid placing hot pans directly on non-tempered glass. Use trivets or coasters. Tempered glass handles heat better but is not indestructible.
Frequently Asked Questions About Fixing Glass Tables
Can I repair a cracked glass table myself?
You can repair small chips and superficial scratches yourself using epoxy or polishing compounds. However, if the glass is cracked completely through or shattered, you must replace it. Attempting to repair structural cracks is unsafe.
What is the best adhesive for reattaching glass table legs?
JB Weld two-part epoxy is the best choice for reattaching metal legs to glass. It creates a rigid, heat-resistant bond that outperforms standard super glues and silicones.
How long does it take for glass table epoxy to cure?
JB Weld requires a minimum of 24 hours undisturbed to cure fully. For broken glass legs repaired with epoxy, clamp and wait 24 to 48 hours before use.
How do I stop my glass table top from sliding?
Install clear rubber bumpers on the contact points between the glass and base. This creates friction to prevent sliding. For metal bases, you can also use glass top adapters bolted into the frame.
Can toothpaste really remove scratches from glass tables?
Yes, toothpaste can remove superficial scratches. Mix equal parts non-gel toothpaste and baking soda with water to form a paste. Rub gently in circles for 1 to 2 minutes, then wipe clean.
When should I replace my glass table instead of repairing it?
Replace immediately if the glass is cracked through, shattered, or broken in half. Also replace if there are deep cracks that compromise structural integrity, especially if the table will support heavy loads.
Key Takeaways for Fixing Your Glass Table
Fixing a glass table is not just about appearance. It is about safety and durability. With the right materials and methods, you can reinforce weak joints, repair minor damage, and prevent accidents. The most common fix involves cleaning old adhesive with acetone, sanding the glass surface with 200-grit paper for better grip, and re-bonding metal legs with JB Weld epoxy. Let the joint cure undisturbed for 24 hours for a flange stronger than the original factory bond.
For surface damage, use epoxy and a syringe for chips, or toothpaste and baking soda for superficial scratches. Deep scratches may require glass polishing compound or replacement. Stop dangerous sliding with clear rubber bumpers, which cost under $10 and take minutes to install.
When the glass is cracked or shattered, replacement with tempered glass is the only safe choice. Order custom from a local glass shop, and ensure measurements are exact since tempered glass cannot be cut after production. By following these proven steps, you will extend the life of your furniture, avoid costly replacements, and keep your home hazard-free.