How to Move a Pool Table Safely
Moving a pool table isn’t like shifting a couch or bookshelf. This heavy, precision-crafted piece of furniture can be permanently damaged by even minor mistakes during relocation. Weighing between 700 and 2,500 pounds, with most of that weight coming from the fragile stone slate playing surface, a pool table requires expert handling to avoid costly repairs or personal injury.
This guide walks you through every phase of moving a pool table, from disassembly and protection to transport and precise reassembly. You’ll learn when DIY makes sense and when calling in professionals is the smarter investment.
Disassemble Top-Down, Reassemble Bottom-Up
The golden rule for moving a pool table is to disassemble from the top down and reassemble from the bottom up. This systematic approach ensures stability throughout the process and protects both the equipment and your safety. Trying to lift or shift the table while fully assembled risks cracking the slate or warping the frame.
Before you begin, clear the surrounding area completely. Remove nearby furniture, rugs, and obstacles. Measure all doorways, hallways, and staircases, especially if you plan to tilt or carry large sections. A standard 8-foot table measures about 4 feet wide, so tight corners or narrow passages may require partial dismantling.
Take photos at every stage of disassembly. Snap pictures of how rails attach, where bolts go, and how the legs connect to the frame. These visual references will save hours during reassembly. Label everything using masking tape and markers to tag each rail, leg, and slate piece with matching numbers.
Remove Accessories and Cover First
Start by clearing the playing surface completely. Take out all balls, cues, chalk, triangle racks, and brush sets. If your table has a cover, fold it neatly and set it aside. This clears your workspace and gives you a chance to inspect the table for damage or loose parts before beginning the move.
While this step seems obvious, skipping it creates hazards later. A cue ball hidden underfoot while carrying a heavy rail can cause serious injury.
Detach Rails and Pockets Carefully
Rails are secured with bolts underneath the table frame. Use a socket wrench to remove these bolts, but do not let the rail drop. Have a helper support each rail from below as you loosen the fasteners. Dropping a rail can damage its wood finish or crack the slate edge.
Some tables have leather tabs stapled to the underside of the rails. If you plan to reuse the felt, cut the staples carefully with wire cutters instead of ripping the cloth. Check side pockets for hidden screws, as some models secure rails through the pocket casting.
Protect the Slate During Removal
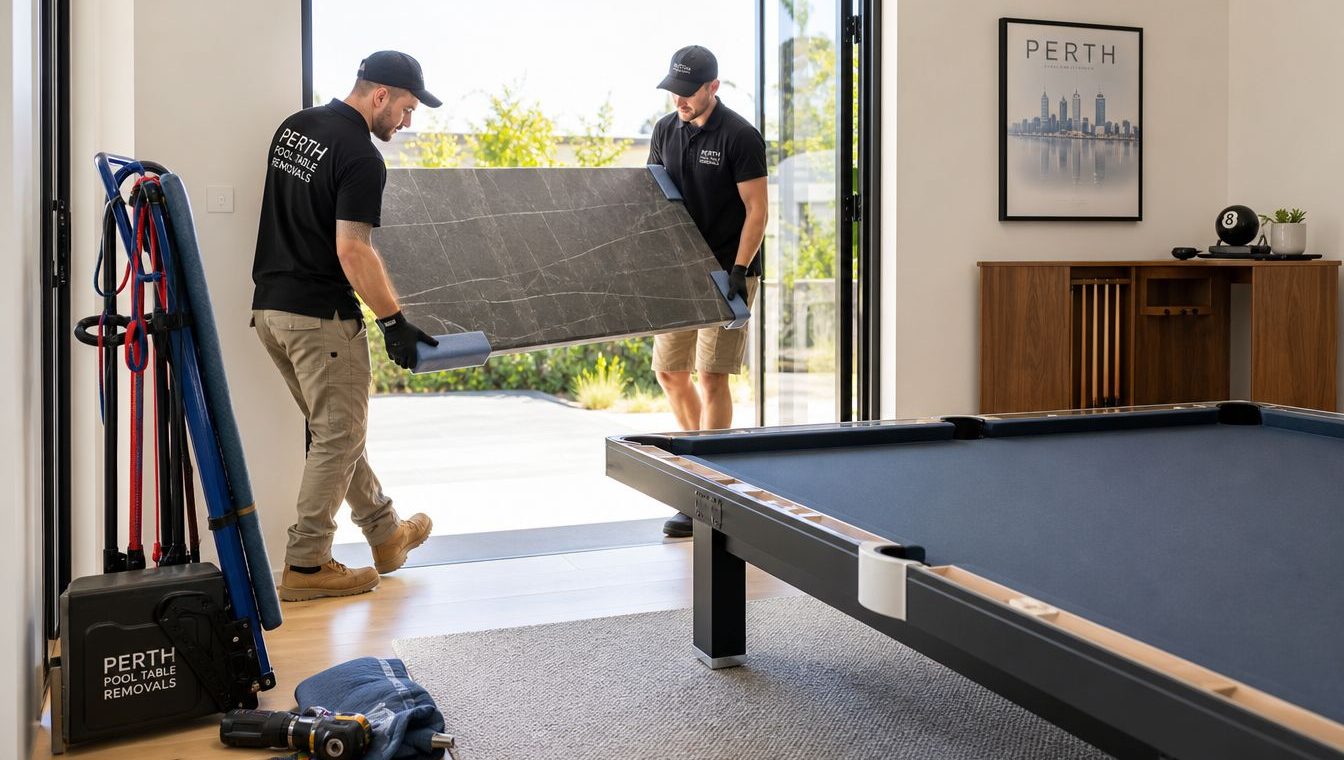
Slate removal is the most critical phase of moving a pool table. One misstep can ruin the entire table. Most home pool tables use three separate slate pieces, each weighing between 100 and 500 pounds. They must be handled individually and with extreme care.
Check for Slate Pins First
Before lifting, inspect the seams between slate pieces. If you see metal pins connecting them, do not attempt to move the slates. Lifting pinned slates more than an inch off the frame creates stress that leads to cracks. Contact a professional mover immediately. This is not a DIY task.
If no pins are present, proceed with caution. Unscrew all bolts securing the slate to the wooden frame, typically located near the edges. Keep the bolts organized in a labeled bag.
Mark and Lift Each Piece
Use a pencil to label each slate section, such as “Front,” “Center,” and “Back,” and mark its corresponding spot on the frame. This ensures perfect alignment when reassembling.
Next, break the adhesive seal. Many tables use beeswax, Bondo, or plaster of Paris to bond the slate to the frame. Gently insert a putty knife around the edges to separate the slate. Scrape off all residue before reinstallation, as any leftover material causes an uneven playing surface.
Lift each piece straight up using two strong people. Never tilt or twist. Carry one piece at a time and place it flat on moving blankets in the transport vehicle.
Handle Frame and Legs Safely
Once the slate is removed, the frame becomes more manageable but still requires careful handling. Support it properly as you remove the legs to prevent collapse or injury.
Remove Legs in Pairs
Unscrew two legs at a time while a helper braces the frame. Removing all four at once causes the structure to collapse under its own weight. If your table has leg levelers, remove them before tipping the table. Leaving them in risks bending the screws when pressure is applied.
For narrow doorways, tilt the frame sideways. Most standard frames can pass through a 30-inch doorway when angled diagonally. Wrap corners with bubble wrap to protect walls during transit.
Use Special Techniques for Short Moves
If you’re only moving the table a few feet within the same room, full disassembly may not be necessary. Two specialized methods allow limited relocation with minimal risk.
Move on Its Side with Dollies
For bar-box style tables or short-distance moves, you can tip the table onto its side using heavy-duty furniture dollies.
Steps for this method:
- Remove leg levelers to prevent damage during tipping
- Position two vertical dollies along one long side of the table
- Secure them to the cabinet with long ratchet straps
- Two people lift the opposite side and tip the table onto the dolly wheels
- Roll carefully to the new location
This creates a stable cart effect. The table balances against itself, making it surprisingly easy to maneuver through small spaces or onto trailers.
Slide With Furniture Sliders
For minor adjustments of just a few feet, place furniture sliders under each leg. Push gently and evenly. Never drag the table, as uneven pressure can flex the frame and damage the slate underneath.
Avoid this method on carpet or uneven floors. Use it only on smooth, hard surfaces like wood or tile.
Pack and Load Like a Pro
How you pack and transport the disassembled parts determines whether your table arrives intact. Proper loading technique is just as important as careful disassembly.
Stack Slate Flat with Protection
In the truck, lay slate pieces flat against the cab wall to prevent sliding during transit. Stack them in order with thick moving blankets between each layer. Never stack anything heavy on top of the slate pieces.
If moisture is a concern, such as with an open trailer, wrap each piece in plastic before adding blankets for extra protection.
Organize Rails and Hardware
Place rails finished-side down, then finished-side up, like a sandwich, to protect the wood. Secure them with straps so they don’t shift during transport.
Store all hardware in clearly labeled Ziploc bags. Use separate bags for rail bolts, leg screws, and pocket parts. Tape a checklist to the inside of the truck or keep it in the cab for easy reference.
Use ratchet straps to secure the entire load and prevent any movement. Drive slowly and avoid potholes, as vibrations can damage slate edges even in a well-packed truck.
Reassemble and Level Precisely

Reassembly is more than just putting parts back together. It’s about restoring the table’s playability. A poorly leveled table leads to inaccurate rolls and ruins games.
Reinstall Slate With Perfect Alignment
Start by cleaning the frame thoroughly. Remove every trace of old wax or adhesive. Place each slate piece according to your pre-disassembly markings.
Use a high-quality carpenter’s level in multiple directions, checking front-to-back, side-to-side, and diagonally. Adjust the frame or add thin shims under the slate until the surface is perfectly flat. Even a 1/16-inch deviation affects ball movement significantly.
Fill seams with beeswax or slate filler. Scrape it smooth until the joint is flush and invisible to touch.
Stretch Felt Tightly
If reusing felt, unroll it carefully and let it acclimate for 24 hours in the new location. Stretch it evenly from the center outward. Staple securely every 2 to 3 inches, pulling taut but not tearing.
Most professionals recommend replacing felt during a move. Old felt rarely performs well after removal and stretching. Expect to pay $500 or more for new cloth, but the smooth roll is worth the investment.
Reattach Rails and Final Check
Bolt rails back in place, tightening screws gradually and evenly. Over-tightening can warp the wood or compress the cushion rubber.
Reinstall pocket liners and corner castings. Then do a final level check, as the added weight of the rails can slightly shift the frame.
Test the table with a few practice shots. Watch how balls roll. If they curve unexpectedly, recheck the leveling immediately.
Know When to Hire a Professional

Some situations demand expert help. Understanding when to call professionals saves money and frustration in the long run.
Pinned or One-Piece Slate Tables
If your table has pinned slates or a single-piece slate, do not attempt DIY relocation. These require specialized lifting gear and years of experience. A professional mover has the tools and insurance to handle it safely.
Professionals charge $375 to $1,500 for local moves and up to $4,000 for long-distance or high-end tables. Their fee typically includes full disassembly and reassembly, precision leveling, new felt installation, and damage insurance.
Long-Distance or Stair Moves
Moving a pool table up or down stairs multiplies the risk significantly. Narrow landings, sharp turns, and elevation changes make disassembly almost mandatory. Reassembly becomes even more challenging in these conditions.
Tipping $100 per mover is customary for excellent service.
Avoid Common Moving Mistakes
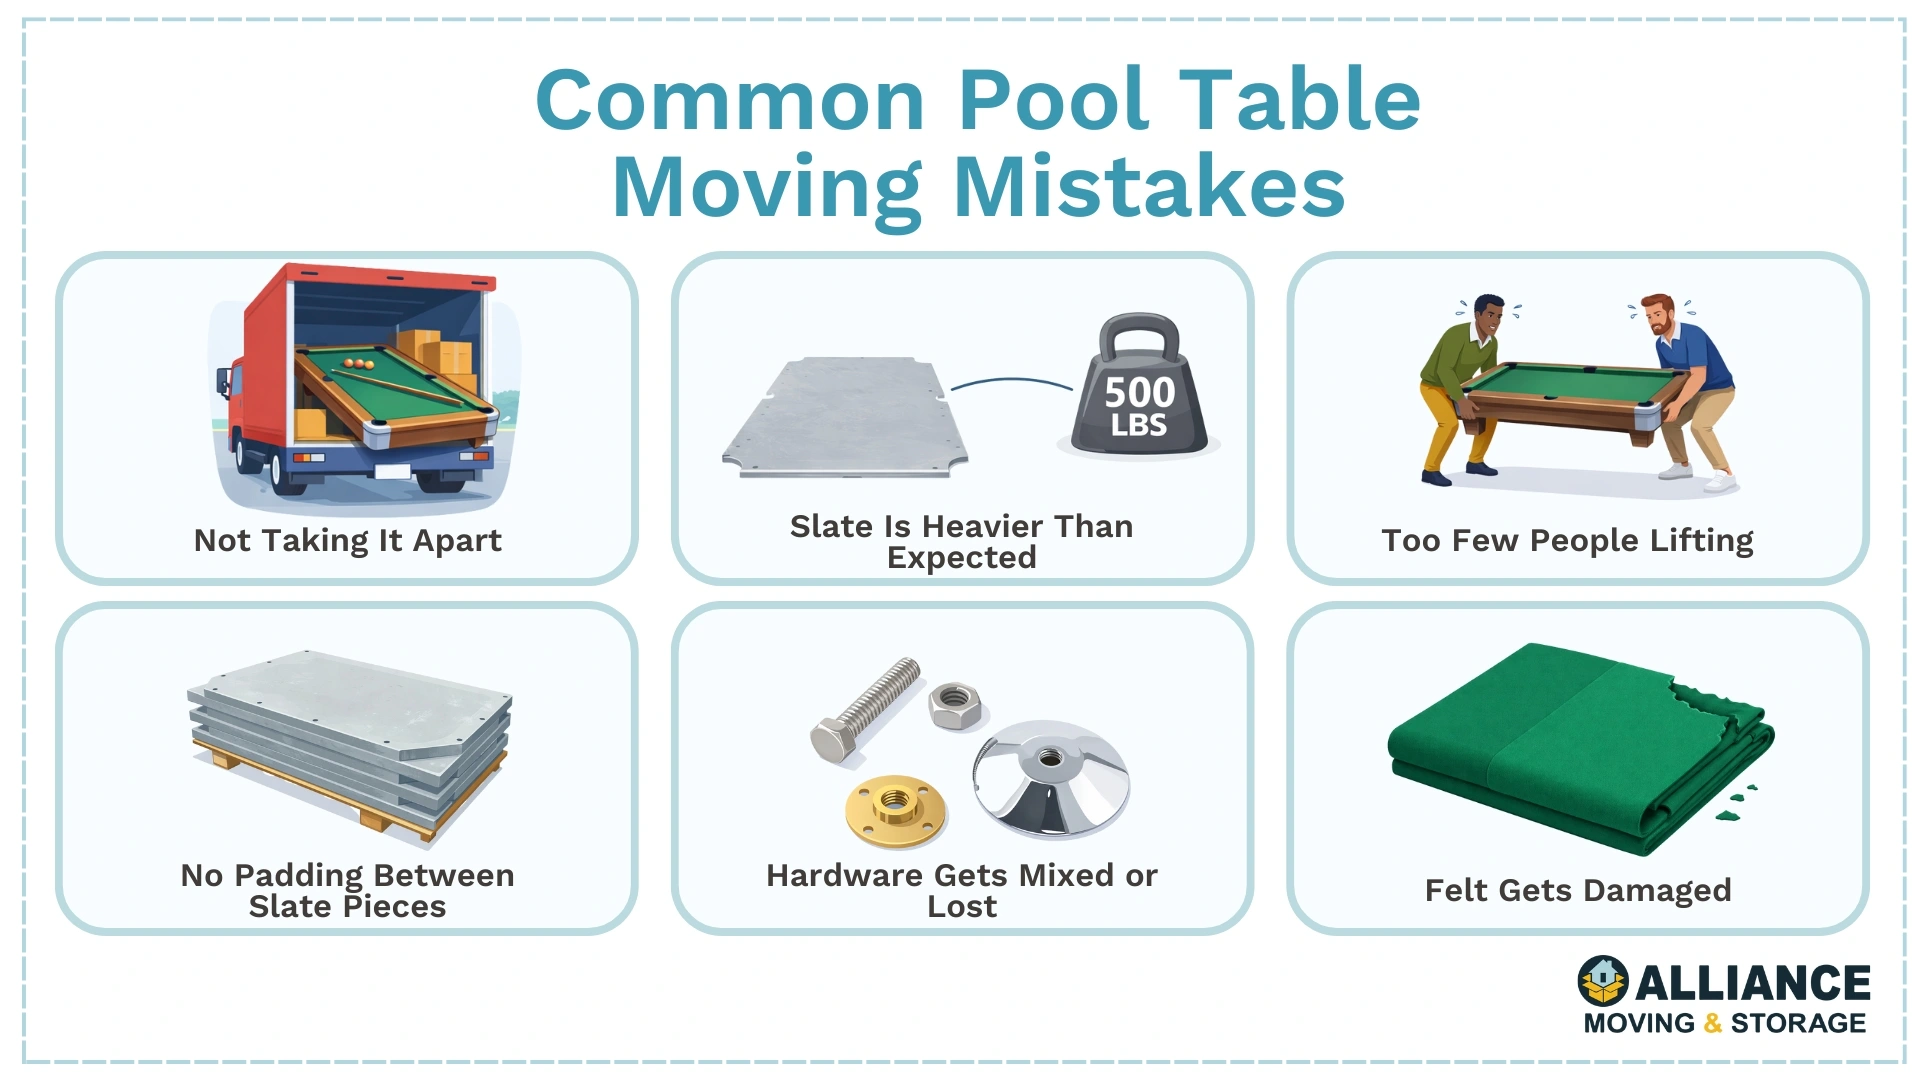
Even experienced DIYers make errors that cost time and money. Knowing these pitfalls helps you avoid them.
Lost Hardware
Mixing up rail bolts with leg screws leads to confusion during reassembly. Prevent this by using labeled bags and taking before-disassembly photos. One bag per component type keeps everything organized.
Cracked Slate
Slate cracks occur from lifting pinned slates, dropping a piece, or flexing the frame during transport. Always support the slate fully and carry one piece at a time with minimum two strong people.
Uneven Play Surface
This usually results from poor leveling or leftover adhesive under the slate. Use a precision carpenter’s level and scrape the frame completely clean before reinstallation.
Damaged Felt
Rushing staple removal or folding the cloth causes tears. Use a staple puller and roll the felt for storage rather than folding it.
Frequently Asked Questions About Moving a Pool Table
Can I move a pool table without disassembling it?
You can move a pool table without full disassembly only for very short distances of a few feet, and even then it requires furniture sliders or dollies. For any significant move, disassembly is strongly recommended to prevent slate damage.
How much does it cost to hire professionals to move a pool table?
Professional movers charge $375 to $1,500 for local moves and up to $4,000 for long-distance relocations or high-end tables. This typically includes disassembly, transport, reassembly, leveling, and new felt.
What is the most dangerous part of moving a pool table?
The slate is the most dangerous and fragile component. It weighs 70% of the total table weight and can crack easily if dropped, tilted improperly, or if pinned pieces are lifted more than an inch.
How do I know if my pool table has pinned slate?
Inspect the seams between slate pieces. If you see metal pins connecting them, the slates are pinned. Do not attempt to lift pinned slates yourself. Contact a professional mover.
Should I replace the felt when moving my pool table?
Most professionals recommend replacing felt during a move. Old felt rarely performs well after removal and stretching. Budget $500 or more for new quality felt.
How long does it take to move a pool table yourself?
For DIY disassembly, transport, and reassembly, plan for a full day or more. Professional teams typically complete the job in 3 to 5 hours.
Key Takeaways for Moving Your Pool Table Successfully
Moving a pool table is a major undertaking that requires careful planning, adequate manpower, and attention to detail at every step. The slate is the most vulnerable component, accounting for 70% of the table’s weight and prone to cracking if handled improperly.
Always disassemble from the top down and reassemble from the bottom up. Take photos and label every component before starting. For short moves on the same level, dollies and sliders work, but any significant relocation demands full disassembly.
For tables with pinned slates, one-piece slate construction, stairs, or long distances, hiring professionals is the smartest investment. Their expertise, tools, and insurance coverage protect you from costly mistakes and ensure your table plays perfectly once reassembled.