How to Repair a Computer Table
A wobbly, scratched, or unstable computer table can disrupt your workflow and damage your gear. Whether it is a hand-me-down desk, a budget IKEA model, or a decades-old heirloom, most issues from loose joints to stained surfaces can be fixed with the right tools and techniques. The good news? How to repair a computer table does not require professional carpentry skills. With basic tools, some patience, and this step-by-step guide, you can restore stability, fix surface damage, and extend your desk is life for years.
This guide covers everything from reinforcing shaky frames to refinishing worn surfaces and maintaining functional components like drawers. You will learn how to diagnose problems, apply proven fixes, and avoid common pitfalls like fire hazards from stain-soaked rags or sanding through delicate veneer. Whether your desk has a broken support, creaky legs, or coffee rings, you will find actionable solutions here.
Strengthen Loose Frame Joints
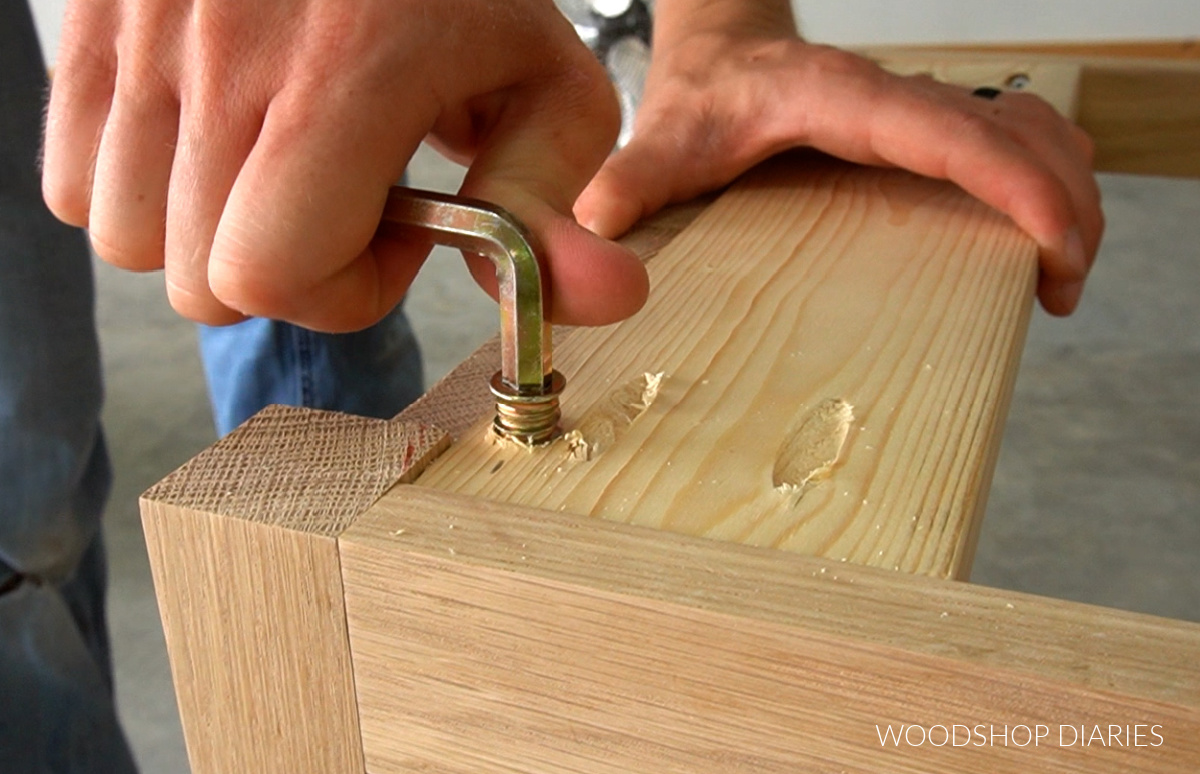
A shaky computer table often stems from weakened structural joints. Over time, screws loosen, wood expands, and connections between side and back frames degrade. Left unattended, this leads to dangerous wobble and potential collapse. Reinforcing these joints restores rigidity and ensures long-term durability.
Use Threaded Inserts for Permanent Fixes
When standard screws no longer hold, threaded inserts offer a stronger, long-lasting solution, especially in particle board or MDF frames common in flat-pack desks.
Mark and drill holes in the side frame, aligning precisely with the back frame. Use a carpenter is square or drill guide for accuracy.
Control depth by marking the drill bit against the back frame to prevent over-penetration.
Install inserts using a screwdriver or wrench until flush with the surface.
Secure with matching screws, avoiding lengths that could pierce the opposite side.
A hammer drill delivers consistent torque for faster, tighter installation than hand tightening.
Add Metal Corner Brackets for Extra Support
External reinforcement with L-brackets stabilizes the most vulnerable points where legs meet the frame and side-to-back joints.
Install one bracket per corner at main frame connections.
Use short screws to avoid puncturing through the wood.
Tighten with maximum torque to lock joints in place.
Combine with threaded inserts for a double reinforcement system, internal strength plus external support.
This dual approach eliminates rocking and prevents future loosening.
Fix Wobbly or Broken Legs

Unstable legs are a top cause of desk wobble. The fix depends on whether the issue is loose hardware, broken supports, or uneven flooring.
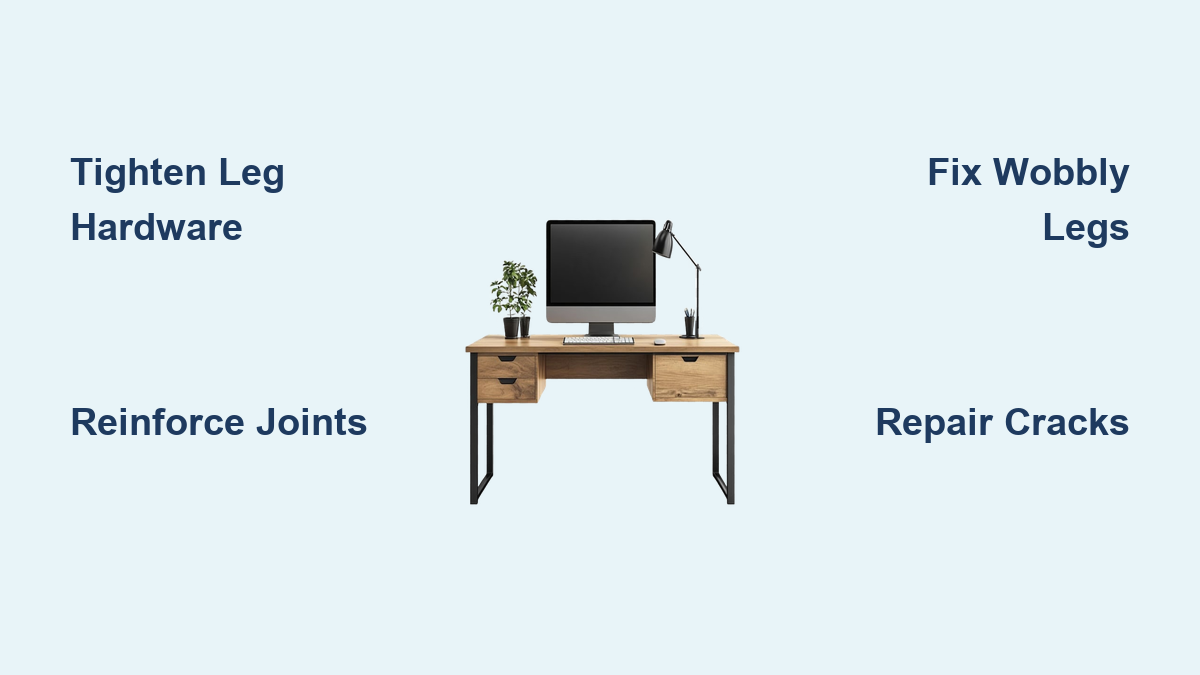
Tighten All Leg Hardware
Start with the basics. Check every screw, bolt, and hex connection on legs and rails. Use a Phillips #1 screwdriver or hex wrench to tighten all fasteners. Retest stability, many wobbles vanish after a simple tightening.
Replace Damaged Support Strips
If the desk flexes when pressed, a broken internal support strip may be the culprit.
Remove the damaged strip by unscrewing bolts or prying off fasteners.
Cut a replacement from solid wood, typically around 17 inches long and 8 inches wide, but adjust to fit your desk.
Position the new support under the tabletop, aligned with the frame.
Secure with bolts and nuts on both sides, ensuring a snug fit.
Test for rigidity, no flex should remain when the table is lightly shaken.
This repair fully restores structural integrity without replacing the entire unit.
Stabilize on Uneven Floors
If the floor, not the desk, causes wobbling, attach rubber or cork pads to the bottom of each leg. Trim or layer pads to compensate for height differences. Test by rocking the desk; it should sit flat and motionless.
Repair Cracks and Split Wood
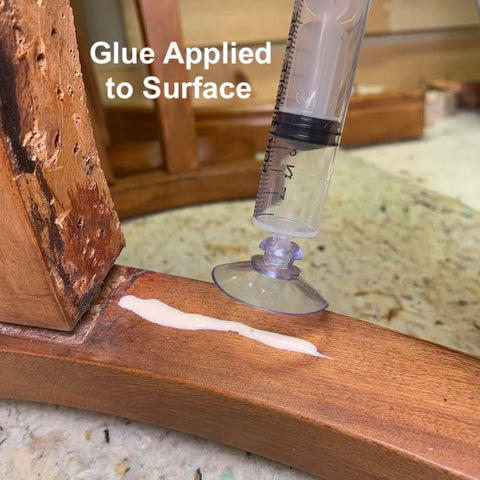
Hairline cracks or splits, often from humidity changes or impact, weaken the frame and mar appearance.
Stop Cracks from Spreading
Clean the crack with a soft brush to remove dust and debris.
Inject wood glue using a toothpick or fine brush for deep penetration.
Clamp tightly across the split until dry, usually 2 to 4 hours.
Wipe excess glue immediately to avoid residue.
Finish Smooth and Match Color
After clamping, sand the area smooth with 320-grit paper. Apply matched wood stain to blend with the surrounding surface. Seal with polyurethane to protect the repair and prevent future splitting.
For larger gaps, fill with wood filler or a mix of sawdust and glue before sanding and staining.
Restore the Desk Surface

A worn or stained tabletop affects both looks and usability. Repair success depends on identifying the surface material first.
Identify Your Desk Material
Not all surfaces can be refinished the same way. Solid wood or thick veneer (4mm plus) can be sanded and restained. Paper veneer or laminate cannot be sanded, only cleaned or covered. MDF or particle board is sandable but highly moisture-sensitive; seal after refinishing.
Never use coarse sandpaper on veneer. Start with 220-grit only.
Sand for a Smooth Base
Proper sanding removes scratches, burns, and stains without damaging the surface.
Sand across the grain first to level imperfections.
Finish with the grain using 320-grit or higher to eliminate scratches.
Feather edges around dents to reduce visibility.
Use dust collection, trapped sawdust blocks stain absorption.
Replace sanding pads often; clogged ones scratch instead of smooth.
Refinish with Stain and Sealant
Reviving color and protection requires careful staining and sealing.
Prepare the Surface
Wipe with a damp terry cloth in one direction to reveal hidden dust. Look for white specks, these mean more cleaning is needed. Wear powder-free gloves to avoid contaminating the wood.
Apply Oil-Based Stain
Shake the can well. Pour a small amount onto the surface. Work in with a 10-inch stain applicator pad using circular motions. Let sit for 15 minutes (or as directed), the stain will lighten as air bubbles escape. Wipe off excess with clean cloths to avoid a thick, uneven coat.
Dry and Reapply if Needed
Wait 2 to 4 hours for full drying. For deeper color, lightly sand with 320-grit and apply a second coat. After final coat, seal with polyurethane for moisture and scratch resistance.
Fire Warning: Oil-soaked rags can spontaneously combust. Never pile them. Store in a metal container with water or lay flat outdoors to dry before disposal.
Fix Surface Defects Like a Pro
Minor blemishes can be repaired quickly with household items or simple techniques.
Remove Light Scratches
Rub a walnut meat over the scratch, the natural oils darken and fill the mark. Buff with a soft cloth. Alternatively, use a color-matched crayon for deeper concealment.
Repair Deep Scratches
Apply wood filler or a mix of sawdust and glue. Let dry completely. Sand smooth starting with 320-grit. Stain and seal to match the surrounding area.
Eliminate Water Rings and Coffee Stains
Try these safe, effective methods. Vinegar and Baking Soda: Mix equal parts, apply for 5 to 10 minutes, then buff with a soft cloth. Hair Dryer plus Oil: Warm the ring with a hair dryer on low, then rub with olive oil or wood polish. Non-Gel Toothpaste: Apply, gently rub in, then wipe clean, acts as a mild abrasive.
For stubborn stains, repeat or combine methods.
Fix Sticking Drawers and Tracks

Drawers that stick or jam are often due to humidity swelling or lack of lubrication.
Clean and Lubricate Tracks
Wipe tracks with a dry or slightly damp cloth to remove dust. Apply lubricant using candle wax, bar soap, or silicone spray on track edges. Slide the drawer in and out 5 to 10 times to distribute evenly.
Avoid oil-based lubes, they attract dust.
Prevent Swelling in Humid Climates
Place silica gel packets or moisture absorbers inside drawers. Use a dehumidifier in the room to maintain stable humidity. Keep the desk away from windows or exterior walls where condensation forms.
Eliminate Mold and Musty Odors
In damp environments, desks can develop mold or a stale smell, especially in enclosed drawers.
Clean Mold Safely
Spray with 1:2 vinegar-water solution, wipe down, and dry thoroughly. For visible mold, make a baking soda paste, scrub gently, rinse, and dry. Never mix vinegar and bleach, this creates toxic fumes.
Prevent Future Growth
Store moisture absorbers in drawers and under the desk. Ventilate the room regularly, open windows or use fans. Wipe down surfaces monthly in humid conditions.
Use the Right Tools and Materials
Having the correct tools ensures safe, effective repairs.
Essential Repair Kit
Orbital sander for smoothing large surfaces with dust control.
Hammer drill for securing threaded inserts with consistent torque.
Phillips #1 screwdriver for tightening common desk screws.
Hex wrench for fixing leg bolts and frame connections.
220 to 320-grit sandpaper for safe sanding on veneer and MDF.
Wood glue for repairing cracks and joints.
Oil-based stain (Minwax) for restoring color on real wood.
L-brackets for reinforcing weak joints.
Rubber or cork pads for stabilizing legs on uneven floors.
N95 respirator for protecting lungs during sanding and staining.
Metal container for storing oil-soaked rags safely.
Know When to Repair vs. Replace
Not every desk deserves a full restoration.
Repair If
The frame is intact but loose. Damage is cosmetic (scratches, stains). The desk fits your ergonomic and functional needs. You are on a budget.
Replace If
The desk causes back or neck pain. There is no space for monitors, keyboard, or cables. The style demotivates you. Structural damage is severe (rot, shattered MDF, warped metal).
Maintain Your Desk Long-Term
Prevent future issues with simple upkeep.
Monthly Maintenance Routine
Tighten all screws and bolts, especially legs and joints.
Dust with a soft cloth, avoid feather dusters that scratch.
Check for wobble and adjust leg pads if needed.
Environmental Protection
Avoid direct sunlight, prevents fading and warping.
Use coasters, stops water rings and spills.
Keep dry, wipe up spills immediately, especially on MDF.
Clean Safely
Use mild soap and water on a damp cloth. Never use ammonia or harsh cleaners, they strip finishes. Dry immediately after cleaning.
Frequently Asked Questions About Computer Table Repair
Can I repair a computer table myself, or do I need professional help?
Most computer table repairs are DIY-friendly. Structural fixes like tightening joints, replacing support strips, and refinishing surfaces can be done with basic tools and this guide. Professional help is only needed for extensive water damage, major frame reconstruction, or specialized materials like tempered glass.
How do I fix a wobbly computer table that rocks on uneven floors?
Attach rubber or cork pads to the bottom of each leg. Trim or layer the pads to compensate for floor height differences. Test by rocking the desk; it should sit flat and motionless. If wobble persists, the issue is likely structural, not the floor.
Can I refinish a veneer-covered computer table?
Yes, but with caution. Veneer that is 4mm or thicker can be sanded and restained. Start with 220-grit sandpaper only, never use coarser grits that could gouge the surface. Paper veneer or laminate cannot be sanded; it must be cleaned or covered with a new surface.
How do I remove water rings from my desk surface?
Try three methods. Mix equal parts white vinegar and baking soda, apply for 5 to 10 minutes, then buff. Use a hair dryer on low heat followed by olive oil or wood polish. Apply non-gel toothpaste as a mild abrasive. Repeat for stubborn stains.
Are oil-based stains safe to use indoors?
They require caution. Oil-based stains emit harmful fumes, so work in a well-ventilated area with open windows and fans. More importantly, stain-soaked rags pose a fire hazard. Never pile them. Store used rags in a metal container with water or lay them flat outdoors to dry before disposal.
Final Thoughts on Repairing Your Computer Table
Repairing a computer table is often faster and cheaper than buying new. With the right approach, reinforcing joints, refinishing surfaces, and maintaining components, you can transform a worn desk into a sturdy, attractive workspace. Focus on structural stability first, then aesthetics. A well-built desk can last decades with proper care.
Always prioritize safety during repairs. Ventilate when staining, wear an N95 mask when sanding, and never ignore the fire risk of oil-soaked rags. Address wobble issues immediately to prevent further damage, and perform monthly maintenance checks to keep your desk stable. The effort you invest now pays off in years of reliable service.