How to Restore a Teak Table
A once-beautiful teak table turning dull and gray? You’re not alone. Over time, exposure to sun, rain, and dirt can leave even solid teak furniture looking lifeless. But here’s the good news: how to restore a teak table is simpler than most assume—and far more affordable than replacement. With just a few tools and the right method, you can revive your table’s rich amber glow or preserve its elegant silvery patina, all without spending thousands.
Teak’s natural oils make it one of the most durable hardwoods, resisting rot, warping, and insect damage. Whether your table has a failing varnish, deep grime, or just surface weathering, this guide walks you through every restoration path—no sanding required in many cases, and full sanding or stripping when necessary. You’ll learn how to clean, brighten, protect, or leave bare—based on your desired look and maintenance preference.
By the end, you’ll know exactly how to restore a teak table to like-new condition, avoid common mistakes, and choose the best finish for longevity.
Assess Your Table’s Condition Before Restoration

Before lifting a brush or sander, inspect your teak table closely. The restoration path depends on three factors: wood type, existing finish, and your preferred final look.
Solid Teak vs. Veneer or Imitation
Only solid teak can withstand deep cleaning or sanding. If your table feels lightweight or has a thin wood layer over particleboard, it may be veneer. Sanding or stripping veneer risks irreversible damage. Confirm it’s solid by checking weight, grain continuity, and edge thickness.
Identify the Existing Finish Type
Different finishes require different approaches. Here’s how to identify yours:
- No finish or weathered gray: Uniform silvery color, no shine, water soaks in. Cleaning restores color.
- Failing varnish: White or cloudy patches that darken when wet. Requires stripping.
- Sticky or peeling surface: Old oil buildup or degraded film finish. Needs complete removal.
- Mold or green stains: Surface discoloration from moisture. Easily cleaned with dedicated teak cleaner.
Choose Your Final Look
- Warm honey tone: Apply teak oil. Best for indoor or high-maintenance outdoor use.
- Natural silvery-gray: Clean and sand only. No finish. Zero maintenance.
- Protected natural look: Use a breathable sealer. Repels stains and UV without gloss.
- High-gloss film finish: Marine varnish. High effort, frequent recoating needed.
Gather Essential Tools and Supplies
Having the right tools ensures a smooth, effective restoration. Most items are affordable and reusable.
Must-Have Tools
- Orbital sander (for flat surfaces)
- 220-grit sandpaper
- Stiff-bristle scrub brush or dip brush
- Foam applicator pads
- Spray bottle or pump sprayer
- Tack cloth (for dust removal)
- Lint-free rags (old t-shirts work well)
Key Cleaning and Finishing Products
- Teak cleaner (e.g., Walker, Snappy, or One-Step Teak Cleaner)
- Two-step cleaner and brightener (ideal near stainless steel)
- Teak oil (e.g., Cabot’s, Walker—check for UV protectants)
- Teak sealer (e.g., Triton One-Step Protectant—water-based, breathable)
- Mineral spirits or thinner (for cleaning brushes or thinning thick oil)
Safety Gear
- Rubber gloves
- Safety goggles
- Dust mask (especially when sanding or using strippers)
Remove Old Varnish or Paint
If your table has a peeling, white, or cloudy film, it’s coated in varnish or paint. Cleaning alone won’t fix this—you must strip it.
Test for Varnish
Spritz water on the surface. If it beads up or darkens unevenly, varnish is present. If it soaks in uniformly, it’s likely bare or oiled wood.
Use Chemical Stripper Safely
- Apply methylene chloride-free stripper with a foam brush.
- Let sit 10–15 minutes (follow product instructions).
- Scrape off softened layers with a plastic or metal scraper.
- Wipe residue with mineral spirits.
Pro Tip: Work in small sections. Avoid letting stripper dry on the wood.
Sand After Stripping
Use 220-grit paper on an orbital sander to smooth the surface and remove any remaining finish. Always sand with the grain to prevent scratches. Wipe down with a tack cloth afterward—no dust should remain before finishing.
Deep Clean Without Sanding
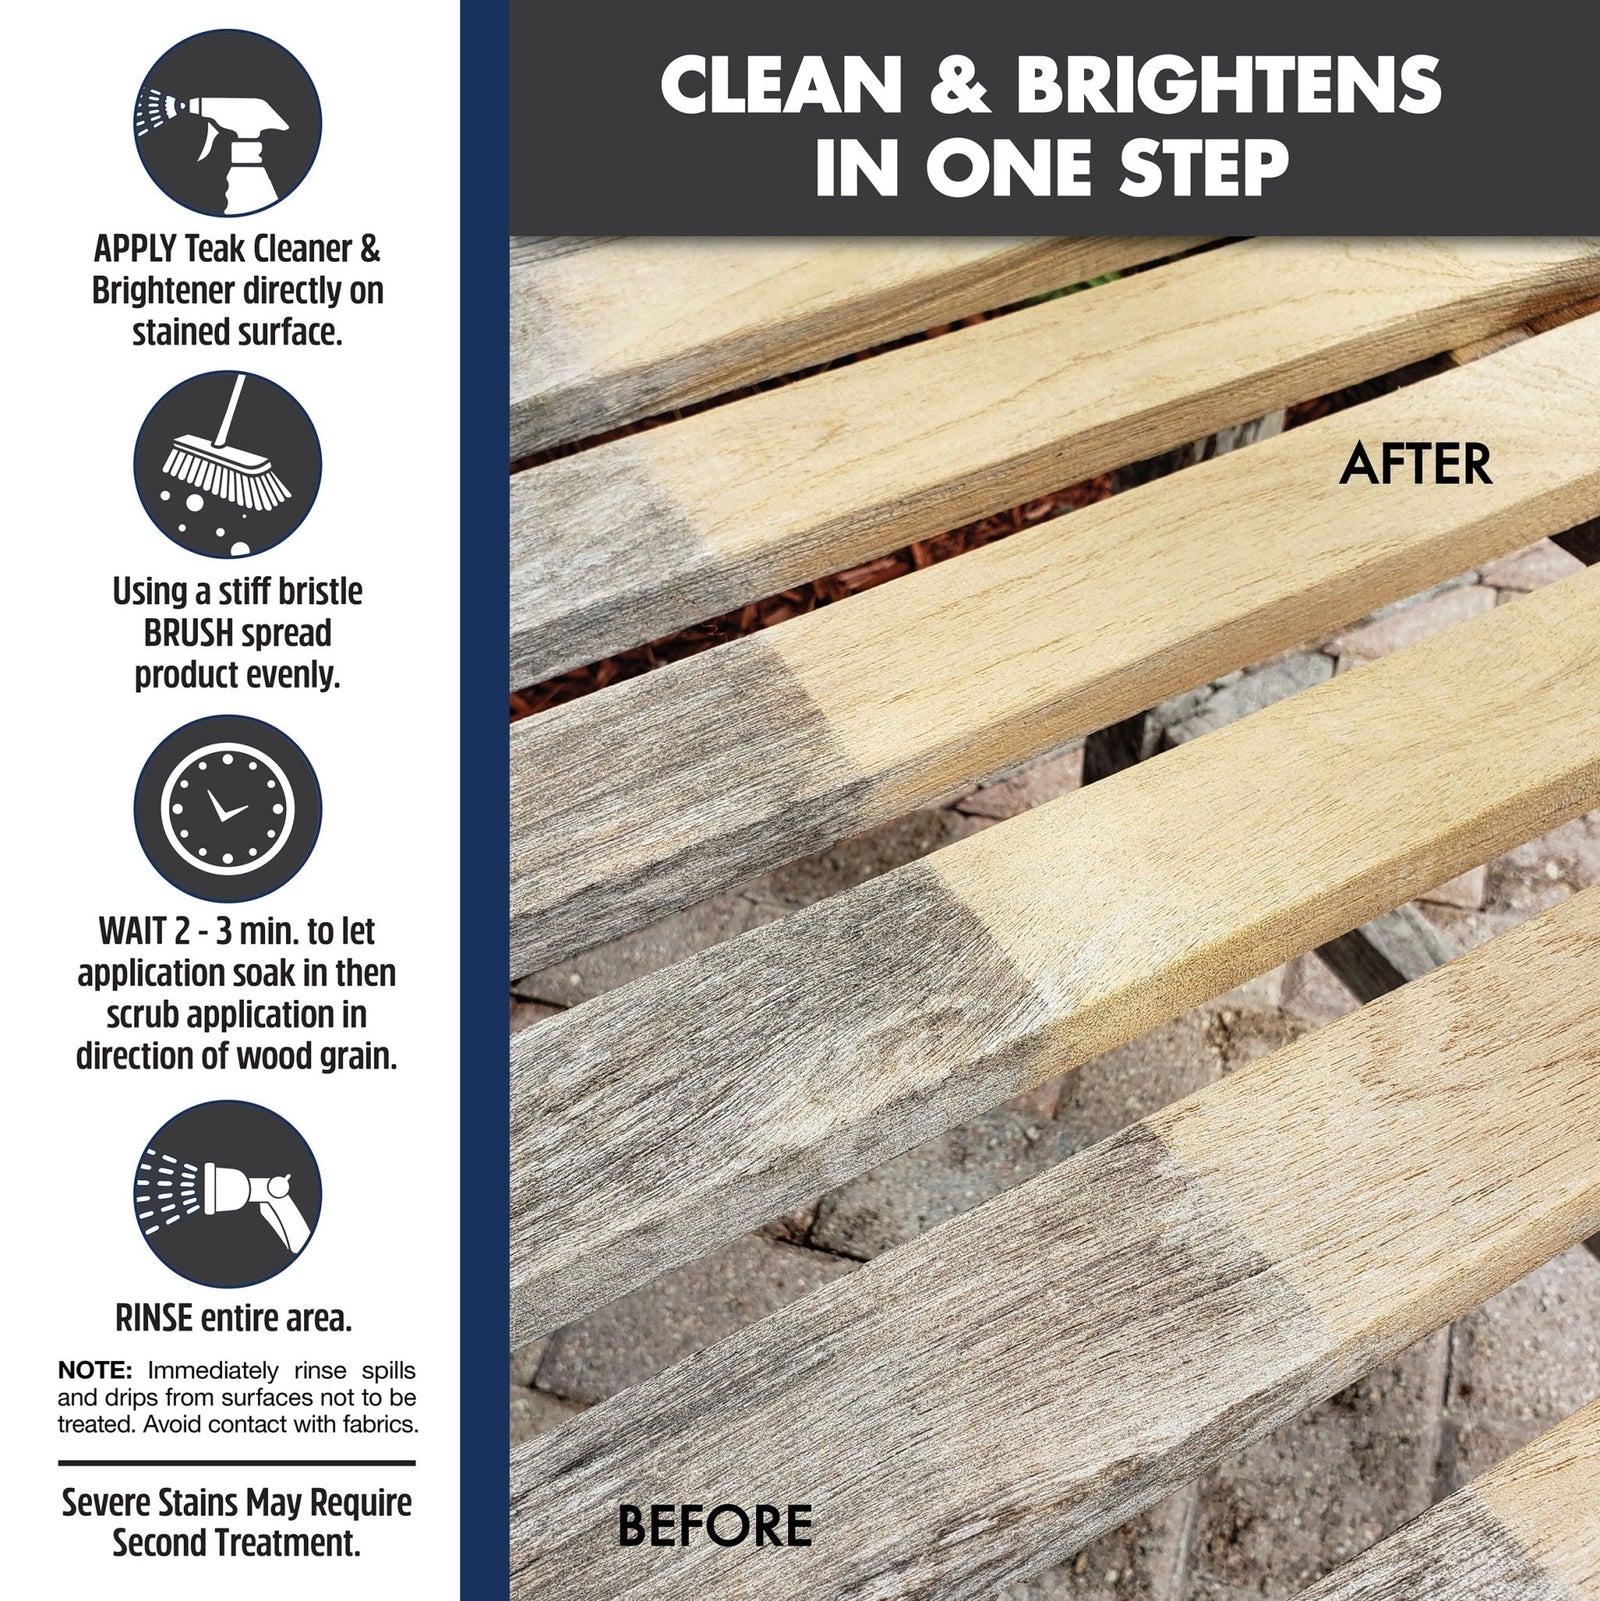
If your table is solid teak with no film finish, skip sanding. Cleaning alone can restore its golden hue.
Apply Teak Cleaner to Dry Wood
Mix cleaner 1:1 with water unless the label says otherwise. Spray or brush onto a dry surface to maximize penetration.
Let It Dwell 3–5 Minutes
This allows the cleaner to break down grime, mold, and oxidized wood fibers. Do not let it dry—rewet if needed.
Scrub Thoroughly
Use a soft bristle brush or scrub pad. For large tables, a floor buffer with a soft pad speeds things up. Avoid steel wool or wire brushes—they damage wood.
Rinse Completely
Hose off all residue. Never skip rinsing—leftover cleaner blocks oil absorption and harms wood.
Dry Fully Before Proceeding
Wait 24–48 hours in dry, sunny weather. Wood must be completely dry before oiling, sealing, or leaving bare.
Sand for Smoothness or Color Reset
Sanding isn’t always needed, but it’s essential for certain goals.
When to Sand
- Removing deep gray layers cleaning didn’t fix
- Smoothing rough or splintered areas
- Preparing for varnish or oil
- Achieving a like-new smooth finish
Use 220-Grit Sandpaper
This fine grit removes the weathered layer without gouging. Use an orbital sander on flat surfaces, hand-sand edges and legs. Always sand with the grain to avoid swirl marks.
Light Sanding After Cleaning
Even after cleaning, a light 220-grit pass enhances smoothness and helps finishes adhere better. Wipe with a tack cloth immediately after—dust ruins finish application.
Choose the Right Finish or Skip It

Your finish choice defines maintenance, appearance, and longevity.
Apply Teak Oil for Warmth
Best for indoor tables or owners who like annual upkeep.
- Apply first coat with an applicator pad.
- Wait 10 minutes, apply second coat.
- Wait 15 minutes, wipe off excess.
- Buff lightly.
Use oil thinned with mineral spirits if it feels sticky. Cure Time: 6–8 hours minimum; avoid use for 24–48 hours. Maintenance: Reapply every 6–12 months.
Use a Breathable Sealer for Protection
Ideal for outdoor tables needing stain and UV resistance without gloss.
- Apply first coat with roller or sprayer.
- Back-roll for even spread.
- Let dry 2–4 hours.
- Apply second coat.
Performance: Water and wine bead up. No sticky residue. Maintenance: Reapply once a year. Clean with teak cleaner every two years.
Leave Bare for Zero Maintenance
Want a set-it-and-forget-it table?
- Strip and sand to bare wood.
- Clean and dry thoroughly.
- Apply nothing.
The wood will naturally turn silvery-gray in 4–8 weeks. No oiling, sealing, or recoating ever needed.
Myth Busting: Bare teak doesn’t rot. It ages cosmetically, not structurally.
Avoid Marine Varnish Unless Necessary
Only use if you want a high-gloss look. Requires epoxy sealer first. Needs annual scuff-sanding and recoating. Eventually peels, requiring full strip. High effort for minimal gain—most experts recommend sealers or bare wood instead.
Handle Tough Stains and Mold

Discoloration doesn’t mean damage. Most stains come out with proper cleaning.
Remove Green Mold or Mildew
Caused by moisture and shade. Use teak cleaner and scrubbing—no bleach needed. Rinse well. Prevent recurrence by placing table in sunlight or under cover.
Treat Water or Sun Damage
Grayed wood from UV or flooding isn’t ruined. Clean and sand to restore warm color. Teak recovers remarkably well—even after submersion (proven in flood recovery cases).
Prevent Wine or Oil Stains
On unsealed teak, spills soak in instantly and stain. On sealed teak, they bead up. Wipe within 30 minutes—no residue remains.
Test First: Drip a little wine or oil on a hidden spot to see how your finish performs.
Outdoor vs. Indoor Care Differences
Environment changes your approach.
For Outdoor Tables
- Use two-step cleaner and brightener near stainless steel (prevents corrosion)
- Prioritize UV-protective sealers, not oil
- Avoid pressure washers—damage fibers
- Clean every 1–2 years; reseal annually
For Indoor Tables
- Teak oil enhances warmth and grain
- Cleaning required only if stained
- Dust regularly; wipe spills immediately
- No need for UV protection
Avoid Common Restoration Mistakes
Even small errors ruin results. Steer clear of these pitfalls.
Skipping the Rinse
Residual cleaner prevents oil absorption and can discolor wood. Always rinse thoroughly.
Using Pressure Washer on High
High pressure strips natural oils and creates a fuzzy surface. If you must use one, keep it low and at a distance—only after cleaning.
Over-Oiling or Using Wrong Oil
Many teak oils are just mineral oil that sits on the surface, attracts dirt, and degrades. Use quality products with UV inhibitors and natural resins.
Sanding Too Coarse
Avoid grits below 150—too aggressive. 220-grit is ideal for final smoothing.
Applying Finish to Wet Wood
Wood must be fully dry. Test by taping plastic over a section—if condensation forms, wait longer.
Maintain Your Restored Table
Proper upkeep prevents future deep restoration.
Follow a Simple Care Schedule
| Frequency | Action | Purpose |
|---|---|---|
| Weekly | Wipe with damp cloth | Remove dust and light debris |
| After Spills | Wipe immediately | Prevent staining |
| Every 6–12 Months | Reapply oil (if oiled) | Maintain color and hydration |
| Annually | Reapply sealer (if sealed) | Refresh protection |
| Every 2 Years | Deep clean | Remove built-up grime before resealing |
Long-Term Durability Tips
- Teak doesn’t rot—its natural oils prevent decay.
- Consistent cleaning and sealing prevent deep sanding later.
- If left bare, expect graying—but it’s not damage.
- Store indoors or cover during harsh winters for longest life.
When to Refinish
- Oiled tables: When water stops beading and soaks in
- Sealed tables: When water no longer beads after cleaning
- Bare tables: Never—just clean as needed
Final Thoughts on Restoring a Teak Table
Restoring a teak table isn’t about perfection—it’s about preserving a durable, beautiful piece. Whether you choose a warm oiled finish or a natural silver patina, the process is straightforward, cost-effective, and deeply satisfying. With the right method, your $100 thrifted table can outshine a $3,000 replacement. Now that you know how to restore a teak table, grab your cleaner and brush—your furniture’s second life starts today.
Frequently Asked Questions About Restoring a Teak Table
Can I restore a teak table without sanding?
Yes. If your table has no varnish or film finish, cleaning with a dedicated teak cleaner can restore its golden color without sanding. This method works well for weathered but undamaged teak.
How long does teak restoration take?
The cleaning process takes 1–2 hours plus 24–48 hours drying time. Full restoration with sanding and finishing takes a weekend. Plan for oil to cure 24–48 hours before use.
What’s the difference between teak oil and teak sealer?
Teak oil darkens wood for a warm amber look but requires reapplication every 6–12 months. Sealer provides UV and stain protection while maintaining a natural look, lasting up to a year with less maintenance.
Will my restored teak table turn gray again?
If left bare, yes—it will naturally silver within 4–8 weeks. If sealed or oiled, the gray is prevented or slowed significantly. Regular maintenance keeps the desired look.
Can I use a pressure washer on teak furniture?
Avoid high-pressure washing. It strips natural oils and damages wood fibers, creating a fuzzy surface. If needed, use low pressure on wet, cleaned wood only.
How do I know if my table is solid teak or veneer?
Check the weight—solid teak is heavy. Examine the grain at edges and underside for continuity. Thin layers over particleboard indicate veneer, which cannot withstand sanding or stripping.