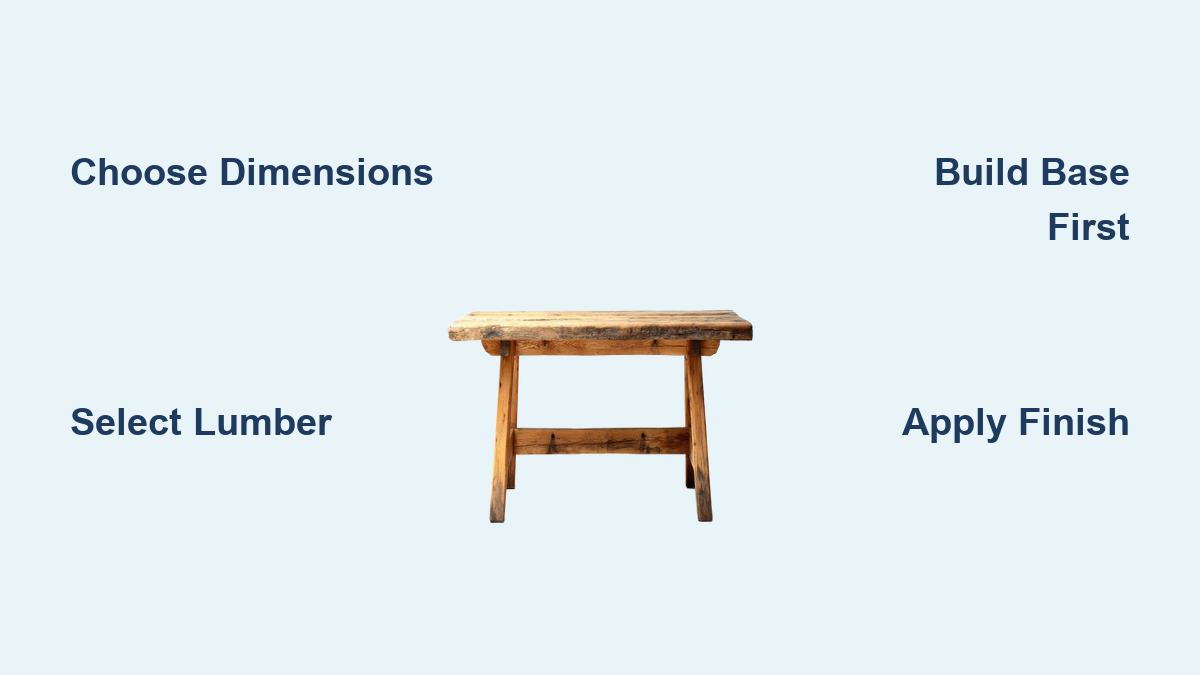
How to Build a Farm Table
Building a farm table is one of the most rewarding DIY woodworking projects you can tackle. Whether you’re feeding a family of four or hosting holiday dinners for ten, a custom-built farm table brings warmth, durability, and character to your dining space that store-bought furniture simply cannot match. The best part? You do not need a full shop or professional skills just basic tools, quality lumber, and this step-by-step guide. In this comprehensive guide, you will learn how to build a sturdy, stylish farm table from scratch, covering everything from selecting the right materials to applying a durable finish that protects your investment for decades.
Choose the Right Table Dimensions
Standard Height Requirements for Comfortable Seating
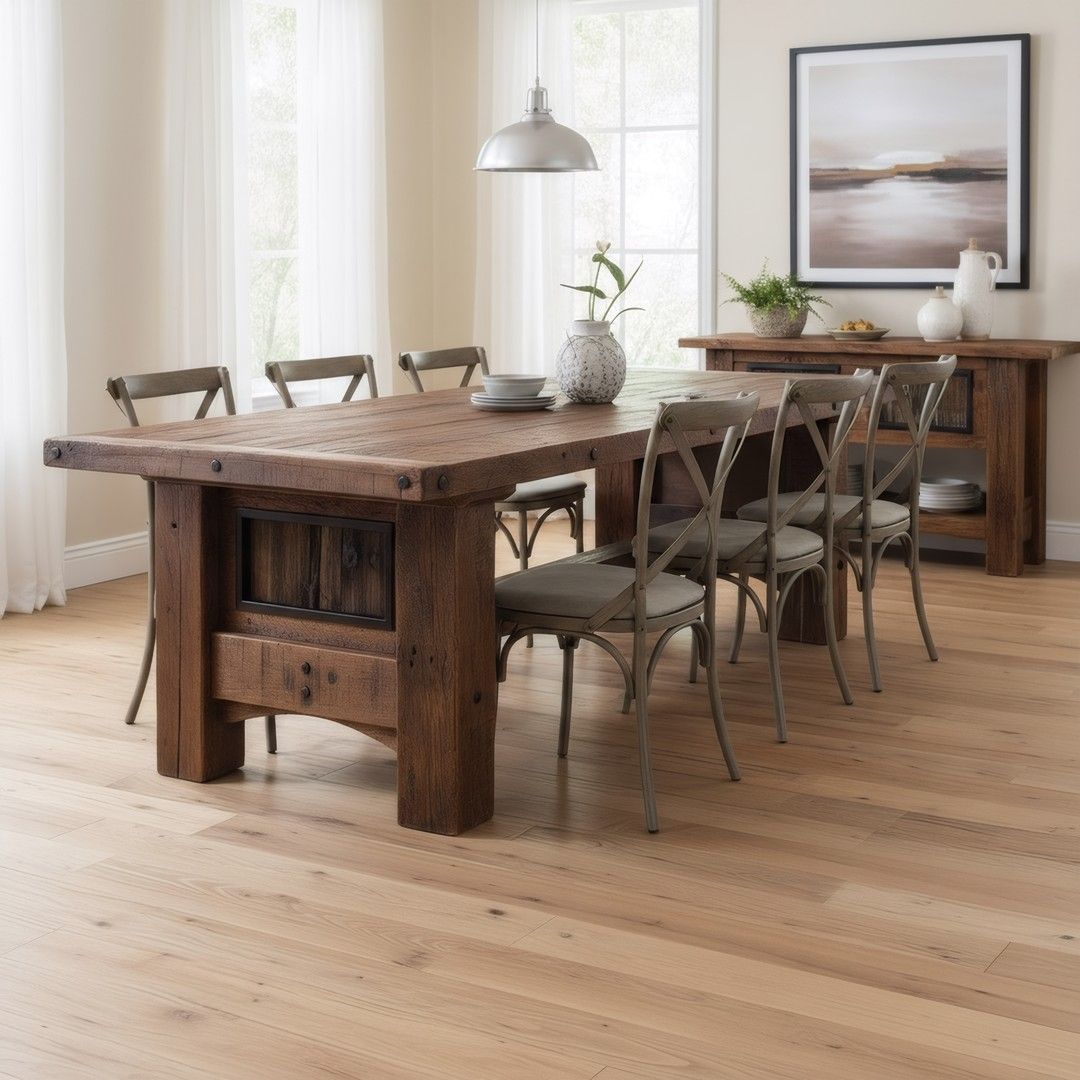
All dining tables should stand between 30 and 31 inches tall to ensure compatibility with standard dining chairs. This measurement is critical because it affects how comfortably your family and guests can sit at the table. If the table is too tall, chairs will not fit underneath properly. If it is too low, the dining experience feels awkward. Measure from floor to tabletop surface when determining your ideal height, accounting for any floor irregularities by taking measurements in multiple spots.
Selecting Optimal Width and Length for Your Space
Width is the next critical dimension. Most farm tables range from 36 to 42 inches wide. A 36-inch width fits five 1×8 pine boards perfectly and typically seats six comfortably. If you want extra elbow room or plan to seat eight regularly, aim for 40 to 42 inches. Be aware that wider tables require thicker or reinforced supports to prevent sagging over time.
Length depends entirely on your space and needs. A 6-foot table fits small kitchens nicely, while 7.5 to 8 feet works better for larger dining rooms. Always measure your dining area first and leave at least 36 inches between the table edge and walls or furniture for adequate chair clearance. Pro tip: build the tabletop first, then size the base to match. This ensures perfect alignment and avoids frustrating fit issues later.
Select the Best Lumber for Your Budget

Pine: The Budget-Friendly Choice
Pine, often sold as whitewood at big-box stores, is the go-to material for affordable, rustic farm tables. It is soft, easy to cut, and takes stain remarkably well. The downside is that it dents and scratches easily, but this is not a flaw it is part of the farmhouse charm that makes your table feel lived-in and authentic. Boards like 1x8s or 2x10s are ideal for tabletops. Just be mindful of knots, as they add character but may absorb stain unevenly, creating natural variation that enhances the rustic aesthetic.
Reclaimed Wood for Authentic Character
Reclaimed barn wood or old maple beams deliver instant vintage appeal that new lumber simply cannot replicate. These woods often come pre-weathered with nail holes, saw marks, and rich patina, meaning you may not need to stain them at all. Clean reclaimed wood thoroughly by scrubbing until water runs clear, then seal with your chosen finish. The primary drawbacks are higher cost and sourcing difficulty, but the unmatched authenticity makes it worthwhile for many builders.
Hardwood for Heirloom Quality
If you want a table that lasts generations, use oak or maple. These hardwoods resist wear far better than pine and develop a deeper luster over time. They cost more and require sharper tools, but the payoff is a high-end, long-lasting piece that becomes a family heirloom. For painted tables, rubberwood legs are a smart, cost-effective option that provides good durability without breaking the bank.
Gather Essential Tools and Supplies
Power Tools Required for the Build
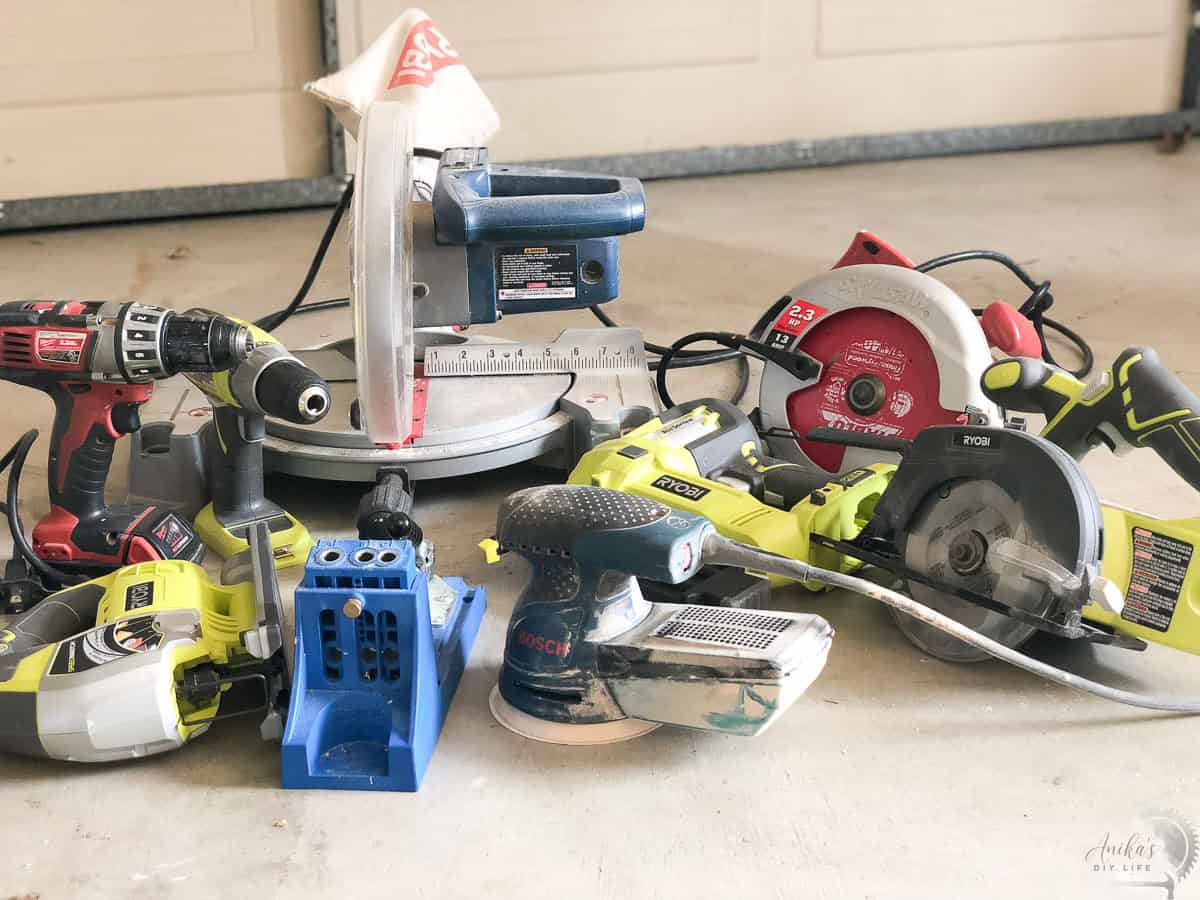
You can build a farm table with just a few core power tools. A miter saw provides precise cuts, and for 4×4 legs, use a two-pass method: cut halfway through, lift the blade, then finish from the other side to avoid binding. A Kreg Jig is essential for pocket hole joinery, set to 1.5-inch depth for 2x material. Your drill driver needs 1.25-inch and 2.5-inch pocket screws. A random orbital sander, preferably 5-inch with 80, 100, and 120-grit paper, smooths surfaces effectively. A circular saw or jigsaw handles shaping and breaking down large boards. A router with a round-over bit is optional but adds a smooth, professional edge that elevates the final product.
Hand Tools and Clamping Equipment
Several hand tools are equally important. A construction T-square aligns boards perfectly during assembly. A speed square marks leg cuts accurately. Face clamps join tabletop boards securely. However, standard clamps often cannot reach the center seam on wide tabletops, so use scrap wood clamping bridges laid across the joint, clamping down through them to apply even pressure. A chisel and mallet clean notches in legs. Always keep a tack cloth handy to remove dust before applying finish.
Build the Table Base First
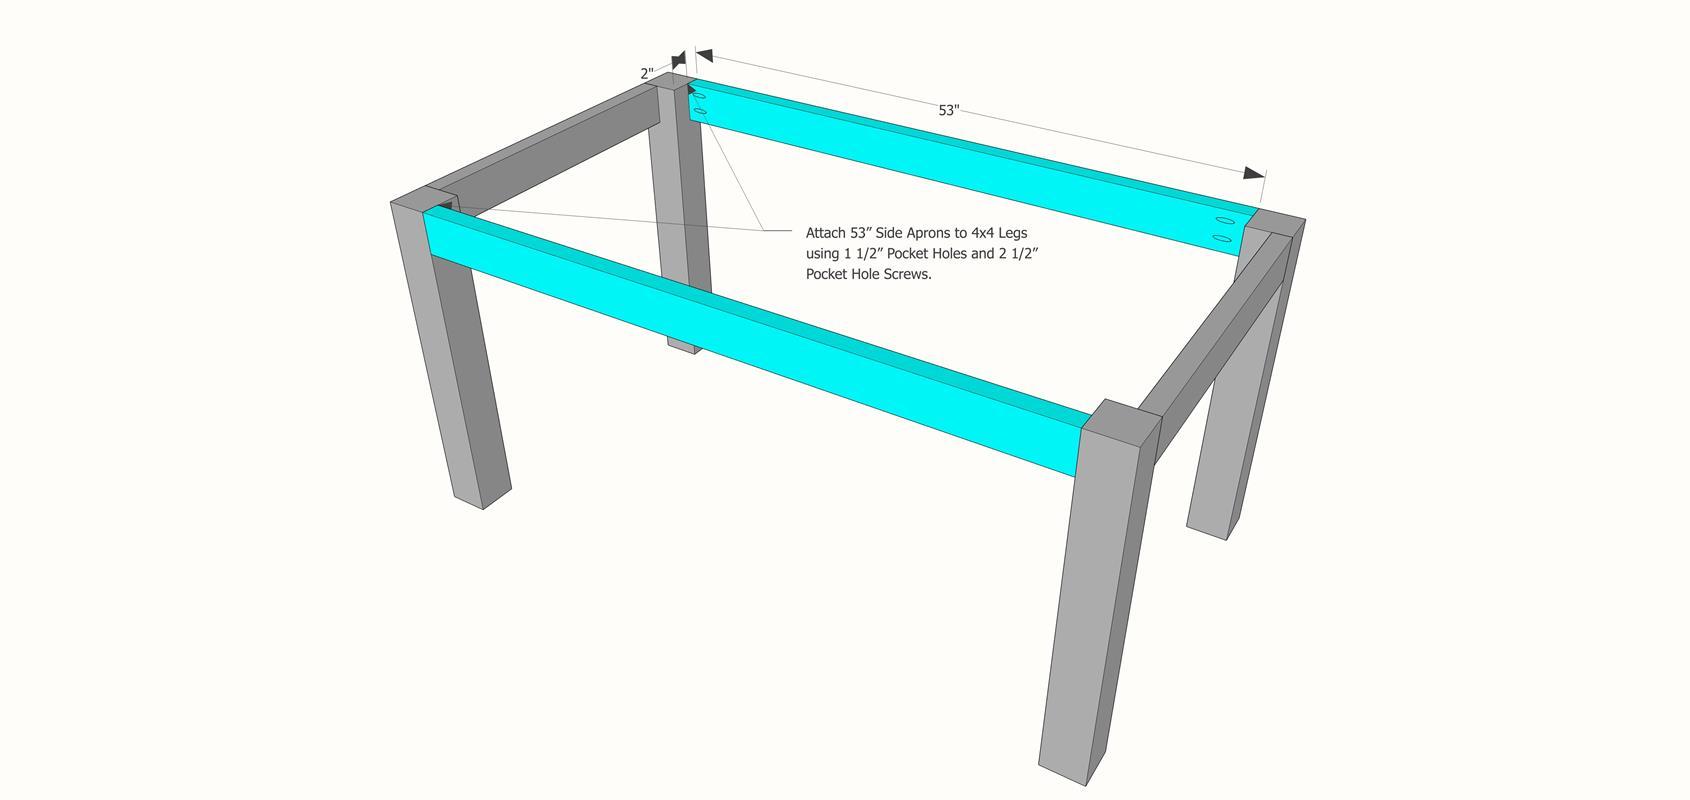
Cutting and Preparing Sturdy Legs
Legs should be 28 to 29 inches long to allow for a 1.5 to 2 inch tabletop thickness. Use 4×4 posts for a chunky, rustic look, or pre-made turned legs for a classic French country style. If cutting your own legs, use a miter saw with the two-pass technique described earlier. For decorative legs with notches, mark the cutout area 5 inches from the bottom. Use a jigsaw to rough-cut the shape, then clean it with a chisel and mallet for a snug fit with cross beams.
Assembling Aprons and Skirts
Cut 2x4s to fit between the legs as side and end aprons. Position them ¾ inch from the outer edge of the legs to create the desired overhang. Use pocket holes on the inside face of the aprons, never on the outside where they will be visible. Apply wood glue before driving screws for maximum strength. For a 6-foot table, use two long aprons at 69.5 inches and two short aprons at 33.5 inches, adjusting based on your specific tabletop size. Always clamp pieces together before screwing to ensure square joints.
Reinforce with Cross Beams and Braces

Installing a Center Support Beam
Tables longer than 6 feet absolutely need a center cross beam to prevent sagging over time. Cut a 4×4 or 2×4 to span between the long aprons. For French-style legs, notch the beam 5 inches up from the bottom so it fits flush against the legs. Secure with wood glue and screws, or use Simpson Strong-Tie L-brackets for extra strength on heavier tables. This reinforcement is not optional it is essential for structural integrity.
Adding Side Braces for Stability
Attach 2×4 braces diagonally or horizontally between legs near the base. These resist racking, which is the side-to-side wobble that eventually loosens joints. Drill pilot holes slightly smaller than your screw diameter to prevent splitting, especially in pine. Use structural screws with hex heads and washers. Pro tip: paint the screw heads to match your finish color so they disappear once installed.
Assemble the Tabletop Correctly
Arranging Boards for Visual Appeal
Lay all tabletop boards face-down on a flat surface. Choose the pretty side by looking for consistent grain, interesting knots, or natural wear patterns. Mark the top side with painter’s tape so you do not confuse it during assembly. Arrange boards in order, alternating grain direction slightly for visual balance. Use a V-mark trick: draw a V across the edges of two adjacent boards. If you separate them for any reason, the V helps you reassemble the seam perfectly.
Joining Boards with Pocket Holes
Drill pocket holes along the edges of each board. Alternate screw positions left, right, left, right to prevent warping and keep the joint balanced. Apply wood glue to all mating edges, then clamp tightly. If clamps cannot reach the center, use the clamping bridge method described earlier. Drive screws slowly to avoid stripping. Once joined, flip the tabletop carefully it is heavy, so get help and sand the underside to remove glue squeeze-out and level the joints.
Shape and Sand the Surface
Rounding Over Edges for Comfort
Use a router with a ¼-inch round-over bit to soften sharp corners on the tabletop and aprons. This adds comfort when leaning against the table and gives a polished, professional look. Move the router steadily with the grain to avoid tear-out. Tape off areas you do not want routed, like the tops of legs where the tabletop meets them.
Sanding in Progressive Grits
Sanding is critical for a smooth, stain-ready surface. Start with 80-grit to remove tool marks and level any uneven joints. Move to 100-grit to smooth the surface. Finish with 120-grit as final preparation for the finish. Do not over-sand pine if you want a rustic texture, because some grain variation is part of the farmhouse charm. Vacuum thoroughly between grits, then wipe with a tack cloth to remove all dust before staining.
Apply Stain and Protective Finish
Staining for Color and Character
New pine often looks too blond and unfinished. Fix this with a gel stain like General Finishes Antique Walnut mixed 50/50 with Candlelight for a warm, aged tone. Apply with a microfiber sponge, following the grain. Use a chip brush to push stain into knots and gaps, as these areas absorb more and create natural contrast. Let dry 6 to 8 hours, then apply a second coat for depth. Remember that end grain soaks up more stain, so wipe excess quickly to avoid blotchiness.
Sealing with Durable Polyurethane
Finish with three thin coats of water-based polyurethane. It dries quickly, stays clear, and resists spills, crayons, and daily wear, making it perfect for families with children. Sand lightly with 220-grit between coats. Wipe with a tack cloth before each new coat to ensure proper adhesion. For extra durability on high-traffic tables, consider Pink Couture Extreme Guard, a high-performance sealer specifically designed for dining tables.
Fix Common Building Mistakes
Avoiding Pocket Hole Depth Errors
A common mistake is setting the Kreg Jig depth to the tip of the bit instead of the shoulder. This causes screws to poke through or not grab enough wood. Always set depth based on the shoulder, not the tip. Test on scrap wood first before committing to your actual pieces.
Preventing Wood Splitting
Pine splits easily, especially near the ends of boards. Always drill pilot holes before driving structural screws or attaching brackets. Use screws slightly thinner than your drill bit to create tension without cracking the wood. This simple step prevents frustration and wasted materials.
Stopping Tabletop Warping
Alternate pocket screw direction along seams left, right, left, right to balance tension and prevent warping. Let wood acclimate in your home for 48 hours before building to reduce moisture-related warping. This is especially important if the lumber came from a cold warehouse or humid outdoor storage.
Customize and Maintain Your Table
Adding Style and Hiding Hardware
Spray-paint L-bracket heads to match your stain color, and they will virtually disappear once installed. Consider leaving small gaps between tabletop boards for a more authentic, rustic look. Avoid perfectly flush joints because slight imperfections enhance the farmhouse character that makes your table unique.
Daily Care and Long-Term Maintenance
Wipe spills quickly with a damp cloth because water-based polyurethane handles moisture well. Use mild soap and avoid harsh cleaners. Over time, scratches and dents will appear, and that is perfectly okay. Spot-sand and re-stain minor damage to blend it in. This patina is part of the story your table will tell.
Time and Cost Expectations
Expect 2 to 4 days total for your project: 1 day for cutting, 1 day for assembly, and 1 to 2 days for sanding and finishing. Beginners may need longer. Material costs range from $150 to $400 depending on wood choice, far less than the $1,000 or more for a comparable store-bought table. With proper bracing and finish, your DIY farm table will last decades.
Frequently Asked Questions About Building a Farm Table
What is the standard height for a farm table?
The standard height for dining tables, including farm tables, is 30 to 31 inches. This ensures compatibility with standard dining chairs and comfortable seating for most adults.
What is the best wood to use for a farmhouse table?
Pine is the most budget-friendly option and provides excellent rustic character. Oak or maple offer superior durability for heirloom-quality tables. Reclaimed wood provides instant vintage appeal but costs more and requires more cleaning preparation.
How long does it take to build a farm table?
Most builders complete a farm table in 2 to 4 days. Experienced DIYers often finish in a weekend, while beginners should allow extra time for learning and drying between finishing coats.
How do I prevent my tabletop from warping?
Alternate screw positions when joining boards, let wood acclimate to your home for 48 hours before building, and add a center support beam for tables longer than 6 feet. These steps significantly reduce warping risk.
Do I need special tools to build a farm table?
You need a miter saw, Kreg Jig, drill, and sander as essentials. These tools handle 90% of the project. A router and jigsaw are optional but add professional finishing touches.
Key Takeaways for Building Your Farm Table
Building a farm table is not about achieving perfection it is about creating function, warmth, and character that becomes the heart of your home. Whether you choose affordable pine, authentic reclaimed wood, or premium hardwood, the process remains fundamentally the same. Focus on accurate measurements, proper joinery with pocket holes, adequate bracing to prevent sagging, and a durable finish that protects your investment. The tools required are minimal, the techniques are learnable, and the satisfaction of gathering around a table you built yourself is immeasurable. Start with quality materials, follow the steps in this guide, and create a farm table that feeds your family and tells a story for generations to come.