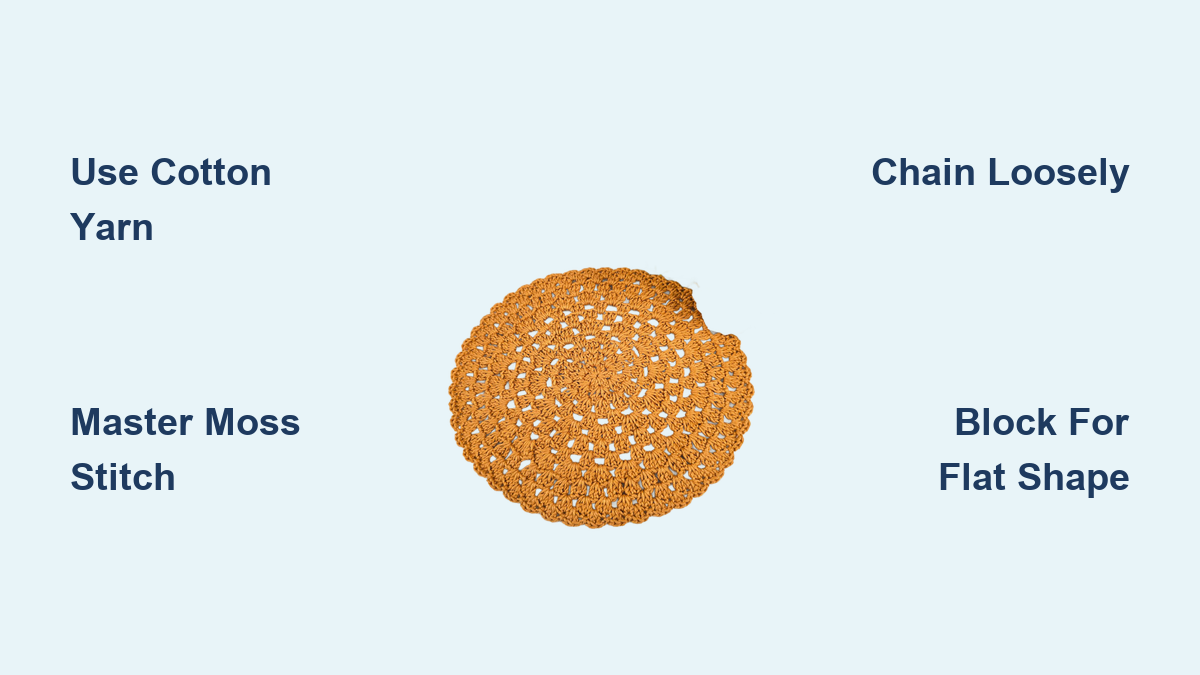
How to Crochet a Table Mat
Crocheting a table mat is a satisfying project that blends practicality with creativity. Whether you’re protecting your dining table from hot dishes or adding handmade charm to your kitchen, a crocheted mat offers durability and style you cannot find in store-bought options. The best part? You can customize the size, color, and texture to match any decor from modern minimalist to rustic farmhouse. With just a few basic stitches and the right materials, you can create beautiful, flat-laying mats that impress guests and last for years.
This guide covers everything you need to know about how to crochet a table mat, from choosing the best yarn and hook to mastering foundational techniques like the magic ring and moss stitch. You’ll learn how to avoid common issues like curling or warping and finish with professional blocking. Whether you prefer round or rectangular designs, delicate scallops or sturdy crab stitch borders, you’ll find clear, step-by-step instructions tailored to real-world results.
Choose the Right Yarn and Hook for Your Table Mat

Pick a Durable, Machine-Washable Yarn
For table mats, 100% cotton or cotton-blend yarn is ideal. It resists heat from warm dishes, absorbs moisture, and can be machine washed without losing shape. Medium-weight worsted cotton provides a soft sheen and balanced drape, perfect for everyday use.
If you want a modern, lightweight look, consider a cotton-linen blend in DK weight. It softens over time and holds crisp stitch definition. For heavy-duty or outdoor mats, 4mm macrame rope or 3mm cotton cord creates a dense, structured fabric.
Avoid acrylic unless necessary because it can melt under hot plates and lacks the natural texture of plant fibers.
Match Hook Size to Yarn Weight
Using the correct hook ensures even tension and proper drape. For worsted cotton, a 5mm hook works best. For DK cotton-linen blends, use a 2.75mm hook. For 3mm cotton cord, reach for a 6mm hook, and for 4mm macrame rope, an 8mm hook provides the right fit.
Always test your gauge before starting. If the fabric curls or puckers, go up or down a hook size to adjust.
Select Colors and Aesthetics
Solid colors highlight textured stitches like moss or crab stitch. Stripes add visual impact, so use navy and white for a modern look, sage green for spring, or red and green for holiday themes.
When working stripes, carry yarn along the edge for fewer ends if you want a single right side. Cut and rejoin for a reversible mat, though this requires more weaving in of ends.
Start Your Crochet Table Mat Correctly
Use the Magic Ring for Round Mats
A magic ring creates a tight, hole-free center, perfect for circular placemats. To start, wrap yarn around your fingers twice. Pull the first loop over the second to form a knot. Insert your hook, yarn over, and pull through to create your first loop.
Chain 2 to count as your first double crochet. Work 11 more double crochets into the ring for a total of 12 stitches. Pull the tail firmly to close the ring tightly. Slip stitch into the top of the first double crochet to join the round.
For thick cord or rope, use an inner ring method by looping yarn around your fingers, inserting the hook, pulling through, then releasing.
Chain Loosely for Rectangular Mats
For rectangular mats, start with a loose chain of an even number such as 56 for a 12-inch width or 96 to 120 for wider mats.
Tight chains cause the mat to shrink up to 20% and warp. If the edge feels stiff or puckered, re-chain with looser tension. After chaining, work your first stitch into the second chain from the hook and keep consistent tension across the row.
Build the Base Structure for Flat Circles

Follow the Math for Flat Circles
To prevent curling or ruffling in round mats, increase stitches evenly using a precise pattern. Start with 12 double crochets in the first round. Round 2 should have 2 double crochets in each stitch for 24 total. Round 3 follows the pattern of 2 double crochets then 1 double crochet, repeating around for 36 stitches.
Round 4 uses 2 double crochets then 1 in each of the next 2 stitches, repeating for 48 stitches. Round 5 continues with 2 double crochets then 1 in each of the next 3 stitches for 60 stitches. Each round increases by 12 stitches, and you can stop at Round 9 to 12 for a full placemat size.
Stabilize the Shape When Needed
Some designs include a stabilization round where no increases are made. This locks in the diameter and ensures the mat lies perfectly flat before continuing. Use this technique if your circle starts to cup or wave by pausing increases for one round, then resuming.
Master Key Stitch Patterns for Table Mats
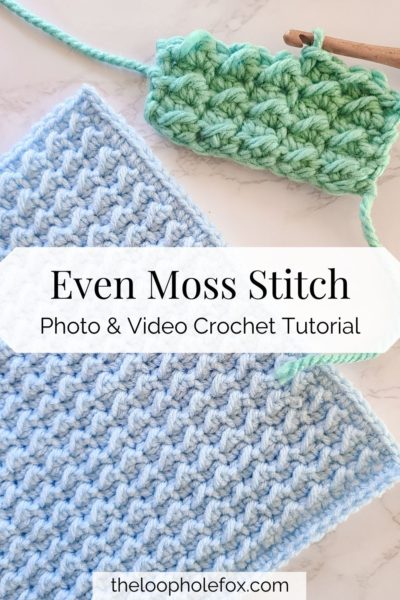
Crochet the Moss Stitch for Flat Rectangles
The classic moss stitch lays flat and resists curling, making it ideal for rectangular mats. For Row 1, single crochet in the second chain from the hook, then chain 1, skip 1 chain, and single crochet in the next. Repeat across the row.
For Row 2 and beyond, turn your work and single crochet into the chain-1 space from the previous row. Chain 1 and repeat across. This creates a woven texture with small holes, and DK or worsted cotton yields the best results.
Try the Even Moss Stitch for Texture
The even moss stitch uses slip stitches and half double crochets for a ribbed, farmhouse look. Row 1 starts with a slip stitch in the second chain from the hook, then half double crochet in the next chain. Repeat slip stitch and half double crochet across, ending with a slip stitch.
Work into the top two loops unless a deeper rib is desired. This stitch shrinks significantly, so chain loosely and plan for aggressive blocking during finishing.
Add a Decorative Border to Your Mat

Create a Scalloped Edge
A scalloped border adds elegance to round mats. The pattern involves single crocheting, skipping 1 stitch, then working 5 double crochets into the next stitch, then skipping 1 again. Repeat this around the entire edge and join with a slip stitch to the first single crochet.
This forms soft, fan-like peaks. Steam gently to open the clusters without flattening them completely.
Finish with a Crab Stitch Edge
The crab stitch, also called reverse single crochet, creates a tight, polished border that resists fraying. To work it, insert your hook from back to front into the stitch, pull up a loop, yarn over, and pull through both loops. Repeat in each stitch, working clockwise around the mat.
Do not add corner increases. One stitch per stitch keeps edges straight. Use a contrasting color for definition or match for a seamless finish.
Avoid Common Crocheting Mistakes
Fix Curling or Warping
Curling means too few stitches or tight tension, while waving means too many stitches. Count your stitches every round and follow the 12-stitch increase rule. Use the fake double crochet join to eliminate gaps at the end of rounds.
Prevent Wavy Edges in Rectangular Mats
Wavy edges come from inconsistent tension or a tight starting chain. Chain loosely and use blocking pins to stretch edges straight during finishing. Steam lightly to relax fibers and smooth the shape.
Account for Shrinkage
Moss stitch can shrink up to 20% after the first row. Chain more than needed, such as chaining 120 for a 96-stitch width, to account for this. Measure after Row 1 and adjust if necessary.
Finish Like a Professional
Weave in Ends Securely
Use a yarn needle for standard yarn. Insert under the V of the first stitch front to back, pull through, then go into the last stitch top-down, grab both loops, and pull through before trimming. For macrame rope, knot the end after weaving for security.
Block to Perfect Shape
Blocking sets the final dimensions and smooths out irregularities. Pin the mat to blocking mats with grid lines, stretch corners to your desired size, and use concentric circles for round mats. Turn the piece face down and steam gently with a handheld garment steamer. Let dry completely before removing pins.
Test steaming on a swatch first. Cotton and linen respond well to steam, but avoid high heat on synthetics.
Customize Your Design
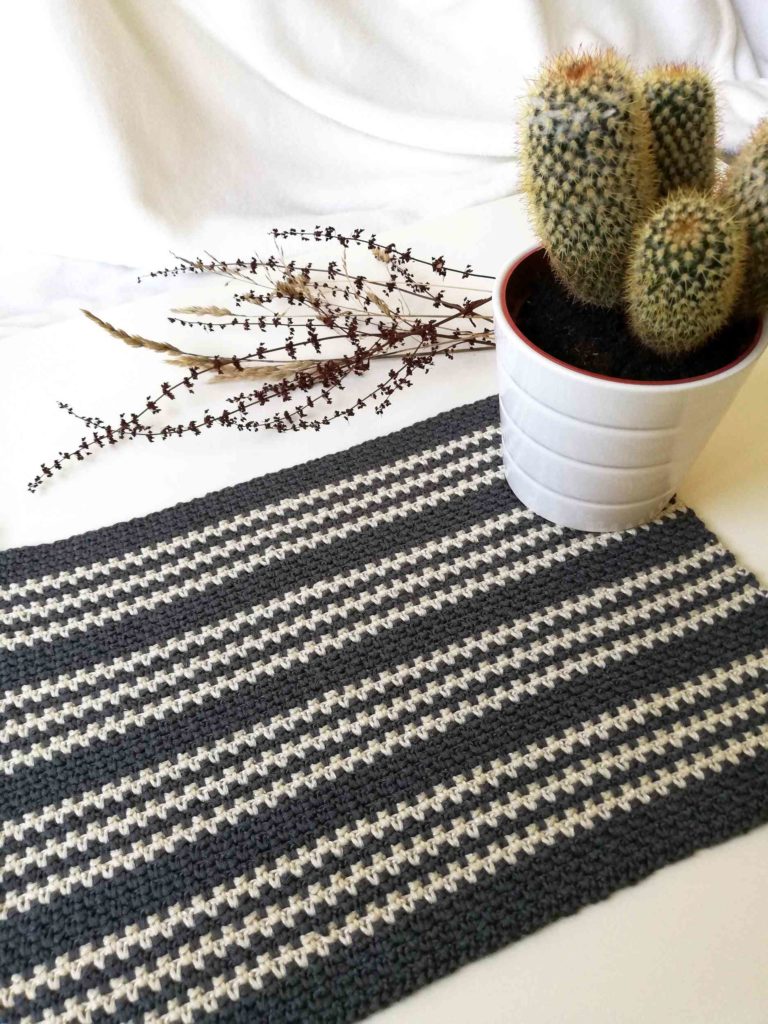
Scale for Any Size
Turn a placemat into a coaster by stopping at Round 4 or 5. Make a table runner by chaining longer and adding more rows. For custom fits like under a tray, measure the object and add 2 to 2.5 inches on each side.
Mix Textures and Styles
Combine stitches for unique effects. Use moss stitch for the body and crab stitch for the border. Add stripes in contrasting colors or try cotton cord for a modern macrame look.
Maintain Your Crocheted Mat
Wash and Dry Properly
Most cotton mats are machine washable on gentle cycle with mild detergent and cool water. For macrame rope or delicate designs, hand wash and lay flat to dry. Avoid wringing or twisting the fabric.
Extend Lifespan with Care
The crab stitch border and dense moss stitch resist wear naturally. Rotate mats periodically to prevent uneven fading. Steam occasionally to refresh the shape and keep your mat looking its best for years.
Frequently Asked Questions About Crocheting Table Mats
What is the best yarn for crocheting table mats?
100% cotton or cotton-blend yarn is best for table mats. Cotton resists heat from warm dishes, absorbs moisture, and can be machine washed without losing shape. Avoid acrylic because it can melt under hot plates.
How do I prevent my round table mat from curling?
Follow the mathematical increase pattern of 12 stitches per round. Round 1 has 12 stitches, Round 2 has 24, Round 3 has 36, and so on. Use a stabilization round if needed and block the finished mat to ensure it lies flat.
What is the moss stitch pattern for rectangular table mats?
For classic moss stitch, chain an even number. Row 1 is single crochet in the second chain from hook, then chain 1, skip 1, single crochet in the next, and repeat. Row 2 places single crochets into the chain-1 spaces from the previous row.
How do I block a crocheted table mat?
Pin the mat to blocking mats, stretch corners to desired dimensions, and use a handheld garment steamer. Turn the piece face down and steam gently to relax fibers without crushing texture. Let dry completely before removing pins.
Can I use different yarn weights for table mats?
Yes, but adjust your hook size accordingly. DK weight cotton-linen needs a 2.75mm hook, worsted cotton needs 5mm, 3mm cotton cord needs 6mm, and 4mm macrame rope needs an 8mm hook.
How do I add a crab stitch border to my table mat?
Work clockwise around the mat, inserting your hook from back to front into each stitch. Pull up a loop, yarn over, and pull through both loops. One crab stitch per stitch keeps edges straight without adding corner increases.
Key Takeaways for Crocheting a Beautiful Table Mat
Crocheting a table mat is a beginner-friendly project with endless customization potential. Choose cotton or cotton-blend yarn for durability and heat resistance. Follow the mathematical increase pattern for flat round mats and use moss stitch for flat rectangular ones. Always chain loosely to prevent shrinkage and warping. Finish with professional blocking to ensure your mat lies perfectly flat and looks polished. The crab stitch border adds a durable, decorative edge that resists fraying. With these techniques, your handmade table mat will be both beautiful and functional for years to come.