How to Make a Tablecloth: Quick Steps
Making your own tablecloth is easier than you think, and it gives you complete control over size, fabric, and style. Whether you need a quick no-sew solution for a picnic or a tailored floor-length design for a dinner party, how to make a tablecloth at home lets you skip the frustration of ill-fitting store-bought options. This guide covers every method from basic hems to professional techniques, using only proven expert practices.
You’ll learn how to measure any table shape correctly, calculate fabric yardage precisely, choose the right material for your needs, and complete the project using your preferred method. No guesswork, no wasted materials, just clear steps to create a perfect-fit tablecloth every time.
Measure Your Table for a Perfect Fit
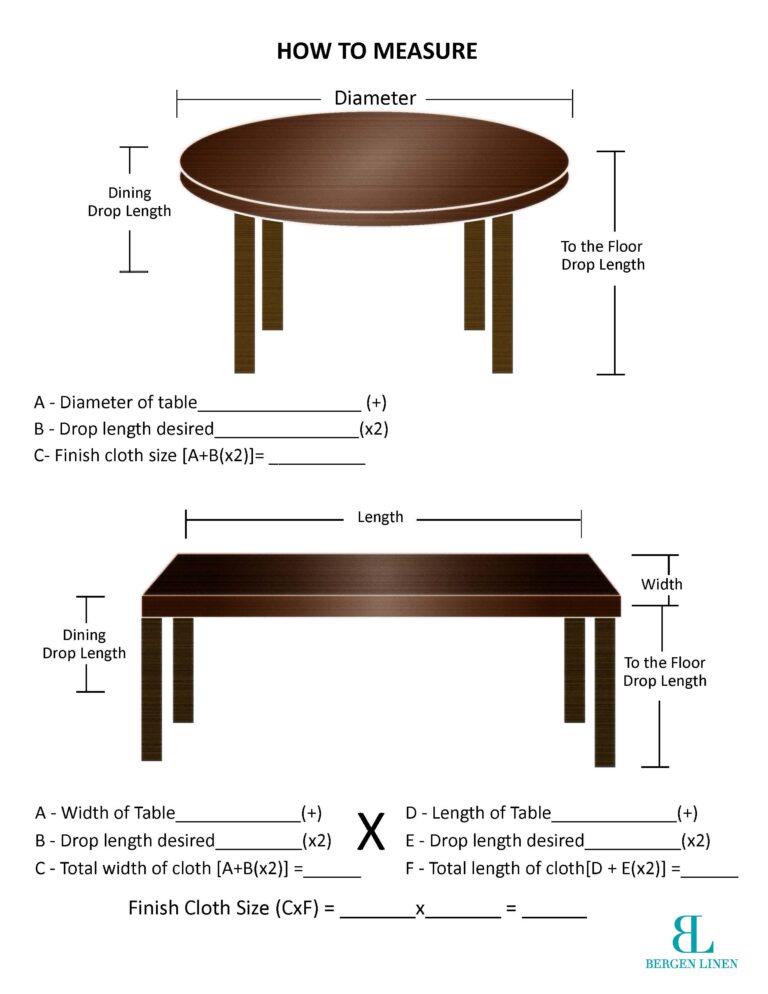
Accurate measurement is the foundation of a well-fitting tablecloth. Taking time to measure correctly prevents costly fabric mistakes and ensures the final result hangs exactly as you want.
Know Your Table Shape and Dimensions
Each table shape requires specific measurements. For rectangular or square tables, measure the length and width across the top surface. For oval tables, measure the longest length and widest width through the center point. For round tables, measure the diameter straight across the center.
Use a flexible measuring tape and record each dimension on a simple diagram. Double-check all measurements before moving to the next step.
Choose the Ideal Drop Length
The drop determines how formal your tablecloth looks and how functional it is for seating. For everyday dining, a casual drop of 6 to 12 inches clears chair legs while keeping things informal. A semi-formal drop of 15 to 24 inches creates an elegant look suitable for dinner parties. Floor-length drops of 28 to 36 inches create dramatic impact for buffets or decorative tables where no one will sit.
You can also customize the drop by measuring from your table edge to your desired endpoint, whether that’s knee height or the floor.
Calculate Fabric Yardage Without Mistakes
Once you have your table measurements and desired drop, calculating fabric requirements is straightforward. This step prevents buying too much or too little material.
Apply the Drop Formula
To find total fabric dimensions, add the drop measurement and hem allowance to both sides of each table dimension. For a standard half-inch double-fold hem, use one inch total per side.
For a table measuring 60 inches long by 30 inches wide with a 30-inch floor-length drop, calculate width as 30 + (2 × 30) + 1 = 91 inches. Calculate length as 60 + (2 × 30) + 1 = 121 inches. You need fabric at least 91 inches wide by 121 inches long.
Convert to Yardage and Check Fabric Width
Standard fabric widths include 44 to 45 inches for quilting cotton, 54 inches for decorator fabric, and 108 inches for wide quilt backing. If your required width fits within one bolt width, simply divide your needed length by 36 to get yards. For the example above, 121 ÷ 36 = 3.36, so round up to 3.5 yards.
If your table requires wider fabric than available, you must piece panels together. Divide your required width by the fabric width to determine how many panels you need, then multiply by the total length to get total inches of fabric required.
Choose the Right Fabric for Your Project
Your fabric choice affects drape, durability, care requirements, and final appearance. Match your fabric to how the tablecloth will be used.
Best Fabrics by Use Case
• Cotton broadcloth and poly-cotton blends work well for everyday dining and are affordable, washable, and easy to sew
• Linen and satin create elegant looks for formal events but require more careful maintenance
• Oilcloth and vinyl are perfect for outdoor use or casual settings because they wipe clean and resist fraying
• Drop cloth canvas offers an affordable rustic look that can be dyed or used as-is
• Spandex and stretchy knits create fitted covers that grip the table snugly
Cotton and linen fabrics require pre-washing to prevent shrinkage after construction. Polyester resists wrinkles and holds up well to frequent washing. Non-fray fabrics like oilcloth and upholstery materials eliminate the need for hemming entirely.
Cut Fabric Accurately the First Time
Precise cutting ensures your tablecloth hangs evenly and looks professional. Rushing this step leads to crooked hems and uneven draping.
Prepare and Mark Your Fabric
Start by pre-washing cotton and linen fabrics to pre-shrink them. Iron the fabric flat to remove all wrinkles before cutting. Lay the fabric on a clean, flat surface large enough to accommodate your dimensions.
Use chalk or a fabric pencil to mark cutting lines. Measure from multiple points to ensure straight edges. For rectangles, cut parallel to the selvage edges. For round tablecloths, fold fabric into quarters and use the compass method to mark and cut a perfect circle.
Sew a Double-Fold Hem for a Clean Finish
The double-fold hem is the standard finish for woven fabrics. It encases the raw edge completely, creates a durable edge, and looks professional on both sides.
Fold, Press, and Pin the Hem
Fold the raw edge under half an inch and press with a hot iron. Fold again another half inch to encase the raw edge completely. Press this second fold firmly to create a crisp crease. Repeat on all four sides.
Pin along the inner folded edge, spacing pins every 3 to 4 inches. Use a size 90/14 universal needle with matching thread. Set your stitch length to 3 millimeters.
Sew and Finish the Hem
Sew close to the inner fold, about a quarter inch from the edge. Backstitch at the beginning and end to lock your stitches. Remove pins as you sew to avoid needle damage.
After sewing, press the hem one final time. This step flattens the stitches and gives a polished, professional appearance.
Create Professional Mitered Corners

Mitered corners eliminate bulk at square and rectangular table corners. They lay flat, look polished, and create a tailored appearance that distinguishes homemade tablecloths from casual covers.
Cut the Diagonal Corner
With your double-fold hems pressed on all sides, unfold one corner. You will see a grid where the folds meet at 90 degrees. Draw a diagonal line from the inner corner intersection to the outer corner. Cut along this diagonal line.
Refold the side hems back into place. The raw edge now folds down diagonally, creating a 45-degree angle. Tuck it under so it aligns with your fold lines.
Pin and Sew the Miter
Pin the mitered fold in place, ensuring the diagonal lies flat. Sew close to the inner edge, pivoting at the corner. Press thoroughly when finished for a sharp, seamless corner with no excess bulk.
Piece Fabric Panels for Large Tables
When your table exceeds standard fabric widths, you need to sew panels together. This technique creates a seamless look when done correctly.
Plan Your Panel Layout
For the most invisible seams, use a full-width center panel with narrower side panels. Calculate side panel width by subtracting the center panel width from your total width and dividing by two.
For example, for a 90-inch total width using 45-inch fabric, your center panel is 45 inches and each side panel is 22.5 inches.
Sew Panels Together
Place right sides together and align the edges. If possible, align selvage edges since they don’t fray and are more stable. Sew with a half-inch seam allowance. Press the seam open. If your fabric frays, finish the raw edges with a zigzag stitch or serger before pressing.
For patterned fabrics, allow extra yardage to match designs across seams.
Cut a Round Tablecloth Step by Step

Round tablecloths require a different approach than rectangular ones. The key is creating a perfect circle from flat fabric.
Sew Panels Into a Square First
If your table is larger than your fabric width, sew panels together to create a square larger than your final diameter. This approach is easier than trying to cut a circle from multiple panels after they’re joined.
Fold and Mark the Circle
Fold your fabric in half, then in half again to create quarters. Mark the exact center point at the folded corner. Measure your radius by dividing the final diameter by two. Tie a string to a pin at the center, measure out the radius length, and hold chalk at that point. Swing the string like a compass to draw an arc through all fabric layers.
Cut and Hem the Circle
Cut along the marked line through all layers. Unfold to reveal your perfect circle. Hem using a double-fold technique, but ease the fabric gently around the curve to prevent puckering. You may need to slightly gather the edge as you fold to accommodate the curve.
Make a No-Sew Tablecloth with Fusible Tape
No sewing machine? No problem. Fusible web tape creates a clean hem in minutes using only an iron.
Apply Iron-On Hem Tape
Fold the edge a half inch, then another half inch to encase the raw edge, just like the double-fold method. Insert fusible hem tape inside the fold. Press with a hot iron for 10 to 15 seconds per section according to package instructions. Let cool completely before moving—the bond sets as it cools.
This method works best for light-use tablecloths, temporary events, or testing fit before committing to sewing. Note that fusible bonds may not hold up to frequent washing or heavy use as well as stitched hems.
Create a Fitted Tablecloth with Elastic

A fitted tablecloth stays in place without slipping or bunching. This approach works well for event tables or any situation requiring a snug, wrinkle-free fit.
Sew an Elastic Casing
After completing your hem, create a narrow channel around the entire perimeter. Leave a 2-inch opening to insert elastic. Cut elastic to fit your table perimeter exactly. Use a safety pin to thread elastic through the casing. Overlap the elastic ends and sew them together securely. Close the casing opening.
Try the Tie-Under Method for a Quick Fix
Drape the cloth evenly over your table. Lift the center of one short side from underneath. Tie the two lower corners together in a double knot beneath the table. Tuck the knot up under the table and let the fabric drop. Repeat on the opposite side. This pulls the fabric tight without any sewing.
Handle Special Table Shapes and Sizes
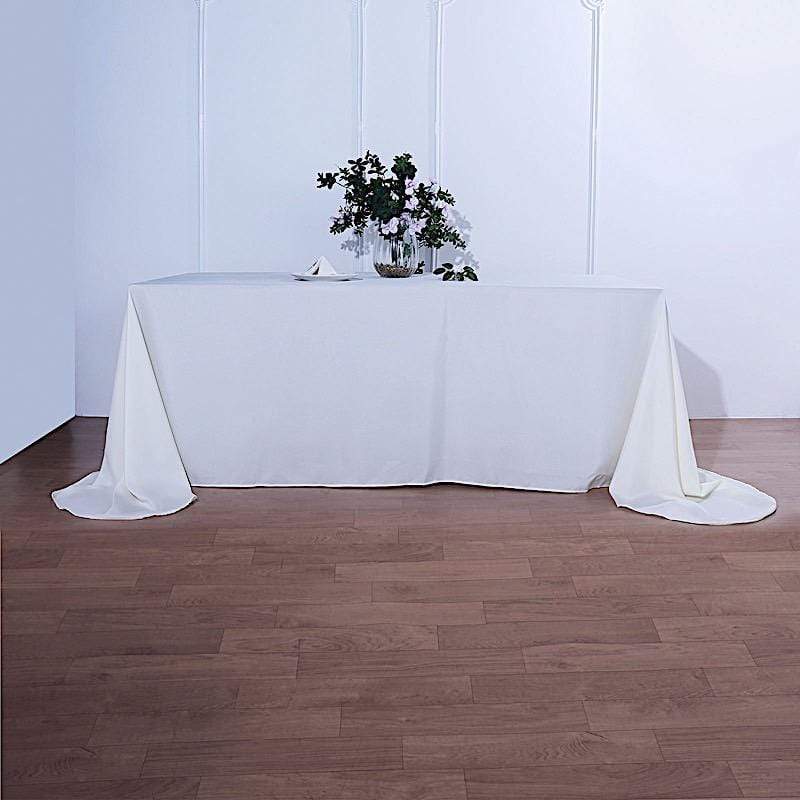
Not every table is a standard rectangle or round. Adapt your techniques for unique shapes and custom looks.
Cut Rounded Corners on Rectangular Cloths
Place a large plate or bowl at each fabric corner. Trace the curve with chalk. Cut along the curve and hem as usual. This creates a soft, casual look perfect for outdoor tables.
Fit an Oval Table
Cut fabric as a rectangle with extra width beyond your table dimensions. At each end, trace a dinner plate to create smooth curves matching your table shape. Cut carefully and hem slowly, easing fabric around the curves to maintain an even drop all around.
Add Decorative Touches and Styling Ideas
Elevate your tablecloth from functional to fabulous with simple styling techniques.
Create Elegant Swags
Drape your cloth with extra length beyond your desired drop. Gather fabric at intervals along the edge and pin with decorative clips or hidden safety pins. The result is soft, elegant folds perfect for dessert tables, head tables, or formal events.
Make a Skirted Table
Cover a cabinet or storage unit with fabric. Place a round tabletop on top. Let the fabric hang down as a skirt. Add a glass cut to size on top to hold everything in place and protect from dust. This approach transforms everyday furniture into stylish craft or studio tables.
Care for Your Handmade Tablecloth
Proper care extends the life of your tablecloth and keeps it looking its best.
Wash According to Fabric Type
Machine wash cotton and polyester blends in warm water and tumble dry. Hand wash or line dry linen to minimize wrinkles. Wipe oilcloth and vinyl with a damp cloth and mild soap. Dry clean satin, lace, and delicate fabrics.
Press for a Professional Finish
Iron after each washing to maintain a crisp appearance. Use steam generously for stubborn creases. A quality iron with automatic shut-off provides safety and consistent results.
Troubleshoot Common Tablecloth Problems
Even careful crafters encounter issues. Here is how to solve the most frequent problems.
Fix Bulk at Corners
Ensure mitered folds lie completely flat before sewing. Press thoroughly at each stage. Avoid over-pinning, which can distort the fabric.
Prevent Puckered Hems on Curves
Ease fabric slowly when folding curved edges. Slightly gather the edge before hemming to absorb excess fabric.
Stop Fraying Edges
Finish raw edges with a zigzag stitch or serger before hemming. Choose non-fray fabrics like oilcloth or upholstery material when possible.
Align Seams Perfectly
Pin frequently when piecing panels. Use fabric weights or clips to hold alignment during sewing.
Frequently Asked Questions About Making Tablecloths
What is the easiest way to make a tablecloth without sewing?
Use fusible hem tape. Fold the edge twice to encase the raw edge, insert the tape inside the fold, and press with a hot iron. The bond sets as it cools. This method takes under 15 minutes but works best for light use or temporary settings.
How much fabric do I need for a tablecloth?
Calculate total dimensions by adding your drop length twice (for both sides) plus hem allowance to your table’s length and width. Convert inches to yards by dividing by 36. Always round up to ensure you have enough material.
What is the best fabric for everyday tablecloths?
Cotton broadcloth, poly-cotton blends, and poly poplin offer the best balance of affordability, durability, and easy care. These fabrics are machine washable, resist wrinkles, and hold up well to frequent use.
How do I make a tablecloth fit a round table perfectly?
Sew panels into a square larger than your final diameter. Fold into quarters and mark the center. Use a string and pin to create a compass and draw your circle. Cut, unfold, and hem the curved edge carefully, easing fabric to prevent puckering.
Can I use a drop cloth as a tablecloth?
Yes, canvas drop cloths work well for rustic or industrial-chic styles. They are affordable, durable, and can be dyed or used as-is. Pre-wash to remove any chemical treatments before use.
How do I keep my tablecloth from slipping?
Create a fitted tablecloth by sewing an elastic casing around the perimeter and threading elastic through to grip the table. Alternatively, use the tie-under method to pull fabric tight without sewing.
Final Tips for Making the Perfect Tablecloth
Making a tablecloth is both practical and creative. Measure twice and cut once to avoid wasting fabric. Press at every stage—it makes the biggest difference in the final appearance. Use wide fabric like 108-inch backing to avoid seams on large tables. Save your scraps—they’re perfect for napkins, coasters, or small projects.
Choose durable fabrics for high-traffic areas and elegant fabrics for special occasions. Match your fabric to your use: cotton for family dinners, linen for holidays, oilcloth for outdoor events. Your perfect-fit tablecloth is just a few careful steps away.