How to Make a Table Cover: Quick Steps
Nothing transforms a dining space or event setup like a custom-fitted table cover made exactly to your specifications. Whether you need an elegant floor-length cloth for a formal gathering, a spill-proof protector for family dinners, or a weather-resistant cover for outdoor furniture, learning how to make a table cover gives you complete control over fit, function, and style. The process is more straightforward than you might think, requiring only basic sewing skills, the right measurements, and appropriate materials for your specific needs.
This guide walks you through every technique you need, from selecting fabrics and calculating precise dimensions to sewing professional mitered corners, installing elastic channels for a snug fit, and even creating specialized covers for outdoor tables and gaming surfaces. Each method includes step-by-step instructions, time estimates, and tips to help you achieve results that look professionally made.
Choose the Right Fabric for Your Table Cover Project

The fabric you select determines how your table cover will look, feel, and perform over time. Different settings and purposes call for different materials, so matching your choice to your specific needs is essential for success.
For formal events, polyester poplin offers a polished appearance with excellent wrinkle resistance, while satin or sequined fabrics create dramatic visual impact. Everyday family use calls for laminated cotton or oilcloth, which wipe clean instantly and resist stains from spills and food. Outdoor tables require solution-dyed acrylic fabrics like Top Notch or SureRite, which resist UV damage, repel water, and maintain colorfastness despite constant sun exposure. Poker and gaming tables benefit from layering felt over batting for a cushioned, smooth playing surface.
Pro Tip: Pre-wash cotton-based fabrics before sewing to prevent shrinkage that could distort your carefully calculated dimensions.
Standard fabric widths are typically 45 or 60 inches. If your table measures wider than the fabric available, you will need to piece panels together, which means buying extra yardage to accommodate seams and pattern matching.
Measure Your Table for a Perfect-Fitting Cover
Accurate measurements form the foundation of any successful table cover project. Before purchasing fabric or cutting anything, measure your table’s length, width, and height.
For floor-length covers, calculate your fabric needs using this formula. The total width equals your table width plus twice the drop plus twice the hem allowance. The total length equals your table length plus twice the drop plus twice the hem allowance. Standard drop measurements are 10 to 12 inches for casual everyday use and 36 inches or more for formal floor-length draping. The hem allowance typically accounts for 1 inch total when using a half-inch double-fold.
As a practical example, a table measuring 60 inches long by 30 inches wide with a 36-inch height and a 36-inch drop requires fabric approximately 133 inches long by 103 inches wide. Since 103 inches exceeds standard 60-inch fabric width, you will need to join panels to achieve the necessary dimensions.
Cut and Join Fabric Panels
When your calculated width exceeds standard fabric dimensions, joining panels becomes necessary. The key technique is offsetting seams so they do not create a bulky line running directly down the center of your table.
The recommended approach uses a center panel flanked by two narrower side strips. Cut one full-width piece to your required length, then cut a second piece in half lengthwise to create two side panels. Trim the side panels to fit the remaining width. For instance, if your total width is 103 inches and your center panel occupies 59 inches, each side panel would be 22 inches wide.
To join panels, place the center panel and side strip with right sides together and sew with a half-inch seam allowance. Press each seam open to reduce bulk and ensure flatness. Selvage edges, which do not fray, can be used where possible to skip additional edge finishing.
Create Professional Mitered Corners
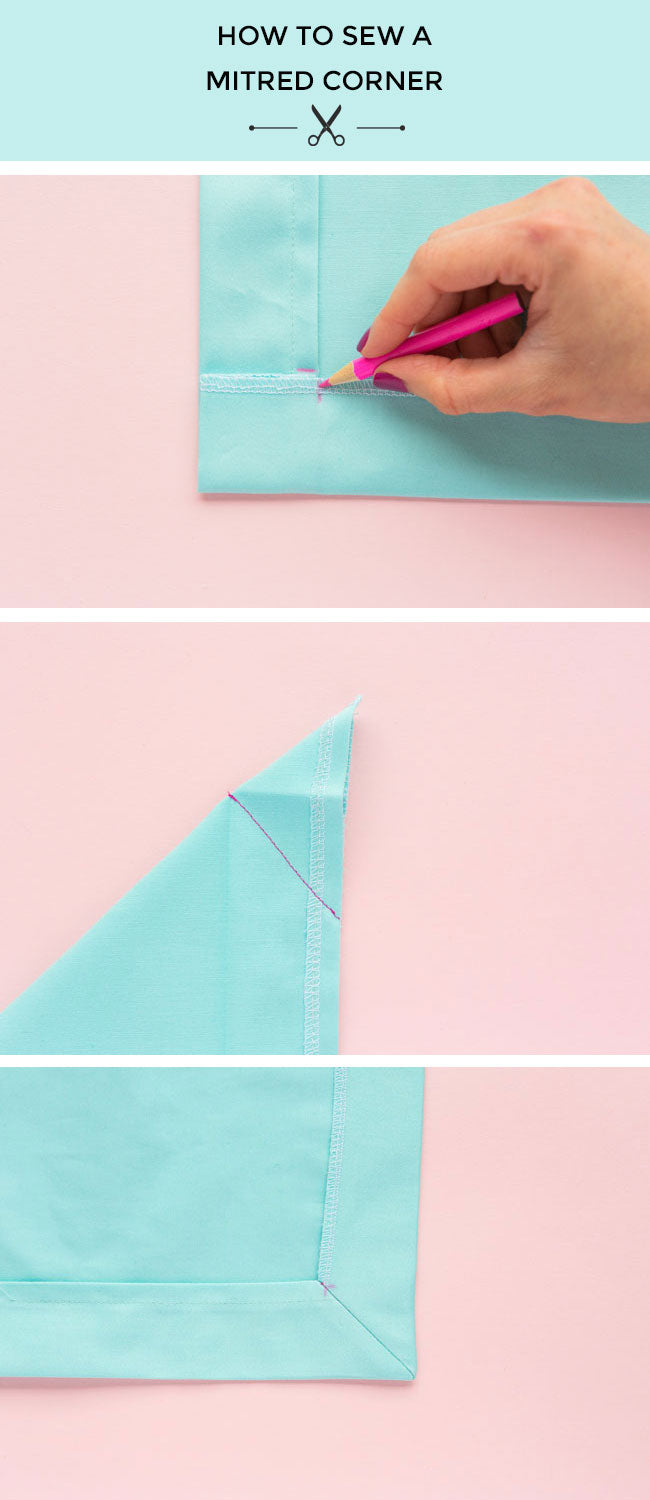
Standard folded hems create bulky, uneven corners that disrupt the clean drape of a formal tablecloth. Mitered corners lie flat, look polished, and create the crisp 45-degree angles expected in professional table settings.
The mitering process begins by folding all four edges down half an inch and pressing. At each corner, unfold to reveal the grid of crease lines and mark a diagonal line from corner to corner through the center square. Cut along this diagonal line, then refold the edge so the cut diagonal meets the hem crease with raw edges aligned. Fold the side edges in, then fold the diagonal flap over to complete the corner. Pin securely and press, then sew along the inner fold, backstitching at both start and end points.
The finished corner should display a clean 45-degree angle with no puckering or bulk. This technique is essential for formal tablecloths but optional for casual or fitted covers where corner visibility is minimal.
Make a Fitted Table Cover with Elastic
Fitted covers stay in place remarkably well, making them ideal for households with children, outdoor dining in windy conditions, or any situation where a loose-hanging cloth presents problems. These covers work like fitted bed sheets, hugging the table edges with elastic.
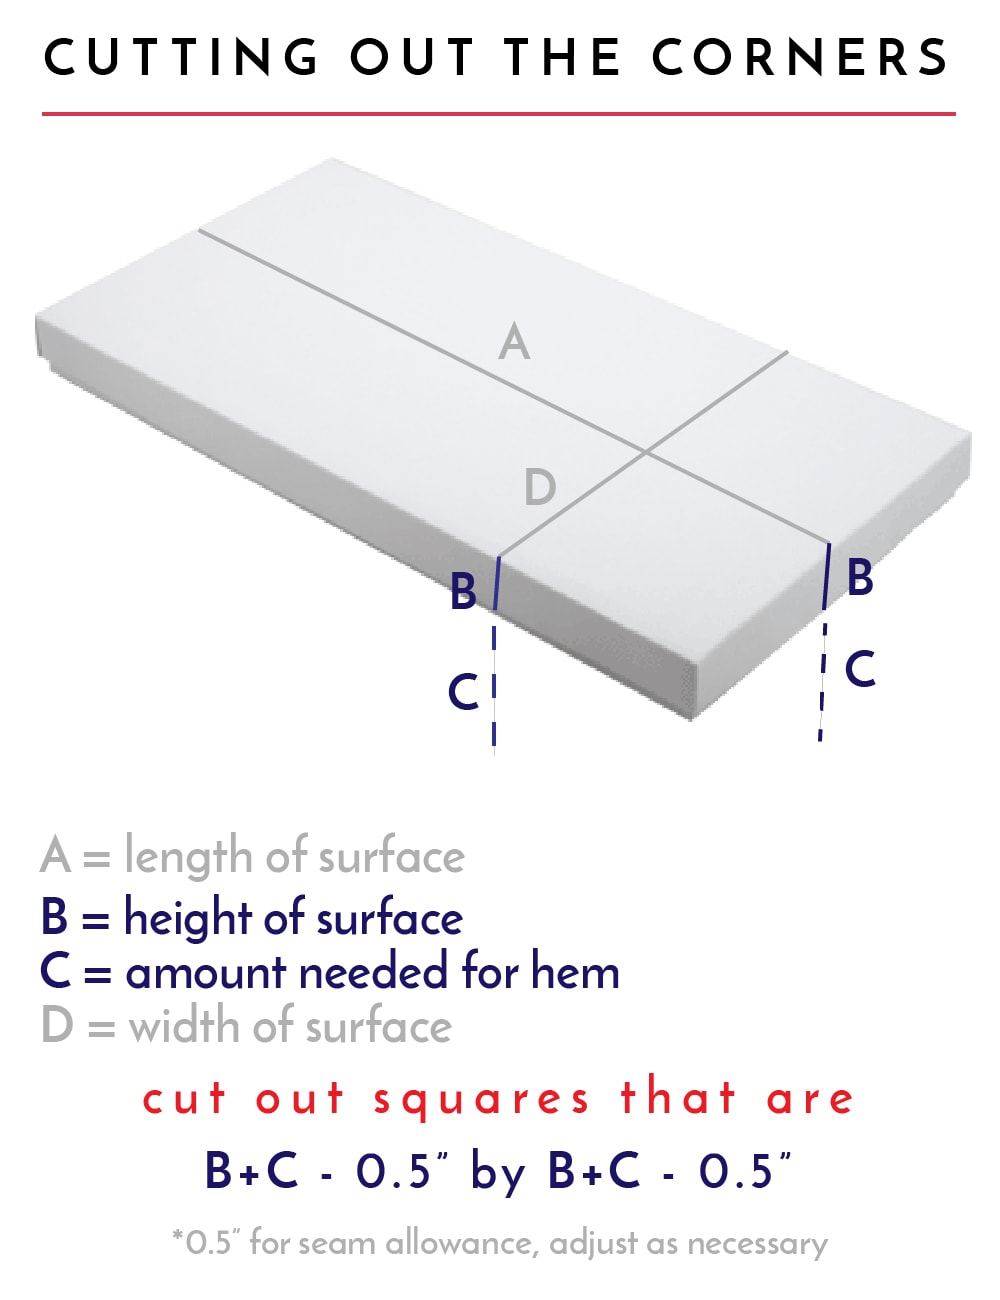
Calculating fitted cover dimensions requires accounting for table depth and wrap-around distance. Use these formulas. The width equals tabletop width plus twice the depth plus twice the wrap distance plus 1.5 inches for seam allowance. The length follows the same calculation. The corner cutout size equals depth plus wrap distance plus 1 inch.
For a practical example, a table measuring 40 by 80 inches with 1.5-inch depth and half-inch wrap requires a corner cutout of 3 inches square. Cut your fabric to the calculated size, then cut a 3-inch square from each corner. Fold the fabric so cutout edges meet right sides together and sew with a quarter-inch seam allowance, locking stitches at start and end. Press seams toward the corner. This creates the three-dimensional pocket that slips over your table edges.
Install an Elastic Channel for a Snug Fit
The elastic channel construction transforms a flat piece of fabric into a fitted cover that stays put regardless of activity or weather conditions. This method works for both indoor and outdoor applications.
Begin by folding the raw edge inward 1 inch around the entire perimeter, pressing firmly, then folding again another 1 inch to create a clean channel. Sew close to the inner folded edge while leaving a 4-inch gap for threading. Use a safety pin or jumbo elastic threader to insert elastic sized to 70 percent of your table’s perimeter for a tight but not warp-inducing grip.
For a square table with 45-inch sides, the perimeter equals 180 inches, so elastic length would be approximately 126 inches. After threading, tie elastic ends with a square knot, trim excess leaving 1-inch tails, tuck the knot into the channel, and hand-sew the gap closed.
Warning: Do not over-tighten the elastic. The fabric should grip the table without distorting its shape or pulling the cover out of position.
Try the Quick Tie Method for Instant Results
When time is limited or sewing equipment unavailable, the tie method provides instant fitted results without any stitching. This technique works particularly well for parties, rental tables, or temporary setups.
Drape your cloth evenly over the table, then lift the center of one short side up and over the corner. Take the two loose corners and tie them in a double knot on top of the table surface. Drop the knot underneath the drape to hide it. Repeat the process on the opposite short side.
The result is a gathered, fitted appearance achieved in under a minute. This method is less secure than elastic and may loosen during extended use, but it serves perfectly for events where appearance matters more than long-term stability.
Build Durable Outdoor Table Covers
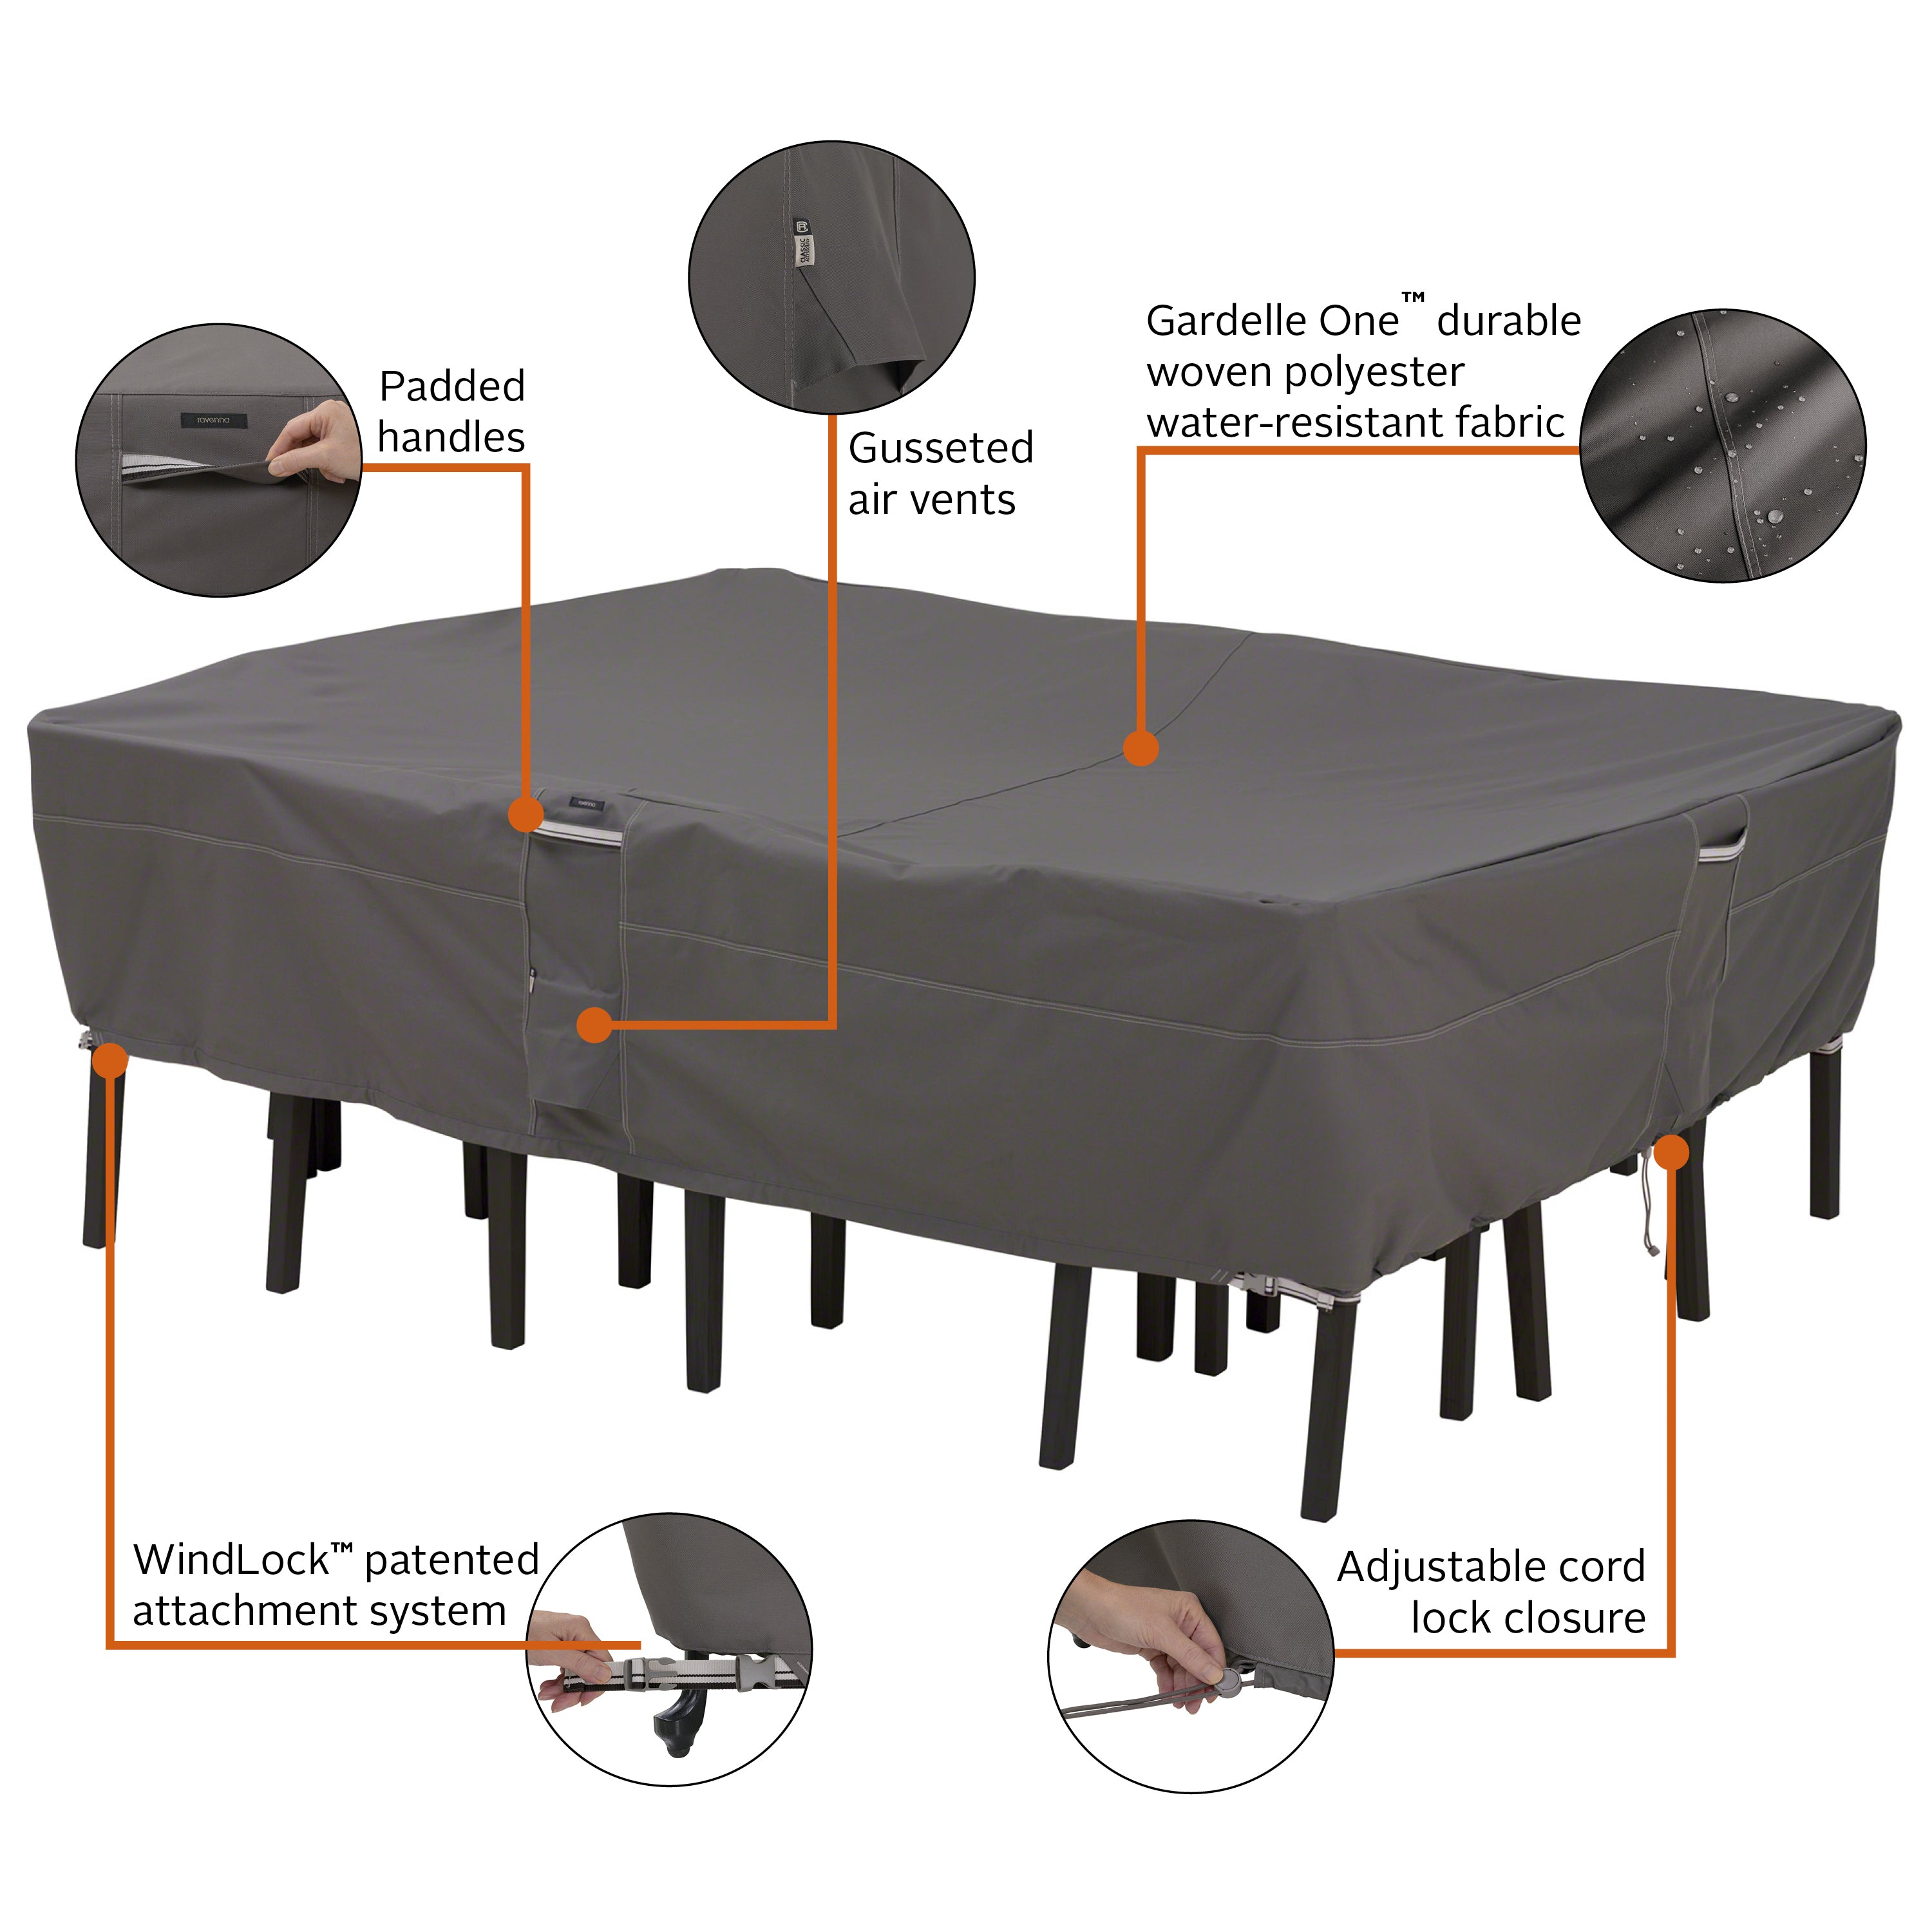
Outdoor table covers face unique challenges including UV exposure, moisture, wind, and temperature fluctuations. Selecting appropriate materials and construction techniques ensures your cover survives multiple seasons of use.
Solution-dyed fabrics provide superior UV resistance because the color is integrated into the fiber before spinning, not applied to the surface. Use UV-bonded polyester thread for stitching that will not degrade in sunlight. Raw edges should be sealed with a hotknife to prevent fraying and extend the cover’s lifespan.
For securing covers on large or irregular surfaces, install a shock cord sleeve system. Sew a continuous 1-inch wide channel around the bottom edge, thread three-eighths-inch shock cord through using a cord lock, pull taut, and secure ends with hog rings or clamps. This adjustable system fits odd-shaped tables and resists wind uplift effectively.
Create a Custom Poker Table Cover
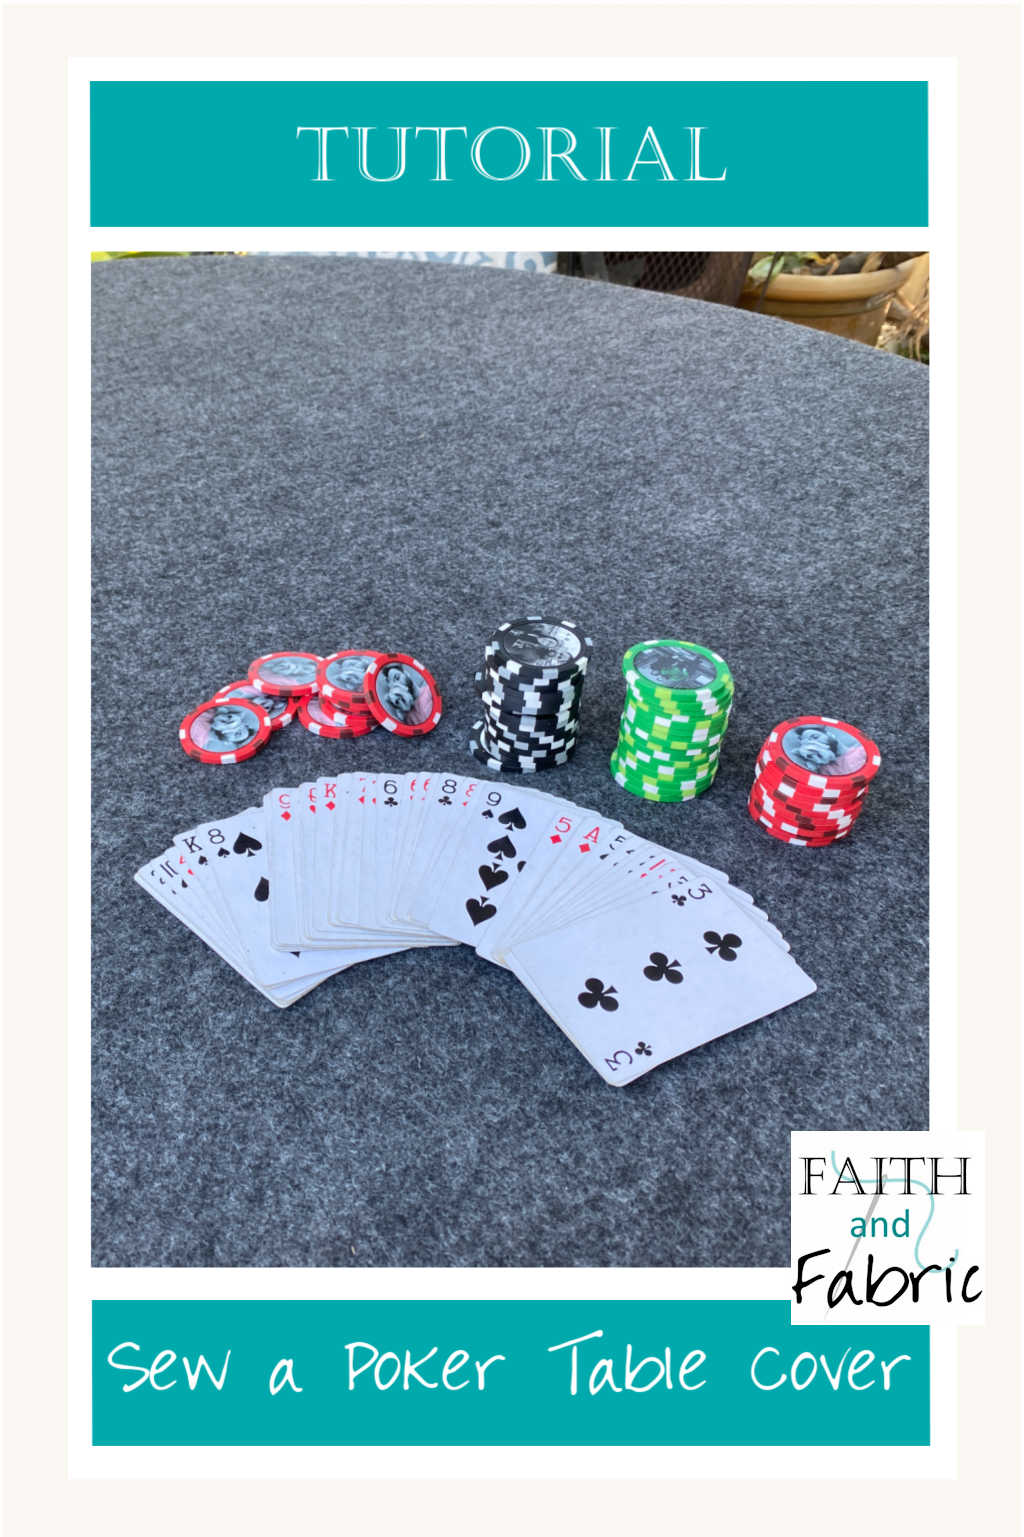
Gaming tables benefit from removable felt covers that protect the playing surface while providing optimal card-sliding characteristics. The layering technique creates a professional-quality setup.
Measure your table and add 8 inches per side for drape. Cut felt and batting to identical dimensions. Hem the felt with a 1-inch double-fold. For round tables, the fabric will bunch naturally during installation. Thread elastic cut to 70 percent of the perimeter through the hem, then place the felt over the batting and stretch the elasticized edge onto the table.
The result is a removable, washable cover that enhances gameplay while protecting your investment. Both layers can be removed for cleaning or replaced independently if wear occurs.
Essential Tools for Table Cover Projects
Having the right tools makes every aspect of table cover construction easier and produces better results. Key equipment includes a 60-inch rotary cutter with cutting mat for smooth wide fabric cuts, Gingher 8-inch scissors for precision trimming, and a chalk pencil for marking seams and corners.
A Teflon presser foot prevents laminated fabrics from sticking to your machine, while a magnetic seam guide ensures consistent half-inch seam allowances throughout your project. A jumbo elastic threader simplifies threading elastic through channels, and a hotknife seals outdoor fabric edges cleanly.
Use Gütermann polyester thread with a 3-millimeter stitch length for durability across all project types.
Avoid Common Table Cover Mistakes
Several frequent errors can undermine even well-planned projects. Preventing these mistakes saves time, materials, and frustration.
Incorrect drop length makes covers look awkward or create tripping hazards. Measure floor clearance before cutting to ensure your chosen drop works in your actual space. Bulk at corners results from improper hemming. Always miter formal cloth corners for flat, professional results. Elastic that is too long creates a loose, sloppy fit. Use the 70 percent rule and test on scrap fabric before final installation. Unsealed outdoor edges fray quickly. Use a hotknife or zigzag stitch to finish raw edges. Ironing laminated fabric on high heat causes melting or delamination. Always use a cool iron with a pressing cloth when needed.
Frequently Asked Questions About Making Table Covers
What is the best fabric for a formal tablecloth?
Polyester poplin offers the ideal balance of durability, wrinkle resistance, and elegant drape for formal events. Satin or sequined fabrics create more dramatic appearances but may require more careful handling.
How much extra fabric should I buy for seams and hems?
Purchase 10 to 15 percent extra fabric beyond your calculated dimensions to accommodate seams, pattern matching, and potential cutting mistakes.
Can I make a table cover without a sewing machine?
Yes, the quick tie method provides a fitted look without any sewing. For more permanent solutions, hand-stitching around elastic channels works but takes significantly longer.
How do I calculate elastic size for a fitted cover?
Cut elastic to approximately 70 percent of your table’s perimeter. This percentage provides snug tension without warping the table or pulling the cover out of position.
What is the easiest table cover type for beginners?
A simple flat cloth with mitered corners represents the best starting point. This project teaches fundamental skills including accurate measuring, seaming, and professional corner finishing.
How do I clean laminated cotton table covers?
Wipe with a damp cloth for everyday cleaning. Machine wash in cool water on a gentle cycle, then air dry. Avoid prolonged heat exposure to prevent delamination.
Key Takeaways for Making Table Covers
The skills required for successful table cover projects are within reach of any motivated beginner with basic sewing knowledge. Selecting appropriate fabrics for your specific purpose, whether formal events, family use, outdoor protection, or gaming, determines long-term satisfaction with your finished piece. Accurate measurements using the formulas provided eliminate guesswork and ensure professional results on the first attempt.
The techniques you master through table cover projects, including elastic channel installation, mitered corner construction, and precise seaming, transfer directly to numerous other sewing endeavors. Reusable bowl covers, tote bags, and furniture throws all utilize these same fundamental skills. Start with a simple project, then progress to more complex constructions as your confidence grows.