How to Set a Buffet Table: Quick Steps
Nothing says celebration quite like a well-organized buffet table. Whether you’re hosting a holiday dinner, a wedding reception, or a casual backyard brunch, a thoughtfully arranged buffet can elevate your event from ordinary to unforgettable. But a poorly planned setup leads to long lines, cold food, and frustrated guests. The key to avoiding chaos lies in knowing exactly how to set a buffet table the right way.
This guide walks you through every step of creating a functional and stunning buffet. From space planning and food flow to temperature control and décor, you’ll learn how to design a layout that keeps guests moving smoothly, food at the right temperature, and your stress levels low.
Plan Layout and Guest Flow for Your Buffet

Calculate Table Space Needed
For every 8 to 10 guests, plan for 2 feet of linear table space. This ensures enough room for dishes, decor, and serving without crowding. If you’re using tiered stands or decorative elements, add extra inches to prevent a cluttered look. For gatherings over 20 people, avoid one long table because it creates bottlenecks. Instead, use an L-shaped layout or split food, drinks, and desserts into separate stations to improve traffic flow.
Position Table for Easy Access
Place the buffet near the kitchen for quick refills, but far enough from dining seats to avoid congestion. Keep at least 3 feet of clearance around all sides so guests can move freely. If possible, set the table freestanding with access from both sides. This doubles serving capacity and cuts line time in half. For wall placement, use a single-file line but ensure it does not block conversation areas or doorways.
Optimize for Outdoor Events
For patios or gardens, choose a stable, level surface away from wind and direct sun. Secure table linens with small weights tucked under the edges or use non-slip pads. Avoid placing food in direct sunlight to prevent spoilage. If using a dining table, remove chairs to signal it is now a serving area and free up much-needed space.
Prepare the Table Base
Choose and Layer Linens
Start with a full-length tablecloth in a neutral tone. Ivory, stone, or soft green works well for most events. For themed parties, match colors deliberately. Dark brown suits fall gatherings, red and green work for Christmas, and pastels are perfect for baby showers. If your table surface is attractive like wood or quartz, skip the full cloth and use textured placemats or vinyl coverings to protect it while showing it off.
Add a table runner down the center for visual guidance and texture. Beaded or lace runners add elegance while burlap suits rustic themes. For a polished finish, use a pleated table skirt to hide storage bins or unattractive table legs.
Use Risers for Height and Depth
Maximize small spaces with vertical layering. Place cake stands, tiered trays, or pedestals under serving dishes to create dimension. Repurpose wooden crates, sturdy books, or pot saucers as bases and cover them with fabric to match your theme. This lifts food into view, frees up surface space, and makes the spread look more abundant.
Arrange Items by Height
Place taller decor like vases or centerpieces at the back of the table. Keep shorter dishes and plates in front so guests can see everything at a glance. Avoid blocking sightlines with tall items in the middle of the table. Low bowls or wide platters work best for centerpieces.
Organize Food in Serving Order

Start with Plates
Place stacked plates at the beginning of the line, the very first item guests see. If the table is accessible from both ends, mirror the plate stack on each side. Elevate the stack on a decorative tray or cake stand to make it stand out and easier to grab.
Follow Meal Sequence Left to Right
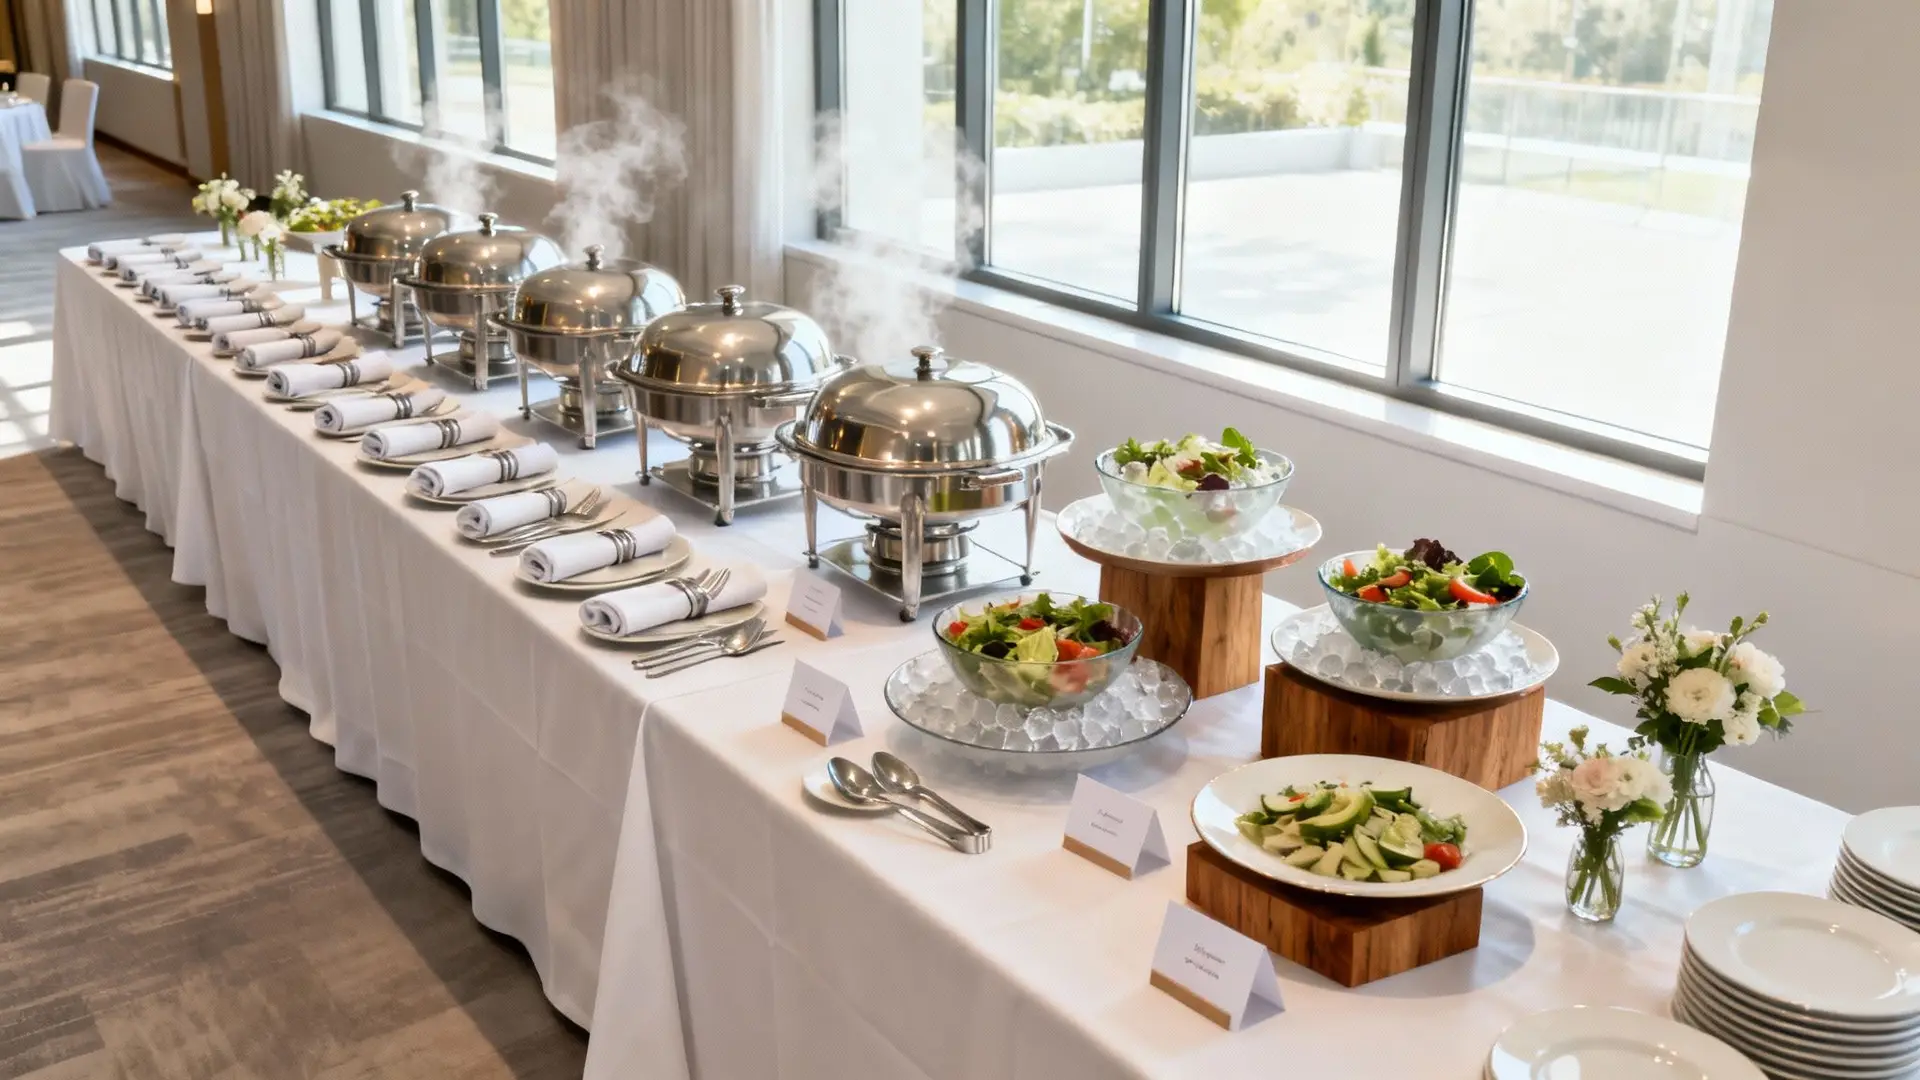
Arrange food in the order guests eat. Start with cold foods like salads, charcuterie, and dips. Follow with hot mains such as roasts, casseroles, and pastas. Place sides next including vegetables, grains, and dressings. End with bread and spreads. Utensils and napkins go at the very end. This left-to-right flow prevents guests from missing items and eliminates backtracking.
Group Complementary Dishes
Keep gravy next to roast beef, crackers near cheese, and butter near bread. Group hot items together and cold items together to maintain temperatures. Never place a warm dish directly beside a chilled salad because it risks warming the cold food and cooling the hot dish.
Separate Utensils and Napkins
Place flatware and napkins at the end of the line, after food. This lets guests fill their plates first without juggling utensils. For formal events, pre-set utensils at dining tables instead. If using the buffet for self-serve, bundle napkins with forks and knives and place them at both ends for faster access.
Maintain Food Safety and Temperature
Keep Hot Foods Hot
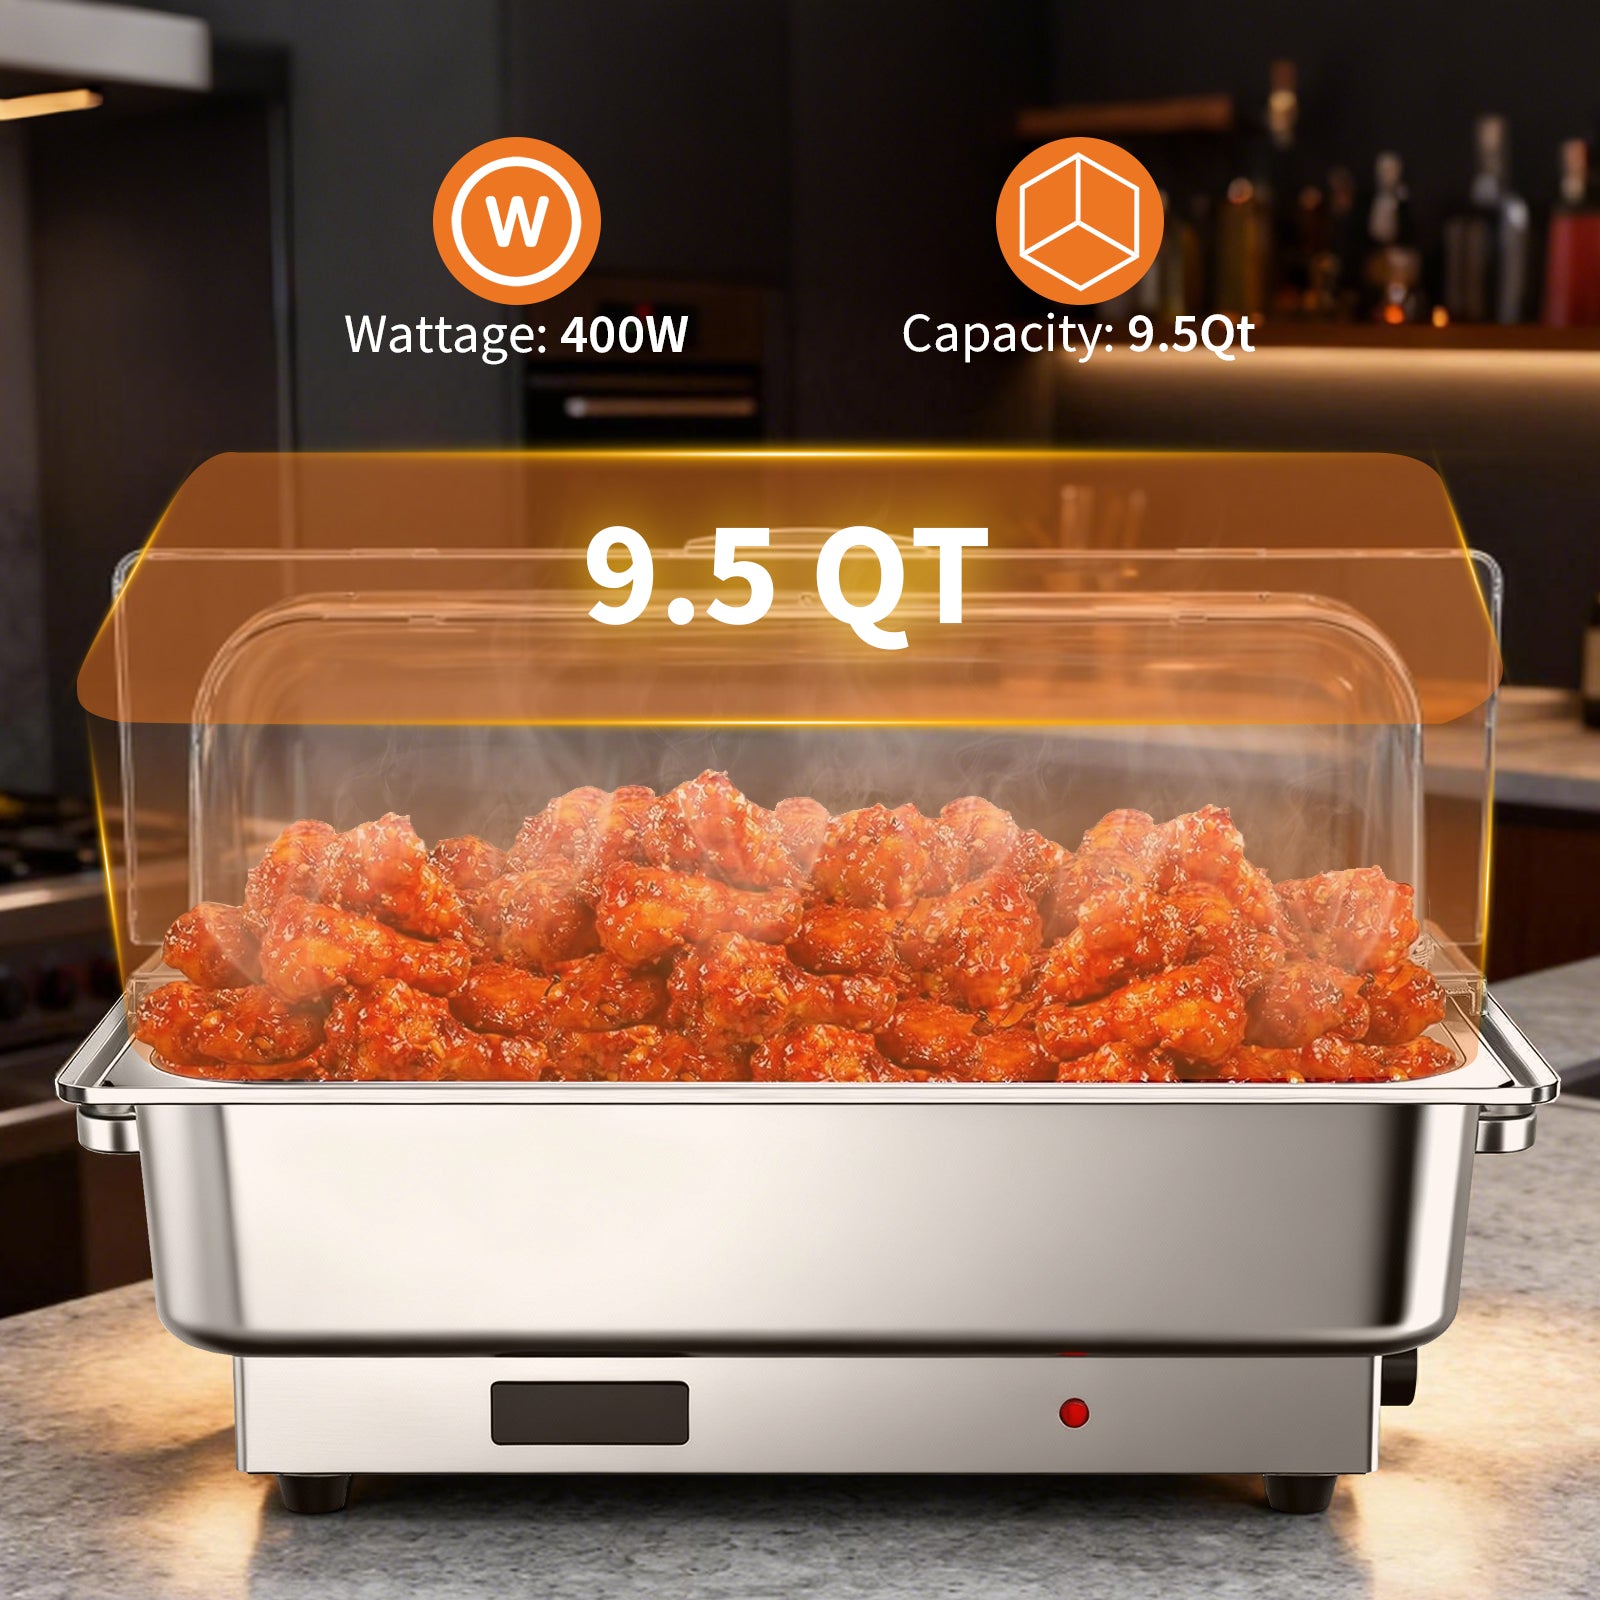
Use chafing dishes, warming trays, or insulated containers for hot items. Cover dishes with lids to retain heat and prevent drying. Avoid placing bread or greens near steamy dishes because the moisture will make them soggy.
Keep Cold Foods Cold
Place chilled items on ice beds. Fill bowls with ice and nestle serving dishes into them. Use this method for shrimp cocktail, ceviche, or cold soups. Ensure containers are stable and will not tip. Never leave perishable cold foods out longer than 2 hours or 1 hour if temperatures exceed 90 degrees Fahrenheit.
Prevent Cross-Contamination
Provide a dedicated spoon rest next to each dish. A small plate or saucer keeps used serving utensils off the table. Replace utensils if they fall into food or get too messy. Never let serving spoons touch plates or hands.
Refill Before Dishes Empty
Monitor food levels and refill when dishes are half-empty. Have backup portions in matching containers ready for quick swaps. Pre-portion salads or desserts in individual cups for faster service and better portion control.
Match Dishware to the Menu
Pick Functional Serving Vessels
Use shallow bowls for rice and pasta. Choose flat platters for meats and vegetables. Select deep bowls for soups or stews. For dips, use chip-and-dip sets with built-in compartments. Choose serving vessels with handles and wide rims for easy guest access.
Select Stylish, Sturdy Materials
Avoid flimsy disposable plates for formal events. Opt for china, glass, or vintage trays for elegance and stability. Metal or ceramic buckets work best for holding ice at drink stations. Mix textures including wood, porcelain, crystal, and metal for visual interest.
Size Dishes Appropriately
Do not use a massive platter for a small batch of cookies because it looks sparse. Likewise, overcrowding a dish looks messy. Choose containers that hold food snugly with a little breathing room. For large groups, use multiple smaller dishes instead of one giant one.
Style with Decor and Signage

Add Low, Non-Obstructive Centerpieces
Use short floral arrangements, fruit displays, or greenery in the center. Avoid tall vases that block food access. Eucalyptus, ferns, or potted herbs like rosemary or basil add freshness without overwhelming. Faux flowers work fine if real ones have strong scents.
Use Ambient Lighting
Place votive candles, fairy lights, or lanterns around the table for warmth. Ensure flames are away from flammable decor and not near food. Soft lighting enhances colors and makes food look more appetizing.
Label Dishes Clearly
Use chalkboard signs, wooden tags, or handwritten cards on neutral cardstock. Include dish names and allergens such as Vegan Lentil Salad with No Dairy. Use color-coded labels. Red for spicy items and green for vegetarian options helps guests choose quickly.
Create Themed Accents
Match décor to your event. Use seashells for beach parties, pinecones for winter gatherings, or books for literary themes. Use tiered stands for cupcakes or macarons on dessert tables. Add a backdrop of streamers or garlands behind the dessert station for photo-worthy moments.
Set Up Specialized Stations
:max_bytes(150000):strip_icc()/bhg-mojito-drink-station_ApwgiDK_aSG8-_YpPpN0Cz-01ae90a5f6644738a62375dbf7b4104d.jpg)
Create a Separate Drink Station
Place beverages on a second table to avoid congestion. Group wine, water, and cocktail glasses together. Include ice buckets, garnishes like lemons and mint, and stirrers. For self-serve bars, label drink names and ingredients clearly.
Design a Dessert-Only Table
Keep sweets on a dedicated table away from the main food line. Use cake stands, cupcake towers, and glass domes for display. Add small plates and dessert forks at the end. For weddings, place the cake at the back with a decorative knife set.
Offer Interactive Food Bars
Set up build-your-own stations like taco bars, salad bars, or waffle bars. Provide clear instructions and labeled ingredients. Use small bowls and tongs for easy access. These stations engage guests and reduce your prep time significantly.
Test and Finalize Setup
Do a Dry Run Setup
Days before the event, lay out all dishes, decor, and serving tools. Test the flow by walking through the line as a guest would. Adjust spacing if items feel cramped. Ensure every dish is within comfortable reach without leaning over others.
Check Stability of Displays
Test tiered stands and risers by gently nudging them to ensure they will not tip. Secure wobbly bases with non-slip pads or double-sided tape. Avoid stacking too high on unstable surfaces.
Verify All Supplies Are Ready
Before guests arrive, confirm plates, utensils, and napkins are in place. Verify every dish has a serving spoon and rest. Check that labels are accurate and visible. Ensure hot and cold foods are at safe temperatures. Confirm backup plates and food are nearby.
Manage Service and Cleanup
Guide Guests Without Announcing
Let plate placement naturally direct the line. For seated dinners, invite one table at a time to prevent overcrowding. If a bottleneck forms, open a second access point or redirect traffic.
Monitor and Replenish Quietly
Keep an eye on food levels. Refill before dishes empty rather than waiting until they are bare. Wipe spills immediately with a damp cloth. Avoid hovering because guests should feel relaxed, not watched.
Clean Up After Dining Ends
Wait until all guests are finished before clearing. Use a tray or basket to carry items quietly. Snuff candles and remove empty containers. Store leftovers in airtight containers within 2 hours to maintain safety.
Frequently Asked Questions About Setting a Buffet Table
How much table space do I need per guest for a buffet?
Plan for approximately 2 feet of linear table space for every 8 to 10 guests. This allows enough room for dishes, serving utensils, and decor without creating a crowded appearance.
What is the best order to arrange food on a buffet table?
Start with stacked plates at the beginning of the line. Follow with cold foods, then hot main dishes, sides, bread and spreads, and finally utensils and napkins at the end. This left-to-right sequence matches how guests eat.
How do I keep food at the right temperature on a buffet?
Use chafing dishes or warming trays for hot foods and ice beds for cold items. Keep hot and cold sections separated to prevent thermal interference. Replace dishes before they empty to maintain temperatures.
Should drinks be on the same table as food?
No, separate drink stations from food tables significantly improves traffic flow. Place beverages on a second table to prevent bottlenecks and congestion during peak serving times.
How do I prevent long lines at my buffet?
Use a freestanding table with access from both sides. Separate food, drinks, and dessert into different stations. Invite seated guests to come table by table rather than all at once.
Key Takeaways for Setting a Perfect Buffet Table
Knowing how to set a buffet table is not about piling on food. It is about designing an experience that balances function and beauty. Start with proper space planning and guest flow, then layer in thoughtful food organization following the left-to-right serving sequence. Maintain food safety through temperature control and never let dishes empty before refilling.
With smart spacing, logical flow, and thoughtful details, your buffet becomes the centerpiece of your event. Whether it is a Sunday brunch or a milestone celebration, these proven strategies ensure your guests enjoy every bite without the wait.