Make Your Computer Table More Ergonomic
Spending hours at a poorly arranged computer table can lead to nagging neck pain, wrist strain, and chronic back discomfort, but it does not have to be this way. The truth is, most of these issues stem not from overuse, but from preventable setup flaws that force your body into unnatural positions. Making your computer table more ergonomic is not about buying expensive gear. It is about aligning your workspace with your body’s natural posture so you can work comfortably for hours. When done right, an ergonomic setup reduces physical strain, prevents long-term injuries like carpal tunnel syndrome and cervical strain, and boosts both comfort and productivity.
In this guide, you will learn how to adjust your chair for proper posture, position your monitor to protect your neck and eyes, optimize your keyboard and mouse setup, organize your workspace into efficient zones, and build movement habits that safeguard your health. Each section provides practical, actionable steps you can implement immediately, regardless of your budget or current setup.
Chair Height and Posture Alignment

Your chair is the foundation of an ergonomic workspace. If it is not adjusted correctly, even the best desk will not prevent strain. Most people sit in chairs that are either too high or too low, causing their feet to dangle or their knees to rise above their hips. This creates pelvic tilt and places excessive pressure on the lower back. Taking time to dial in your chair first saves you from compounding problems down the line.
Set 90-Degree Joint Angles
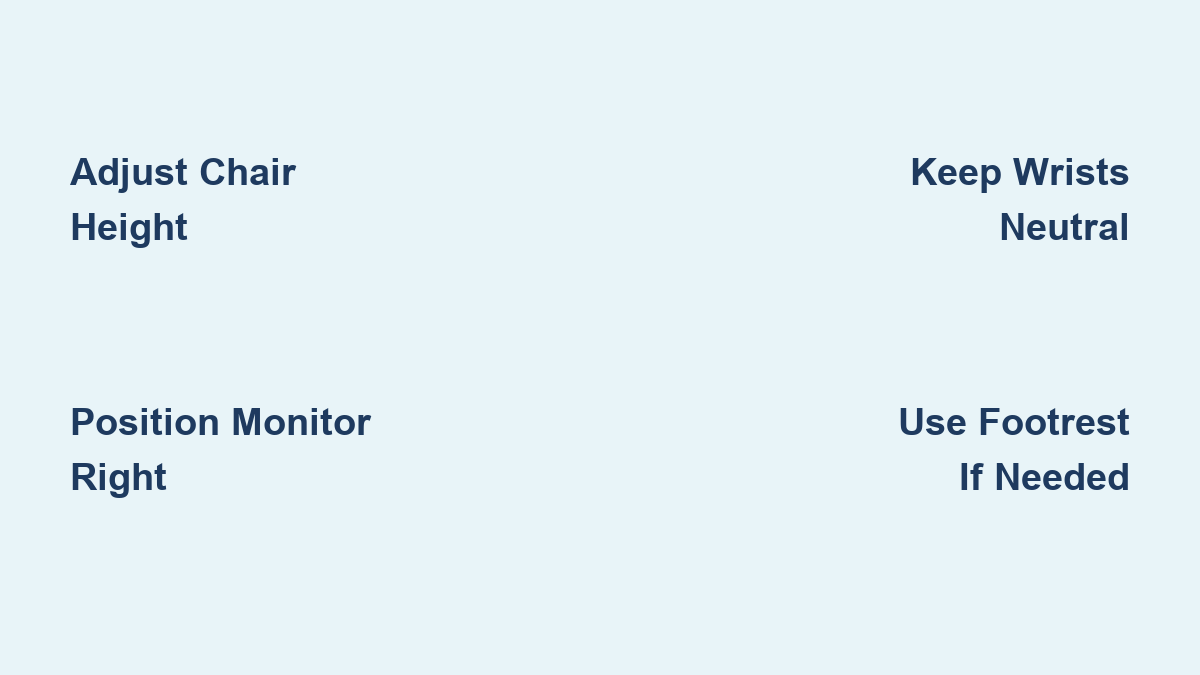
Align your body using the 90-90-90 rule. Your hips, knees, and elbows should each form roughly 90-degree angles. This neutral posture minimizes stress on your spine and joints. Adjust the seat height so your feet rest flat on the floor with thighs parallel to the ground. If your feet dangle, use a footrest. Even a stack of sturdy books works in a pinch as a temporary solution.
Optimize Seat Depth and Back Support
Ensure there are 1 to 2 inches of space between the edge of the seat and the back of your knees. Too much pressure here restricts blood flow and causes discomfort. Engage your chair’s lumbar support so it fits snugly into the small of your back at belt level. This maintains your spine’s natural curve and prevents slouching. If your chair lacks built-in support, roll up a towel and secure it behind your lower back for an improvised solution.
Position Armrests Correctly
Armrests should support your elbows without forcing your shoulders up. When typing, your upper arms should hang close to your body with forearms parallel to the floor. Avoid resting your arms on the armrests while actively typing. Use them only during breaks when you are not working. Choose chairs with armrests that move with the backrest during recline to keep support consistent throughout your workday.
Monitor Placement for Neck and Eye Health

Poor monitor placement is a leading cause of neck strain and eye fatigue among desk workers. A screen that is too low forces you to crane your neck forward, while one that is too high tilts your chin upward. Both positions strain the cervical muscles and lead to chronic discomfort. Fixing your monitor placement takes seconds but delivers long-term relief for your neck, shoulders, and eyes.
Align Top of Screen at Eye Level
Sit upright and look straight ahead. The top of your monitor should align with your eye level. This creates a natural 20 to 30 degree downward gaze to the center of the screen, reducing neck extension. If you wear bifocals or progressive lenses, lower the monitor an extra 1 to 2 inches so you can read comfortably without tilting your head back.
Position at Arm’s Length Distance
Place your monitor about 20 to 40 inches away, roughly an arm’s length from your eyes. If you are squinting, move the screen closer. If the text feels overwhelming, push it back slightly. Keep the display directly in front of you to avoid twisting your neck to one side throughout the day.
Tilt Screen Slightly Forward
Angle the monitor 10 to 20 degrees forward to reduce glare from overhead lights and improve visibility. Avoid tilting it backward, which increases glare and forces you to crane your neck to see the screen clearly.
Optimize Keyboard and Mouse Setup
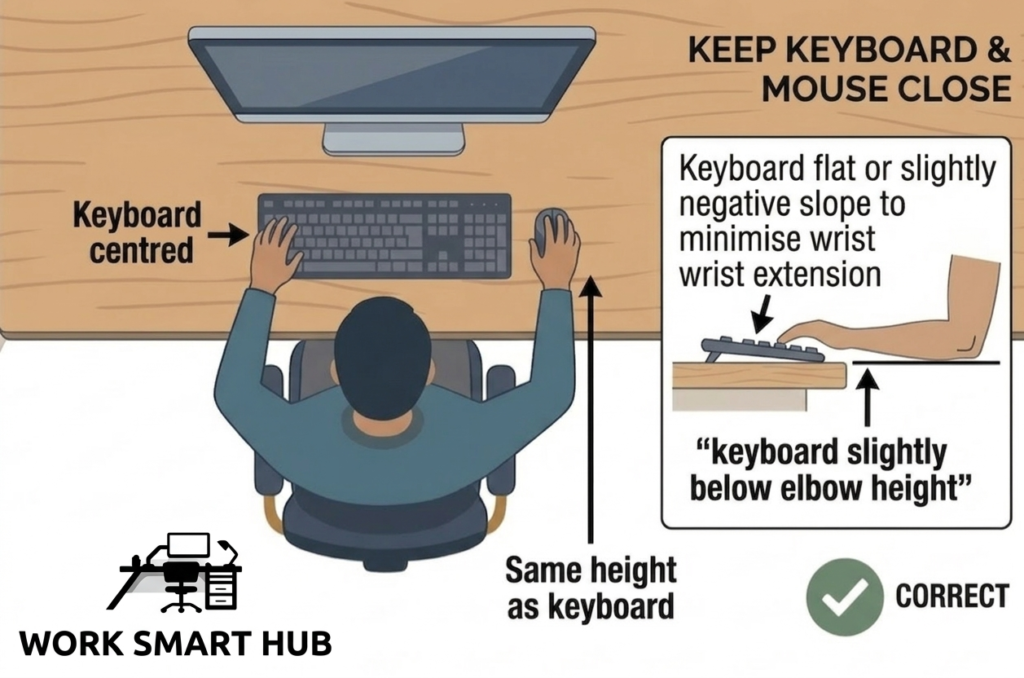
Your input devices directly affect wrist, hand, and shoulder health. Small adjustments here prevent repetitive strain injuries that sideline many computer users. The goal is to keep your wrists in a neutral position, free from bending up, down, or sideways. This reduces compression on the carpal tunnel and surrounding tendons.
Keep Wrists Neutral While Typing
Center the keyboard in front of your body, aligned with the monitor. Your wrists should float straight, not bent in any direction. Avoid resting your wrists on hard desk edges while typing. Use a palm rest only during pauses, supporting the heel of your hand rather than the wrist itself. This prevents contact stress that can lead to nerve compression.
Choose Ergonomic Keyboards
Consider switching to a split keyboard to position keys at shoulder width, opening your chest and reducing shoulder strain. A tented keyboard angles upward in the center, minimizing forearm pronation. A low-profile keyboard reduces wrist extension by sitting closer to the desk surface. For maximum flexibility, install an articulating keyboard tray that allows negative tilt, angling the keyboard away from you to keep wrists straight.
Place Mouse Close and Level
Keep the mouse on the same surface and at the same height as the keyboard. Reaching just 6 inches repeatedly strains your shoulders throughout the day. Move the cursor using your forearm rather than your shoulder, keeping your upper arm relaxed at your side. This simple change makes a significant difference in upper body comfort.
Use Vertical or Centered Mice
A vertical mouse positions your hand in a handshake grip, reducing forearm rotation by up to 90 degrees. This is ideal if you experience wrist pain. A RollerMouse sits in front of the keyboard, eliminating side reaches entirely and reducing neck and shoulder strain. Choose one with adjustable angles and light click force to match your hand size and sensitivity preferences.
Organize Your Workspace Zones
Clutter forces awkward reaches and static postures that undermine even the best chair and monitor adjustments. A smart desk layout keeps everything within safe reach without twisting or leaning. Organizing your workspace into functional zones prevents overreaching and keeps your torso properly aligned throughout the workday.
Define Primary, Secondary, and Reference Zones
Divide your desk into three zones based on how frequently you use items. The primary zone spans 8 to 12 inches from your resting hand position and holds your keyboard, mouse, and tools used hourly. Keep your elbows close to your body when working in this zone. The secondary zone extends to arm’s length and holds your phone, notebook, and water bottle. Reach for these items without leaning. The reference zone sits at the desk edge and holds files, books, and infrequent items. Stand up to retrieve things in this zone rather than stretching while seated.
Clear Under-Desk Clutter
Remove boxes, cables, and storage bins from under the desk. Obstructions limit legroom, increase knee bumping, and raise lower back discomfort by up to 34 percent. Use cable clips or sleeves to bundle cords and keep them out of the way. A clear under-desk area also makes it easier to practice sit-stand transitions if you upgrade to an adjustable desk.
Pad Hard Desk Edges
Sharp desk edges compress nerves in your forearms, potentially causing cubital tunnel syndrome. Use foam padding or a soft wrist rest with a rounded edge to protect the ulnar nerve where it passes close to the surface.
Control Lighting and Glare
Poor lighting causes eye strain, headaches, and poor posture as you lean in to see more clearly. Managing glare and balancing light sources protects your vision and helps you maintain proper positioning without squinting or tilting your head.
Position Monitor Perpendicular to Windows
Avoid placing your screen directly in front of or behind a window. Sit with windows to your side to minimize glare. Turn off the monitor temporarily and check for reflections. If you see lights or windows reflected on the screen, reposition it until the glare disappears.
Balance Ambient and Task Lighting
Aim for ambient light that is about one-third the brightness of your screen, known as a 3 to 1 ratio. Use indirect ceiling lights or a shaded floor lamp to create even illumination. Add an adjustable desk lamp for documents, but point it away from the screen to avoid reflections on the display.
Use Anti-Glare Screens
If repositioning is not possible due to your room layout, apply an anti-glare or privacy screen filter. These reduce reflections and improve contrast, easing eye fatigue during long work sessions.
Prevent Phone-Related Neck Strain
Cradling a phone between your ear and shoulder is a fast track to neck pain. This position forces your neck to bend sideways for extended periods, straining cervical muscles and creating imbalances that persist even after you hang up.
Use Headsets or Speakerphone
Always use a wired or wireless headset or speakerphone, especially when typing or taking notes. This keeps your head centered and shoulders relaxed. The small investment in a quality headset pays off in reduced neck tension and improved productivity.
Place Phone on Non-Dominant Side
If you must use a handset, position it on your non-dominant side. This prevents your dominant hand from constantly reaching across your body, which twists your spine over time and creates chronic muscular imbalances.
Build Movement Into Your Workday
Even a perfect setup fails if you stay still for hours. Movement is non-negotiable for long-term health. Static posture, even in an ergonomic position, restricts blood flow and causes muscles to fatigue. Building regular movement into your routine counteracts these effects and keeps your body functioning optimally.
Take Micro-Breaks Every 20 to 30 Minutes
Pause for 20 to 30 seconds every half hour. Stand up, shake out your hands, or look at something 20 feet away. These micro-breaks reset your muscles and eyes, preventing fatigue from building up throughout the day.
Use the Pomodoro Technique
Work in 25-minute blocks followed by 2 to 5 minute movement breaks. Walk, stretch, or grab water during these breaks. This rhythm boosts focus and reduces physical strain more effectively than relying solely on the basic 20-20-20 rule.
Stand Up Every Hour
Get up and move at least once per hour. Set a recurring reminder on your phone or computer if needed. Standing breaks improve circulation, relieve spinal pressure, and give your postural muscles a chance to reset.
Use Sit-Stand Desks Effectively
Alternating between sitting and standing balances muscle use and boosts energy throughout the day. Sit-stand desks have become increasingly popular, but simply owning one is not enough. You must use them correctly to reap the benefits.
Switch Positions Every 30 to 60 Minutes
Start with 15 to 30 minutes of standing per hour. Gradually increase as your body adapts. Never stand still for long periods. Shift your weight, stretch, or use a foot rail to keep blood flowing. The goal is movement, not static standing.
Maintain Proper Monitor Height When Standing
Your monitor should stay at the same eye-level height whether sitting or standing. Use a standing desk converter or adjustable monitor arm to maintain proper alignment. Tilting your head up or down to see the screen negates the benefits of standing.
Use an Anti-Fatigue Mat
Standing on hard floors increases foot and leg fatigue quickly. An anti-fatigue mat encourages subtle muscle movement, improves circulation, and reduces discomfort during standing work sessions.
Perform Daily Stretches and Exercises
Stretching reverses the postural damage of prolonged sitting. Performing a few simple movements daily counteracts the forward head posture, rounded shoulders, and wrist tension that accumulate during desk work.
Do Chin Tucks and Neck Stretches
Perform 10 chin tucks daily. Gently pull your head straight back while keeping your eyes level. This counters forward head posture caused by looking at screens. Add side neck stretches by tilting your ear toward your shoulder and holding for 20 seconds on each side.
Retract Your Shoulder Blades
Squeeze your shoulder blades together for 5 seconds, repeating 10 times. This opens your chest and combats the rounded shoulder posture that develops from keyboard use. Perform this stretch several times throughout the day, especially during breaks.
Stretch Wrists and Forearms
Hold each wrist stretch for 30 seconds. Extend your arm with your palm up and gently pull your fingers down to stretch the flexors. Then flip your palm down and pull your fingers back to stretch the extensors. These movements prevent the wrist stiffness that leads to repetitive strain injuries.
Improve Blinking Habits
Computer users blink 66 percent less than normal, causing dry eyes and discomfort. Practice deliberate blinking every few minutes. Use preservative-free artificial tears if needed to keep your eyes lubricated during long sessions.
Upgrade with Key Ergonomic Accessories

Smart accessories make lasting improvements without major cost. Investing in a few well-chosen tools transforms an ordinary desk into a comfortable workstation. These additions address common pain points and elevate your setup to professional ergonomic standards.
Install Monitor Arms
A monitor arm frees up desk space, allows precise height and tilt adjustments, and enables easy switching between sitting and standing positions. Mount it to your desk or wall for stability. The ability to fine-tune your monitor position makes a remarkable difference in neck comfort.
Use a Footrest If Needed
If your chair is high enough for proper elbow alignment but your feet do not touch the floor, a footrest is essential. Look for adjustable models with non-slip surfaces. Your feet should rest comfortably flat to prevent dangling and the associated lower back strain.
Add Lumbar and Wrist Support
A lumbar cushion enhances back support in chairs that lack adjustability. Pair it with a padded wrist rest that aligns with your keyboard height to prevent contact stress on your forearms. These small additions address gaps in your existing equipment.
Organize Cables
Use clips, sleeves, or under-desk trays to bundle and route cables. Tidy cords reduce tripping hazards and prevent knee bumps when you are seated. A clean under-desk area also makes it easier to clean and maintain your workspace.
Avoid Common Setup Mistakes
Even small errors undermine your ergonomic efforts. Recognizing these pitfalls helps you fix them quickly before they cause lasting damage. Many people make these mistakes without realizing it, so use this section as a checklist to verify your setup.
Fix Dangling Feet
Hanging feet cause pelvic tilt and lower back pain. Always support your feet with a footrest or adjustable platform. Never let your legs dangle, even temporarily while on a call. This small issue compounds into significant discomfort over time.
Stop Reaching for the Mouse
A mouse placed too far forces shoulder strain. Move it directly next to the keyboard. If you are stretching to reach it, your setup is wrong. The mouse should be close enough that your elbow stays tucked against your body.
Lower High Monitors
A screen that is too high forces you to tilt your chin up, straining neck muscles. Lower it with a stand, tray, or by adjusting a monitor arm. If lowering is not possible, raise your chair and add a footrest to compensate.
Break Laptop-Only Habits
Using a laptop on a desk forces forward head posture and wrist strain. Place it on a laptop stand to raise the screen to eye level, then connect an external keyboard and mouse. This simple change transforms your laptop into an ergonomic workstation.
Do Not Ignore Early Warning Signs
Tingling, numbness, or persistent soreness are red flags. Do not push through pain. Adjust your setup immediately and consult a physical therapist if symptoms persist. Early intervention prevents minor issues from becoming chronic conditions.
Follow a Step-by-Step Setup Routine
Building your ergonomic workspace in a logical order ensures nothing gets missed. Working systematically through each component creates a cohesive setup where all elements work together. Start with the foundation and build outward from there.
Start with Chair Adjustment
First, set your chair height for 90-degree hips and knees. Mark the cylinder with tape so you can return to the correct height easily. Then adjust seat depth and lumbar support. This foundation determines how everything else aligns.
Position Monitor Next
Place your monitor at arm’s length with the top at eye level. Use books, trays, or monitor arms to achieve the right height. Tilt the screen slightly forward to reduce glare and improve visibility.
Align Input Devices
Center the keyboard and place the mouse right beside it. Ensure wrists stay neutral and elbows stay close to your body. This positioning prevents the reaching and twisting that cause shoulder and neck strain.
Organize and Declutter
Clear everything off the desk. Rebuild using the three-zone system, placing frequently used items in the primary zone. Store infrequent items in drawers or shelves rather than letting them clutter your workspace.
Test Lighting and Glare
Turn off the monitor and check for reflections. Reposition lights or screens as needed. Add task lighting for documents without casting light on the screen. Proper lighting completes your ergonomic setup.
Maintain Your Ergonomic Setup
Ergonomics is not a one-time fix. It requires regular check-ins to ensure your setup continues serving you well. Over time, components shift, your habits change, and your body adapts. Regular maintenance keeps everything working optimally.
Check Alignment Weekly
Small shifts happen over time. Every week, verify your monitor height, chair position, and mouse placement. Use the Cornell University weekly check guideline to stay consistent and catch problems early.
Review Every Quarter
Reassess your setup every 90 days. Your tasks, tools, or body may have changed. Update your zones, adjust accessories, or try new stretches to address evolving needs.
Test Changes Gradually
When making adjustments, change one thing at a time. Try a new keyboard for a few days before switching your mouse. Monitor how your body responds before making additional changes.
Get Feedback with Photos
Ask a colleague to take side and back photos of you working. You will often spot slouching, neck tilt, or reaching that you cannot feel while focused. If your eyes do not naturally land on the upper third of the screen, adjust the monitor height.
Frequently Asked Questions About Making a Computer Table More Ergonomic
How do I know if my computer table is at the right height?
Your desk height is correct when your elbows rest at 90 degrees while typing and your forearms are parallel to the floor. If your shoulders rise or your wrists bend, the desk is either too high or too low. Adjust your chair height first, then use a footrest if needed to bring your body into proper alignment.
What is the 90-90-90 rule for ergonomic seating?
The 90-90-90 rule describes ideal sitting posture. Your hips, knees, and elbows should each form approximately 90-degree angles. This neutral position minimizes stress on your spine and joints, reducing the risk of back pain and repetitive strain injuries during long work sessions.
How far should my monitor be from my eyes?
Position your monitor about 20 to 40 inches away, roughly an arm’s length. This range reduces eye strain while keeping text readable. Adjust closer if you squint or farther if the screen feels overwhelming. The key is finding a distance where you can see clearly without leaning forward.
What are the most important ergonomic accessories to buy first?
Start with a monitor arm for height adjustment, a footrest if your feet do not touch the floor, and a lumbar support cushion if your chair lacks built-in lumbar support. These three accessories address the most common ergonomic problems and provide the biggest return on investment.
How often should I take breaks when working at my computer?
Take a micro-break every 20 to 30 seconds to stand, shake out your hands, and look away from the screen. Take a longer movement break every 25 to 30 minutes using the Pomodoro Technique. Get up and move at least once per hour to improve circulation and prevent stiffness.
Key Takeaways for Creating an Ergonomic Computer Table Setup
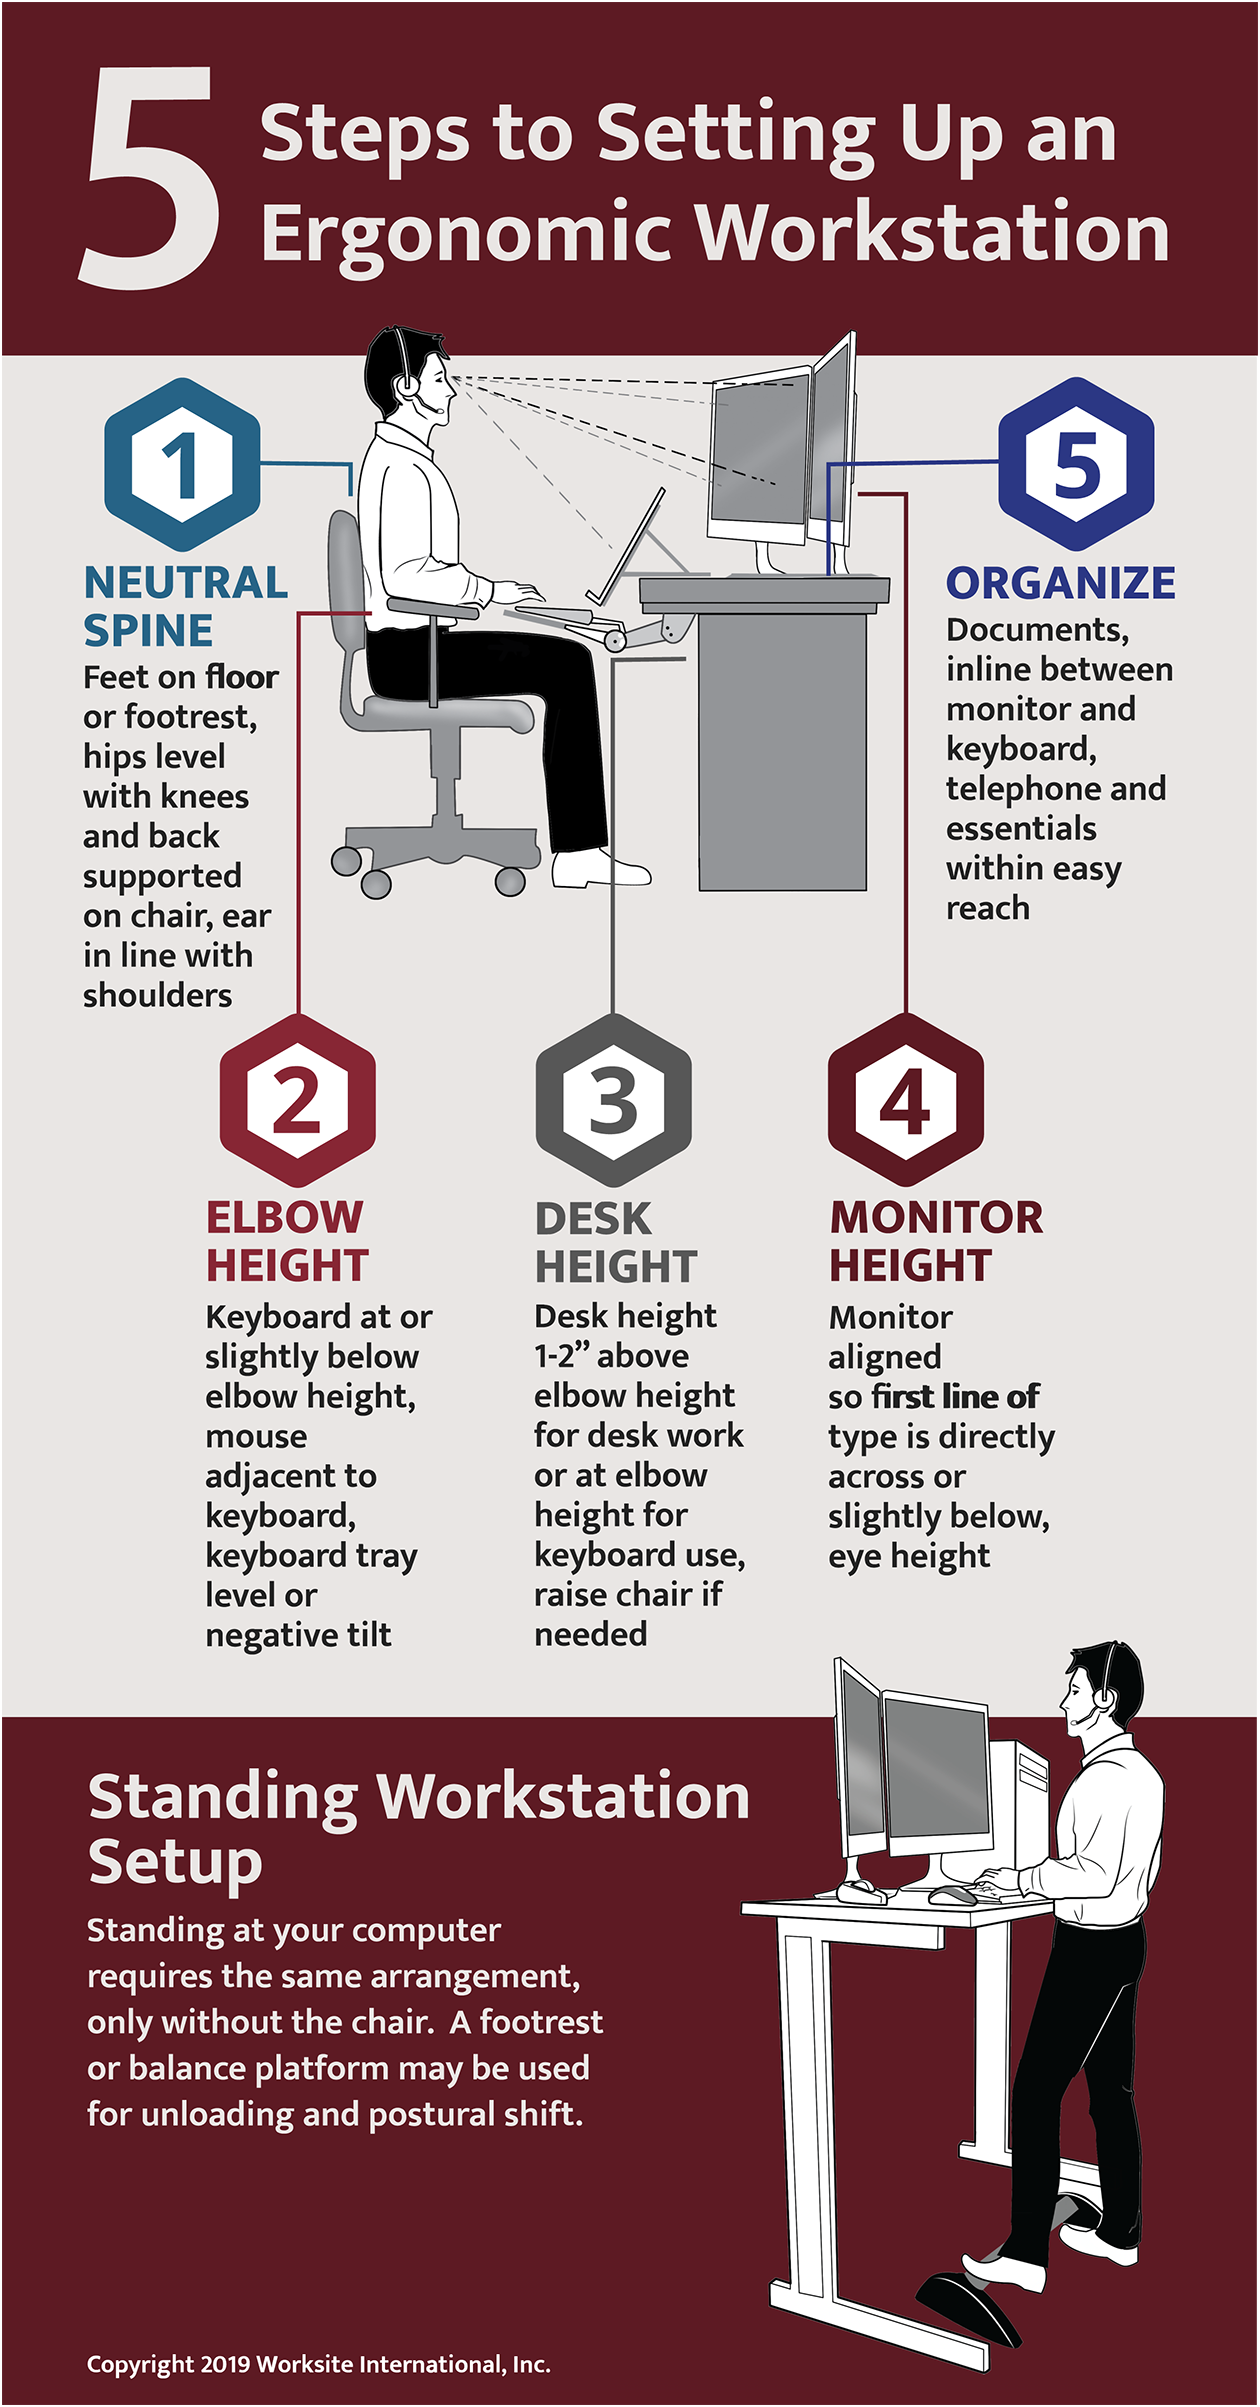
Making your computer table more ergonomic is one of the highest-return investments you can make in your health and productivity. By following these steps, adjusting your chair, aligning your monitor, optimizing input devices, organizing your space, and building movement habits, you can prevent the 23 lost workdays and $1,500 to $3,000 in annual medical costs linked to poor ergonomics. The foundation starts with proper chair adjustment using the 90-90-90 rule, followed by monitor placement at eye level and arm’s length distance. Keyboard and mouse positioning keeps wrists neutral while organizing your workspace into functional zones prevents unnecessary reaching and twisting. Lighting control and regular movement complete the equation for a comfortable, sustainable workstation. Start today with one change, like raising your monitor or adding a footrest, and build from there. Your body will thank you for years to come.