How to Remove Heat Stains From Wood Table
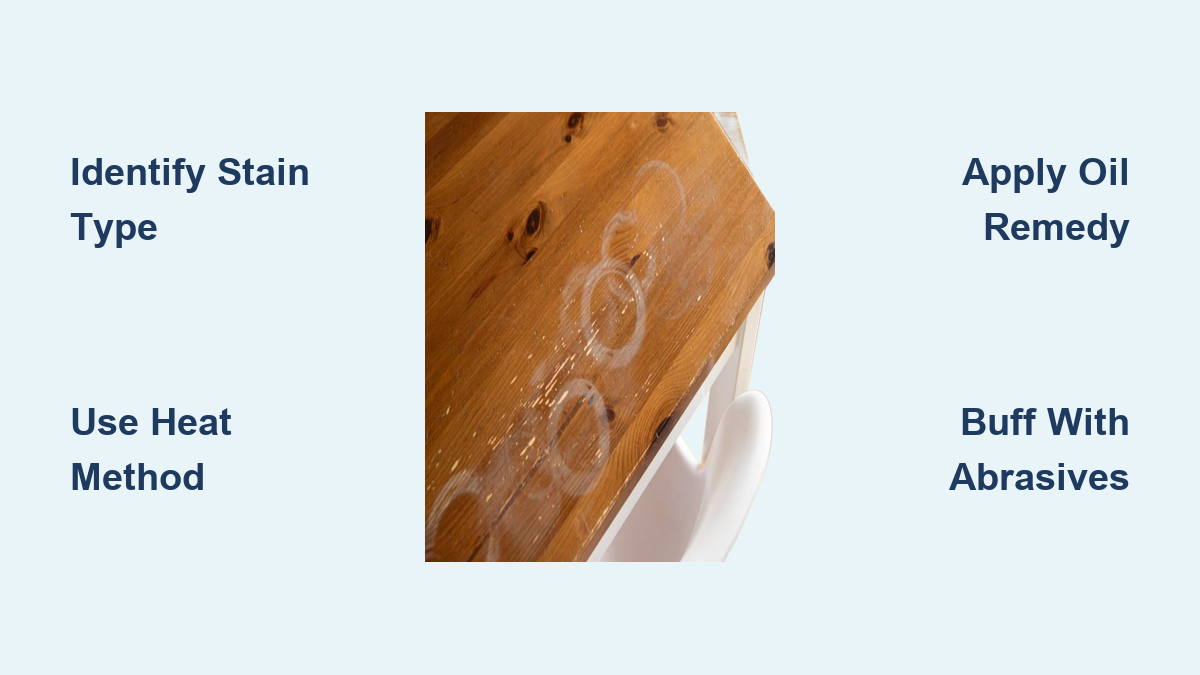
You set a hot pan down on your favorite wood table, and now there is a cloudy white ring staring back at you. It is frustrating, especially when the table is a centerpiece of your dining room or a cherished family heirloom. The good news? Most heat stains on wood tables are not permanent. In fact, white or cloudy heat stains, the most common type, are usually just trapped moisture under the finish, not damage to the wood itself. With the right method, you can often fix them in minutes or hours using household items or simple tools.
But not all heat stains are the same. Dark brown or black marks mean the wood has been scorched, which requires sanding and refinishing. That is why the first step is not grabbing a remedy. It is diagnosing the damage. This guide walks you through exactly how to identify the type of heat stain, choose the safest and most effective removal method, and protect your table afterward.
Identify the Stain Type Before Treating
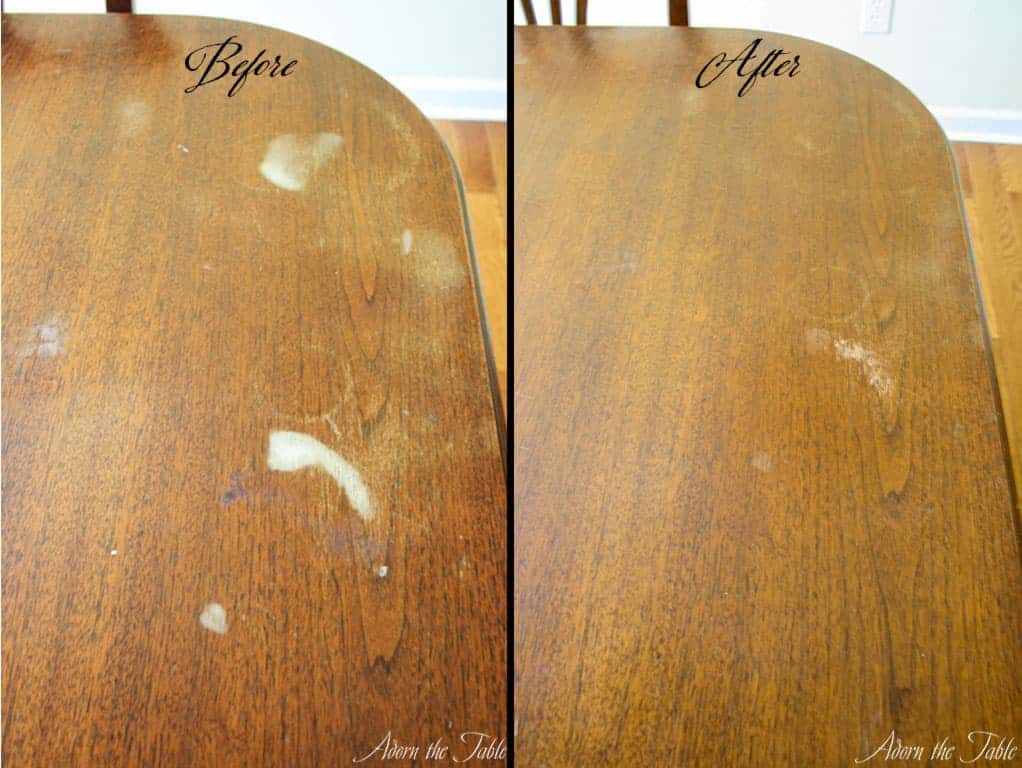
The color of the mark tells you everything about what you are dealing with and whether it is fixable with home remedies.
White or Cloudy Stains Are Fixable
A milky, hazy spot means heat softened the finish, whether varnish, lacquer, or shellac, and trapped moisture underneath. The wood beneath is fine. These stains respond well to heat, oil, or mild abrasives. The sooner you treat them, the better. Fresh stains within days often vanish with one attempt.
Dark Brown or Black Marks Need Professional Help
If the stain is dark, the heat burned the wood fibers. No oil, iron, or polish will fix this. You will need to sand down to bare wood, re-stain, and refinish. Stop all DIY methods here because further attempts can spread damage. For valuable or antique tables, call a professional.
Determine Your Table’s Finish Type
Different finishes react differently to heat and chemicals. Using the wrong method can melt, dull, or ruin the surface.
Shellac: Most Vulnerable Finish
Common on antiques, shellac softens easily under heat. Test with denatured alcohol. If the finish gets sticky or dissolves, it is shellac. Avoid high heat and harsh abrasives on this finish type.
Lacquer: Moderately Sensitive
Found on many modern furniture pieces, lacquer is smooth and durable but prone to white rings. Test with lacquer thinner. If it dissolves instantly, it is lacquer. Use gentle heat or chemical solvents like No-Blush spray on this finish.
Polyurethane: Most Resistant
This tough, thick coating is used in high-traffic areas. It rarely gets heat stains. Neither alcohol nor lacquer thinner affects it. Safe for mild abrasives like toothpaste paste.
Oil or Wax Finish: Heat-Sensitive
These finishes feel like natural wood. Oils soften under heat. Test with mineral spirits. If it dissolves or leaves a waxy feel, it is wax. Use oil-based fixes like mayonnaise or petroleum jelly, and avoid heat methods.
If unsure about your finish, test any method on a hidden spot first. When in doubt, assume the finish is delicate.
Apply Heat to Draw Out Moisture
Controlled heat can re-soften the finish and release trapped moisture. These methods work best on fresh white stains.
Iron and Towel Fix
This is the fastest fix for stubborn white rings on durable finishes.
- Set iron to low or medium heat. Turn steam OFF.
- Place a dry cotton towel or brown paper bag over the stain.
- Press the iron gently for 5 to 10 seconds, moving in small circles.
- Lift and check. Repeat if needed.
- Wipe the area dry immediately after.
Avoid synthetic towels because they can melt. Never leave the iron in one spot.
Hair Dryer Method for Delicate Finishes
Gentler than an iron, this method is ideal for antiques or thin veneers.
- Set hair dryer to low heat.
- Hold 6 to 12 inches from the stain.
- Move slowly back and forth for up to 10 minutes.
- Check every 30 seconds.
For faster results, wipe with a cloth dampened in denatured alcohol while heating. This combination can restore 95 percent clarity on cherry wood.
Use Oil-Based Home Remedies

Oils penetrate the finish and push out trapped water. These are safe for antiques and heat-sensitive finishes.
Mayonnaise Trick for Old Stains
Yes, mayonnaise. The oils displace moisture without damaging the finish.
- Apply a thick layer of regular, not low-fat, mayo directly on the stain.
- Cover with plastic wrap to prevent drying.
- Wait 2 to 3 hours, or overnight for old stains.
- Wipe clean with a soft cloth.
- Repeat if needed.
Warning: Can leave a greasy residue. Clean thoroughly with a damp cloth and dry.
Petroleum Jelly Fix
Same principle as mayonnaise, but cleaner and less messy.
- Rub a small amount of Vaseline on the stain.
- Cover with plastic wrap.
- Let sit for 1 to 3 hours, or overnight.
- Wipe off and buff with a dry cloth.
Try Chemical Solvents for Stubborn Stains
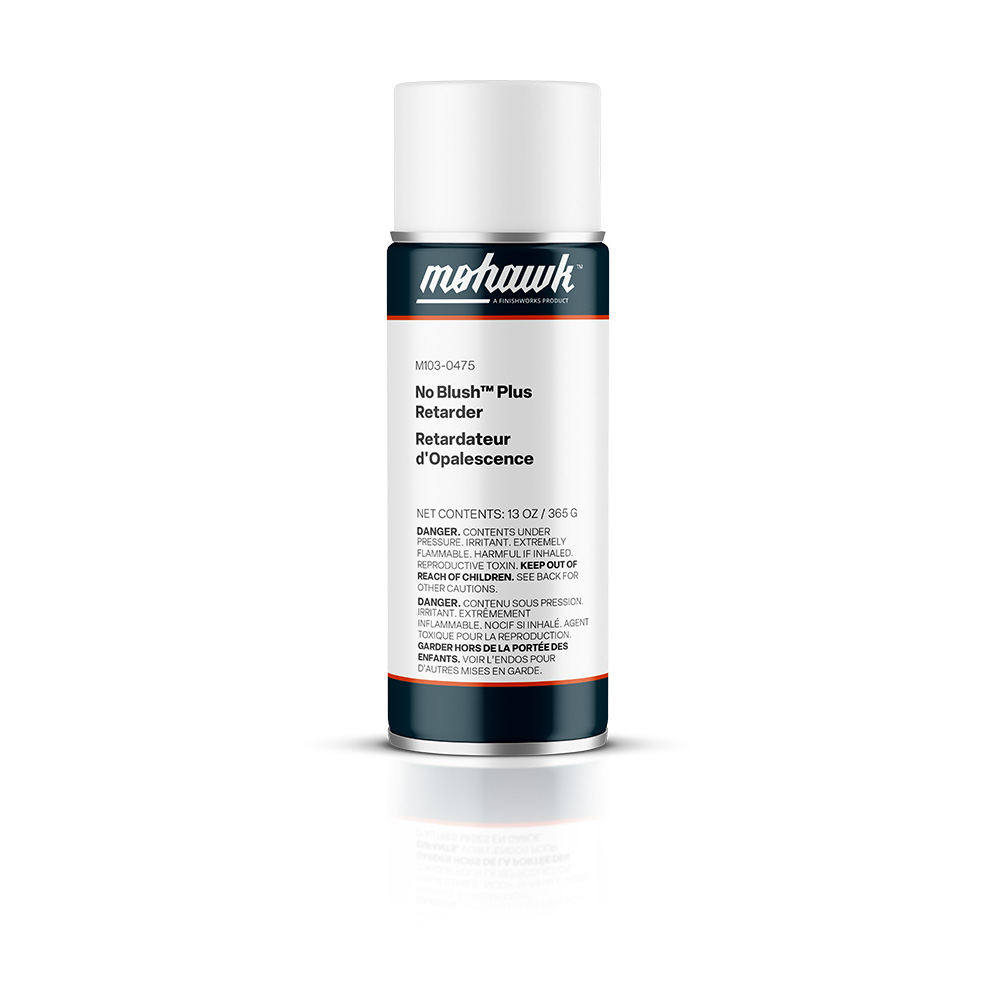
When heat and oil fail, professional-grade solvents can dissolve the finish layer just enough to release moisture.
Mohawk No-Blush Plus Spray
Industry standard for fixing blushing in lacquer and shellac finishes.
- Shake can well.
- Spray a light coat over the cloudy area.
- Let it cure for 24 hours.
- Repeat if needed.
Do NOT use this on polyurethane, water-based, or conversion varnish. It will damage them.
DIY Solvent Mixes
For oil-based finishes or minor stains, try these options.
- Ammonia and water: Dampen a cheesecloth with a few drops of ammonia, wipe gently, then dry.
- Linseed oil and turpentine: Mix 50/50, rub on with a cloth, wait 10 minutes, wipe off.
- Camphorated oil: Apply with a lintless cloth, rub lightly, wipe immediately.
Buff Out Stains with Mild Abrasives
:strip_icc()/103006825_preview-dca925fac4a845a8b814085c89c60116.jpg)
If moisture is gone but cloudiness remains, the finish may be slightly damaged. Light abrasion can polish it out.
Toothpaste and Baking Soda Paste
A safe, effective combo for surface-level haze.
- Mix 1 part white toothpaste, non-gel, with 2 parts baking soda.
- Apply to stain with a soft cloth.
- Rub with the grain for 1 to 2 minutes.
- Wipe with damp cloth, then dry.
Avoid on high-gloss or antique finishes. Test first because it can dull shiny surfaces.
Steel Wool and Mineral Spirits
For tougher spots on durable finishes.
- Use #0000 steel wool, super fine only.
- Dampen with mineral spirits.
- Rub gently with the grain.
- Wipe clean and check progress.
- Finish by buffing with furniture polish.
Never use coarse steel wool because it will scratch.
Wet Sand for Deep Cloudiness
For stains that will not budge, micro-sanding removes the damaged finish layer without full refinishing.
- Soak 600-grit wet/dry sandpaper in water for 10 minutes.
- Mist the stain area lightly.
- Sand with the grain using light pressure and a foam pad.
- Wipe clean, then repeat with 1000-grit, then 2000-grit.
- Finish by polishing with wax or oil.
This is a middle ground fix. It is effective but not for beginners or veneer.
Restore and Protect the Surface
Once the stain is gone, the area may look flat or uneven. Blending and conditioning restores the finish.
Blend with Restor-A-Finish
Howard is Restor-A-Finish penetrates to even out color and sheen.
- Choose the shade that matches your table.
- Apply with a cloth, following the grain.
- Let dry, then buff.
Perfect for hiding minor discoloration after repair.
Condition with Feed-N-Wax
Rebuilds protection and shine.
- Apply Howard is Feed-N-Wax sparingly.
- Rub in with a soft cloth.
- Buff to a soft luster.
Use every 3 to 6 months to prevent future damage.
Prevent Future Heat Stains
Fixing a stain is one thing. Keeping it from happening again is better.
Use Trivets and Coasters
- Silicone trivets resist heat up to 440 degrees Fahrenheit.
- Coasters protect against hot mugs and cold condensation.
- Placemats create a daily barrier.
Keep them visible and easy to use. Do not hide them in drawers.
Maintain a Protective Layer
Regular wax or polish adds a micro-barrier that slows moisture penetration.
- Wax or oil finishes: Reapply every 3 to 6 months.
- Polyurethane or lacquer: Use silicone-free polish.
Even durable finishes benefit from this extra shield.
Know When to Call a Professional
Some situations demand professional help.
Black or Charred Marks
Burned wood cannot be fixed with home remedies. Sanding and refinishing are required.
Veneer Damage
Thin wood veneer can bubble under heat. DIY methods risk peeling. Professionals can re-adhere or patch.
Failed Repairs
If multiple methods fail, the finish may be compromised. A refinisher can assess and restore uniformly.
Antique or High-Value Tables
When the cost of a mistake outweighs the repair bill, go professional.
Key Takeaways for Removing Heat Stains
Most heat stains on wood tables are white and fixable with simple methods like heat, oil, or mild abrasives. The key is acting early, identifying the stain type, and matching the method to your table is finish. Avoid steam, coarse tools, and harsh chemicals unless you are certain they are safe. After repair, condition and protect the surface to prevent future damage. And remember: if the mark is dark, stop DIY efforts. Sanding and refinishing are the only real fix. With the right approach, your wood table can look like new again.
Frequently Asked Questions About Heat Stains on Wood Tables
Can I use steam directly from the iron to remove heat stains?
Generally, no. Most experts recommend turning the steam function OFF. Direct steam can force more moisture into the finish, making the stain worse. The heat alone is usually sufficient to evaporate trapped moisture.
How long should I wait to treat a new heat stain?
Counter-intuitively, it is best to wait until the surface has completely cooled, and ideally 24 hours. This allows the finish to stabilize. However, treating within the first few days yields better results than waiting months.
Does the mayonnaise trick actually work on heat stains?
Yes. The oils in mayonnaise, soybean and egg, penetrate the finish pores and displace trapped moisture. It is particularly safe for antiques because it involves no heat or abrasion, though it requires long dwell times of 2 or more hours.
What is the difference between a white ring and a black mark on a wood table?
White rings are trapped moisture in the finish and are fixable with home remedies. Black marks are charred wood fibers and require sanding and refinishing. The color is the easiest way to determine which repair approach you need.
Will these heat stain removal methods work on wood veneer?
Use extreme caution. Veneer is a thin slice of wood glued to a substrate. Heat can melt the glue, causing bubbles, and abrasives can sand through the thin layer. Professional help is often recommended for veneer heat damage.
Do I need to refinish the whole table after removing a heat stain?
Rarely. Most white heat stains can be treated locally. Full refinishing is reserved for extensive damage, black scorch marks, or when local repair attempts fail and the aesthetic result is unacceptable.