How to Sew Table Mats: Quick Steps
You’ve set the perfect table with crisp linens and polished silverware, but something feels incomplete. A pop of color, a touch of texture, a personal flair. That’s where handmade table mats come in. Learning how to sew table mats is a beginner-friendly project that lets you customize size, fabric, and style while protecting your furniture and elevating every meal.
This guide walks you through everything from choosing the right fabric to adding professional finishing touches. You’ll master standard dimensions, material recommendations, and foolproof construction techniques for reversible, quilted, and decorative mats. Let’s turn simple fabric into table art.
Choosing the Right Size for Your Table
Selecting the correct dimensions ensures your placemats look balanced and function properly during meals.
Standard Rectangular Dimensions
The most popular size is 18 inches by 14 inches, offering ample surface coverage without overcrowding the table. Other standard options include:
– 14 inches by 19 inches for formal settings with napkin sets
– 16 inches by 20 inches for larger dinner plates and wider tables
– 12½ inches by 18½ inches for compact or casual dining
Custom sizes work well too. Simply measure your table setting and subtract 2 inches from each side to prevent overhang.
Cut Size vs. Finished Size
Always add ½ inch to your desired finished size for seam allowances. For example:
– To finish at 14 inches by 19 inches, cut fabric at 14½ inches by 19½ inches
– For 18 inches by 14 inches, cut at 18½ inches by 14½ inches
Interfacing Sizing Tips
To reduce bulk inside seams, cut stabilizers ¼ inch to 1 inch smaller than your fabric pieces. Use this breakdown:
– Fleece: cut 1 inch smaller all around
– Fusible interfacing: trim ¼ inch smaller on each side
This keeps layers hidden and prevents lumpy edges.
Selecting Materials for Durable Table Mats
The right materials make your placemats durable, washable, and heat resistant.
Top Fabric Choices
Natural fibers provide the best longevity and performance:
– Quilting cotton is the most popular choice, offering easy sewing and endless print options
– Linen or linen blends provide elegant texture and age beautifully
– Canvas or chambray add weight, perfect for rustic or farmhouse styles
– Home decor fabric is durable and stylish, often requiring no interfacing
Pro Tip: Pair a bold print on top with a coordinating solid or subtle tone-on-tone fabric on the back for a designer look.
Stabilizers for Structure and Heat Protection
What goes inside matters as much as the outside.
Fusible Fleece adds soft thickness and warmth, perfect for beginners and everyday use. It fuses easily to the wrong side of fabric.
Fusible Interfacing creates a stiff, flat surface that mimics store-bought placemats. Use two layers for extra rigidity.
Quilting Batting adds a plush, quilted feel. Use cotton or an 80/20 cotton-poly blend. This must be quilted in place to prevent shifting.
Insul-Bright is a special thermal lining with a reflective layer, best for mats that double as trivets under hot pots or serving dishes.
Essential Tools and Thread
Gather these items before starting:
– All-purpose cotton or polyester thread
– Contrasting thread for decorative topstitching
– Rotary cutter and self-healing mat for precise cutting
– Walking foot to prevent fabric drag when sewing thick layers
Preparing Fabric Before Sewing
Skipping this step causes placemats to shrink, warp, or fray after washing.
Pre-Washing Your Fabric
Follow these steps before cutting:
1. Wash fabric in cold water on a gentle cycle
2. Tumble dry on low heat
3. Press flat with an iron
Pre-washing prevents post-sewing shrinkage and ensures long-term shape retention.
Preventing Fraying During Wash
Run a zigzag stitch along raw edges before washing. This keeps cuts clean and intact throughout the project.
Accurate Cutting Techniques
- Align selvedge edges and trim the right edge straight
- Place fabric on a grid mat, aligning the cut edge with a vertical line
- Measure and cut strips across the width
- Trim off selvedges
- Cut into individual lengths
Efficiency Hack: Stack up to 8 layers and cut at once for batch production.
Sewing Reversible Table Mats Step by Step

This popular method creates simple, durable mats perfect for beginners.
Fusing the Interfacing
- Apply fusible fleece or interfacing to the wrong side of one fabric piece
- Place a damp pressing cloth over the interfacing
- Press for 5 to 7 seconds per section, lifting the iron without sliding
- Test adhesion by peeling back the paper. If it resists, the bond is complete
Tip: Fuse to the looser-weave fabric for better grip.
Assembling the Layers
- Place fabrics right sides together
- The interfacing side should face out but not touch the other fabric
- Pin all around to prevent shifting
- Mark a 3 to 4 inch opening on one short edge with pins or an “X”
Sewing the Perimeter
- Use a ¼ inch to 3/8 inch seam allowance
- Backstitch at the start, end, and opening points
- Pivot at corners by lowering the needle, lifting the foot, turning 90 degrees, and continuing
Trimming and Clipping Corners
Clip diagonally at each corner, stopping ⅛ inch from stitches. This reduces bulk and helps corners lie flat when turned.
Avoid: Cutting too close, which weakens seams.
Turning and Shaping
- Turn right side out through the opening
- Use a chopstick or turning tool to push out corners
- Gently roll seams with fingers to flatten
Pro Tip: For sharper points, poke the tool into the very tip before pressing.
Pressing and Closing the Opening
- Press the entire mat flat
- Fold raw edges of the opening inward to meet the stitched edge
- Press again to crease
- Spritz the back with water, then press. This reactivates fusible adhesive for a crisp finish.
Topstitching the Edges
- Stitch around the entire perimeter ⅛ inch from the edge
- This closes the gap and secures all layers
- Use a 2.8 to 4mm stitch length for durability
Design Option: Add a second row of topstitching ½ inch to 1 inch in from the edge for a professional double-stitched look.
Adding Texture with Quilted Table Mats

Quilting adds insulation and visual interest, great for rustic or seasonal styles.
Method 1: Quilt Then Assemble
Best for precise, decorative quilting patterns.
- Layer back fabric right side up, then batting, then top fabric right side up
- Baste layers together with pins or spray adhesive
- Quilt with your desired pattern, such as diagonal lines, grid, or concentric rectangles
- Trim to final size
- Follow standard reversible construction steps
Method 2: Assemble Then Quilt
Faster method where quilting happens after turning.
- Layer top fabric right side up, batting, then back fabric right side down
- Sew around edges with 3/8 inch seam, leaving a 3 to 4 inch opening
- Turn right side out, push out corners, and press
- Quilt through all layers
Quilting Tip: Use a walking foot to prevent fabric drag. Secure start and end stitches by sewing in place with zero stitch length for 3 to 4 stitches.
Popular Quilting Patterns
Diagonal Lines: Mark a 45 degree line, then stitch parallel lines 2 inches apart.
Concentric Rectangles: Start at the edge and stitch progressively smaller rectangles inward.
Grid: Draw lines every 3 inches across width and length.
Use coordinating or contrasting thread for visual impact.
Creative Design Variations for Table Mats
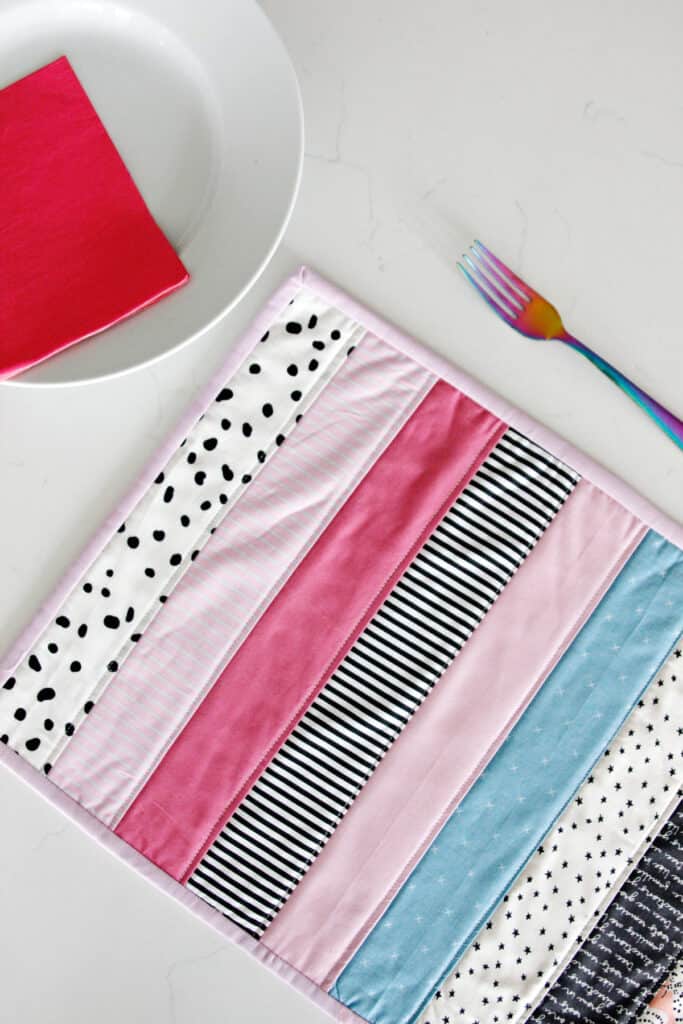
Make placemats with personality using no batting.
Striped Accent Design
- Cut main piece at 14½ inches by 15 inches
- Cut two accent strips at 2½ inches by 15 inches
- Place strips along long edges of main piece
- Sew with ¼ inch seam allowance
- Press seams toward the strips
- Topstitch near seam for a clean finish
Checkerboard Strip Option
- Cut six 2½ inch by 5½ inch strips in alternating light and dark fabrics
- Sew into two rows of three strips
- Press seams in opposite directions
- Nest seams, pin, and sew rows together
- Press all seams one direction
- Attach to main placemat piece
Great for Scraps: Use leftover fabric from other projects.
Professional Finishing Techniques

Small details make your placemats stand out.
Topstitching Styles
Single Row: ⅛ inch from edge creates a clean, classic look.
Double Row: Add a second line ½ inch inward for durability and style.
Longer Stitch: Use 4mm length for a relaxed, decorative appearance.
Sharp Corner Techniques
- Clip corners close to stitching, ⅛ inch away
- Pivot with needle down for precise 90 degree turns
- Use Nancy Zieman’s intersecting seams method for flawless points
Mitered Corners for a Couture Finish
- Fold corner diagonally to create a 45 degree line
- Sew along the line, trim excess, press open
- Creates a flat, professional edge
Sewing Matching Napkins for Your Set
Complete your table with simple rolled-hem napkins.
Cutting and Preparation
Cut 18 inch by 18 inch squares. Use lengthwise grain to minimize stretch and keep hems even.
Rolled Hem Technique
- Fold edge over ⅜ inch and press
- Sew along the inner folded edge
- At corners, fold up twice, ⅜ inch each time, to form a miter
- Stitch to the fold, pivot, and continue
Tip: Use a rolled hem foot for a neater finish on lightweight fabrics.
Keeping Your Table Mats Looking New
Proper care extends the life of your handmade placemats for years.
Washing Instructions
- Machine wash in cold water
- Tumble dry on low heat
- Iron if needed, especially after drying
Avoid: High heat on polyester blends to prevent melting.
Longevity Boosters
- Pre-wash fabrics to prevent shrinkage
- Backstitch at all seam starts and stops
- Use double topstitching for heavy use
- Store flat or rolled. Do not fold sharply.
With proper care, handmade placemats can last for decades.
Gift-Giving and Creative Uses
Turn your sewing skills into meaningful presents.
Personalized Gift Ideas
- Use hobby-themed fabrics such as sports, gardening, or pet prints
- Match to the recipient’s favorite colors
- Add monograms with iron-on letters or embroidery
Seasonal Sets
Holiday: Poinsettias, snowflakes, or fall leaves.
Summer: Nautical stripes, citrus prints, or florals.
Formal: Metallic fabrics or tone-on-tone textures.
Complete Table Sets
Package together:
– 4 to 6 placemats
– Matching napkins
– Coordinating table runner
Packaging Tip: Roll and tie with twine and a gift tag.
Fixing Common Table Mat Problems

Solve problems fast with these expert solutions.
Rounded Corners
Cause: Not clipped close enough or not fully pushed out.
Fix: Clip to ⅛ inch from stitch. Use a chopstick to fully extend corners.
Fabric Drag or Bunching
Cause: Uneven feeding of thick layers.
Fix: Use a walking foot or sew slowly with frequent checks.
Peeling Interfacing
Cause: Insufficient heat or pressure during fusing.
Fix: Re-press with a damp cloth, holding the iron 5 to 7 seconds per section.
Visible Seams or Shadowing
Cause: Light fabric over dark stitching.
Fix: Press seams open or toward the darker fabric.
Fraying Edges
Cause: Unfinished raw edges before washing.
Fix: Always zigzag stitch cut edges before pre-washing.
Frequently Asked Questions About Sewing Table Mats
What is the standard size for a table mat?
The most common size is 18 inches by 14 inches. Other popular dimensions include 14 by 19 inches for formal settings and 16 by 20 inches for larger tables.
What fabric is best for table mats?
Quilting cotton is the most popular choice because it’s easy to sew and comes in endless prints. Linen and linen blends offer elegance, while canvas provides durability for rustic styles.
Do I need interfacing for table mats?
Interfacing adds structure and prevents bunching. Fusible fleece creates a soft feel, while fusible interfacing mimics store-bought placemats. For heat resistance, use Insul-Bright.
How do I keep my table mats from shrinking?
Always pre-wash your fabric before cutting. Wash in cold water, tumble dry on low, and press flat before sewing.
Can table mats be used as hot pads?
Standard cotton mats offer basic heat protection. For hot dishes, use Insul-Bright thermal lining or cotton batting, which provides superior heat resistance.
How long does it take to sew a table mat?
Simple reversible mats take about 30 minutes for beginners. Quilted variations or those with decorative details may take an hour or more per mat.
Key Takeaways for Sewing Beautiful Table Mats
Sewing table mats is a rewarding project that blends creativity with practicality. Whether you’re a beginner or seasoned sewer, this guide gives you everything needed to make beautiful, durable placemats.
Start with quality materials. Choose quilting cotton or linen for easy handling, add fusible fleece or interfacing for structure, and always pre-wash fabric to prevent shrinkage. The reversible construction method produces the most versatile results, with a bold print on one side and a neutral backing for switching looks.
Master the details that matter. Clip corners close, pivot with the needle down, and use double topstitching for durability. Add a matching napkin set using the rolled hem technique for a cohesive table presentation.
Now grab your fabric, fire up your machine, and craft a set that turns every meal into an occasion.