How to Fix Water Damage on Wood Table
Water damage on a wood table can feel devastating. A single forgotten coaster leaves a milky white ring, or a prolonged spill creates a dark, unsightly stain that seems impossible to remove. Whether your table has a cloudy haze from a sweaty glass, a dark watermark from a leak, or a warped surface from humidity, most water damage can be repaired without professional help. The key is identifying the type of damage early and applying the correct fix before the problem worsens. This guide walks you through diagnosing the issue, drying the wood properly, treating each type of stain, and refinishing the surface to restore your table’s original beauty.
Identifying the Type of Water Damage
Before attempting any repair, you must understand what kind of damage you’re dealing with. Different symptoms require completely different solutions, and using the wrong method can make the problem worse.
White Rings vs. Dark Stains
White or cloudy rings are the most common type of water damage and usually affect only the finish, not the wood beneath. These occur when moisture becomes trapped beneath the surface coating, creating a hazy film that disrupts light reflection. The good news is that white rings are often reversible without any sanding or stripping.
Dark or black stains indicate that water has penetrated through the finish and into the wood fibers. This type of damage may involve tannin reactions, metal rust, or even mold growth. Dark stains require deeper treatment, such as bleaching or sanding, to remove effectively.
Checking for Structural Problems
Inspect your table carefully for signs of structural compromise. Bubbles, blisters, or swelling suggest trapped moisture under the veneer or within the wood itself. If the surface feels spongy when you press on it, you need to act quickly to prevent delamination.
Look for warping or cupping, where the tabletop bends upward at the edges. This damage is often caused by repeated wet-dry cycles that compress the wood fibers on one side. Test the stability of joints by gently wobbling the table legs. If legs wobble or seams separate, water may have weakened the glue holding the piece together.
Determining Your Table’s Material and Finish
The material and finish of your table dictate which repair methods will work and which could cause harm.
Solid Wood vs. Veneer vs. MDF
Solid wood tables can be sanded and refinished multiple times without damage. Most modern dining tables are made from solid hardwoods like oak, maple, or walnut.
Veneer tables feature a thin layer of real wood bonded over a cheaper substrate like particle board or MDF. These are common in antiques and mid-century furniture. The veneer is often less than 1/32 inch thick, so aggressive sanding can destroy the surface completely.
MDF and particle board cores swell and crumble when wet. If the core feels soft or is flaking apart, structural repair may not be possible. In these cases, only cosmetic fixes will apply.
Quick Tip: If your table is over 100 years old, it likely has veneer over solid wood, not MDF, which is a modern material.
Testing the Finish Type
Knowing your finish type is essential because different finishes respond to different treatments. Shellac dissolves when touched with alcohol. Lacquer softens when exposed to lacquer thinner. Polyurethane resists most solvents. Oil and wax finishes penetrate the wood and are prone to raising the grain when wet.
To test your finish, dab a cotton swab with denatured alcohol and apply it to an inconspicuous area. If the finish softens, it is shellac. Use lacquer thinner to test for lacquer finish.
Drying the Table Completely
Never begin repairs on damp wood. Trapped moisture leads to mold, continued warping, or complete finish failure.
Stop Further Moisture Exposure
Remove all items from the table immediately. Wipe up any standing water with a dry microfiber cloth.
Promote Slow, Even Drying
Place fans around the table to increase air circulation. Use a dehumidifier in humid environments. Keep the room temperature stable between 65 and 75 degrees Fahrenheit. Allow 3 to 7 days for full drying, especially for thick tabletops.
Avoid: Hair dryers, heat guns, or direct sunlight. Rapid drying causes cracks and worsens warping.
Ideal Humidity: Maintain indoor levels between 40 and 60 percent to stabilize wood movement.
Removing Milky White Water Rings

White rings are surface blemishes that are often fixable without stripping the finish or sanding.
Using Steel Wool and Rubbing Compound
Dampen #0000 steel wool slightly with mineral oil or furniture polish. Gently rub the ring in the direction of the wood grain. Wipe clean with a soft cloth. This method works because the ultra-fine steel wool lightly abrades the finish, removing the cloudy layer without damaging the surface.
The Iron and Cloth Method
Place a clean, dry cotton cloth over the white ring. Set an iron to low heat with no steam. Press down for 3 to 5 seconds, then lift. Repeat 2 to 3 times. Check progress and buff with a soft cloth.
Warning: Never slide the iron across the surface. This can scorch the finish.
Household Remedies for White Rings
Mayonnaise works well because the oils penetrate the finish while mild acids help break down residue. Apply a thick layer, wait 1 to 2 hours, then wipe off.
Mix equal parts vinegar and olive oil. Buff the mixture into the ring with a soft cloth. The vinegar cleans while the oil restores shine.
Non-gel toothpaste also works as a mild abrasive. Apply with a soft toothbrush, rub in circles, then wipe clean.
For a salt and olive oil paste, mix 1 teaspoon of salt with enough olive oil to form a thick paste. Rub gently for 5 to 10 minutes, then buff off.
Best for: Minor rings on varnished or oiled finishes. These remedies are not effective on catalyzed finishes.
Treating Dark Water Stains in Wood

When water reaches the wood, it leaves dark spots that require chemical or mechanical removal.
Bleaching with Oxalic Acid
Oxalic acid is the best treatment for black stains caused by iron tannin reactions or metal leaching. Strip the finish first because the acid cannot work through varnish. Mix oxalic acid crystals with hot water until saturated. Brush the solution over the entire surface, not just the stain, for even color. Let dry completely, which takes about 24 hours. Rinse thoroughly with water to remove residue. Repeat if needed.
Safety: Wear gloves and a mask when handling oxalic acid. Never brush dry crystals because this releases harmful dust.
Using Barkeeper’s Friend
Barkeeper’s Friend contains oxalic acid and serves as a household alternative. Mix the powder with water to form a paste. Apply to the stain, wait 5 to 10 minutes. Scrub gently with a soft brush. Wipe with a damp cloth and dry immediately.
Test First: Some woods, particularly cherry, may lighten significantly. Always test on a hidden area first.
Repairing Bubbles and Blistered Finish
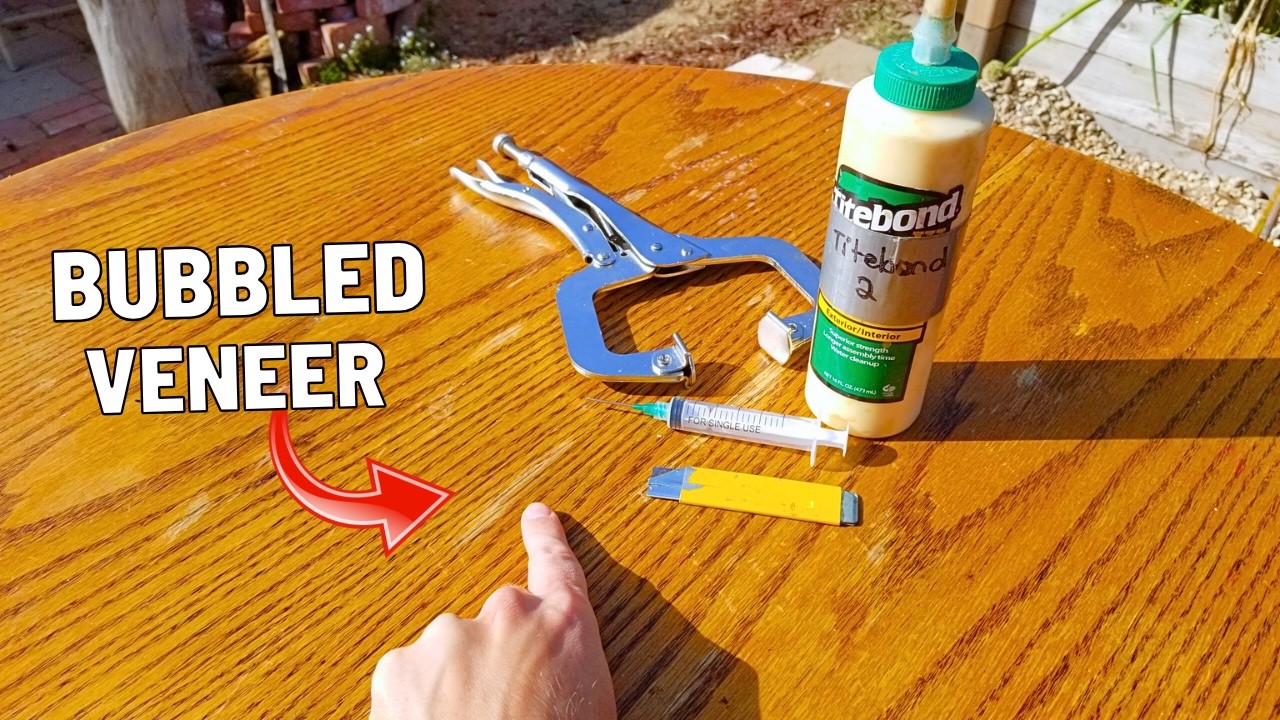
Blistering means moisture has lifted the finish or veneer. Act fast to prevent permanent separation.
Fixing Veneer Bubbles with Glue Injection
Make a tiny X-shaped cut in the bubble with a utility knife. Moisten the area slightly if the veneer feels stiff. Inject wood glue under the veneer using a syringe or thin knife. Cover with waxed paper, place a flat block on top, and clamp or weight down heavily. Use 80 or more pounds for large areas. Let dry for 24 to 48 hours.
Pro Tip: Wipe excess glue immediately with a damp cloth before it dries.
Releasing Moisture from Fresh Blisters
Pierce the blister with a pin. Place a damp cloth over the area. Use a warm iron on low heat to create steam and soften old glue. Press flat and let cool under weight.
Do not use this method on finished surfaces unless you plan to refinish afterward.
Flattening Warped or Cupped Tabletops
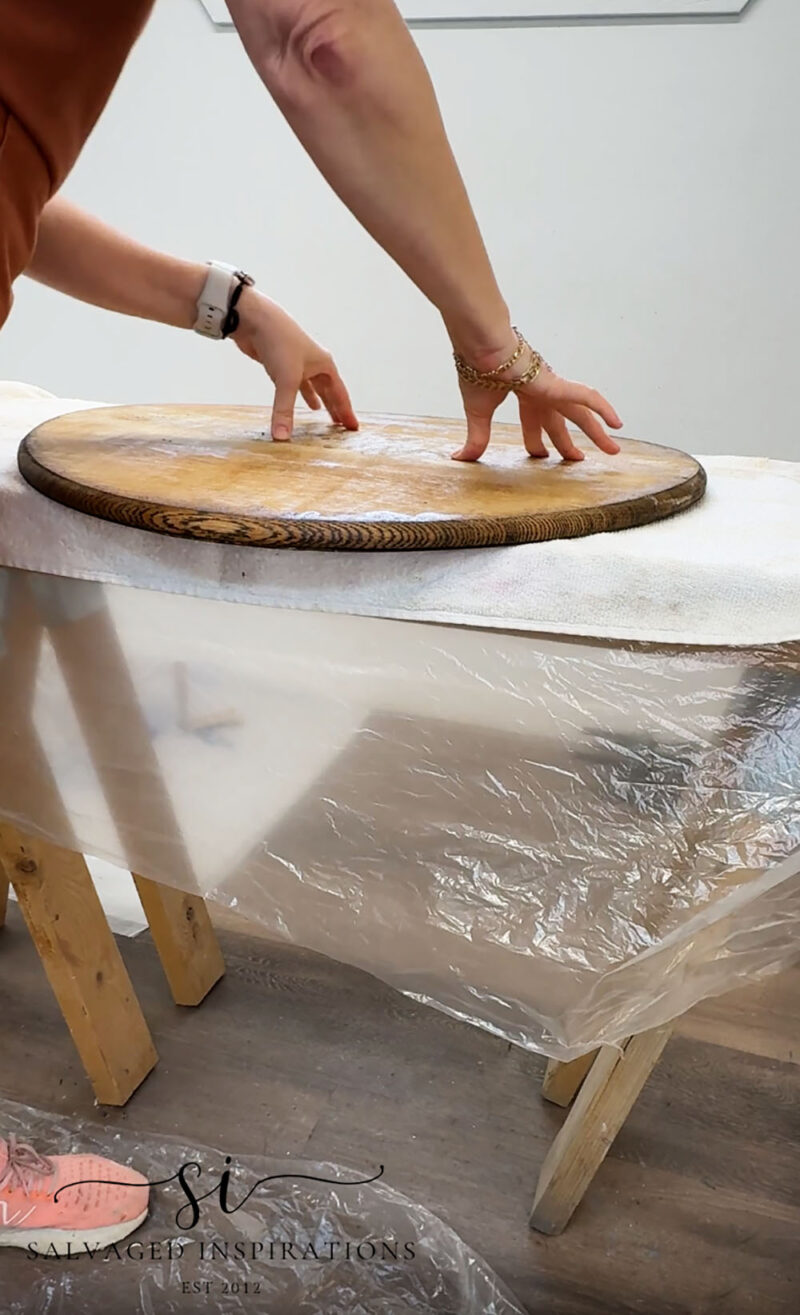
Warping is not always permanent. You can reverse compression shrinkage with controlled moisture.
The Damp Cloth Method for Warps
Identify the concave side of the warp, which is the side that shrank. Lay a damp towel over the bowed area. Place heavy, flat weights like books or bricks on top. Let dry slowly over 24 to 48 hours. Repeat if necessary.
Why it works: Rehydrating the shrunken side allows fibers to expand, gradually flattening the board.
Avoid: Sealing the table while wet. This traps moisture and worsens warping.
Fixing Peeling or Cracked Finish
A failing finish needs replacement, not repair.
Sanding and Refinishing Cracked Areas
Sand ridges smooth with #320-grit paper. Scuff the surrounding area lightly to help the new finish bond. Apply new finish in thin coats. If using lacquer, start with mist sprays to avoid blistering.
Removing and Replacing Peeled Finish
Strip all loose finish with a scraper or 80-grit sandpaper. Clean bare wood with mineral spirits. Stain or tone to match if the color is uneven. Apply 2 to 3 coats of clear finish. Polyurethane is recommended for durability.
Never try to reattach peeling finish. Once the finish fails, it cannot be saved.
Repairing Raised Grain
Water can swell wood fibers, especially under oil or wax finishes, leaving a rough texture.
Smoothing with Fine Abrasives
Rub the area with #0000 steel wool or #320+ sandpaper. Lubricate with the same oil if using an oil finish. Wipe clean, then apply 1 to 2 fresh coats of finish.
Prevent recurrence: Reapply protective oil or wax annually.
Refinishing for a Seamless Repair
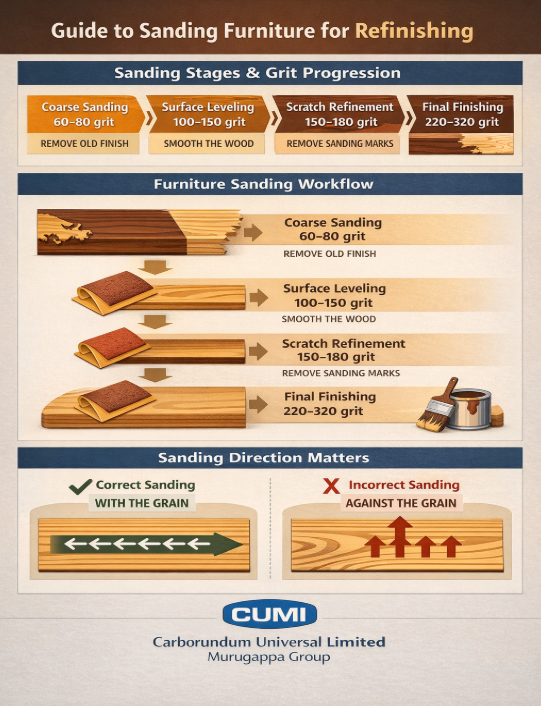
If repairs leave visible patches, full refinishing creates a uniform look.
Sanding the Entire Surface
Use progressive grits for best results. Start with 80 to 120 grit for removing filler, swelling, or old finish. Finish with 220 to 320 grit for final smoothness.
Always sand with the grain to avoid scratches.
Feather edges: Extend sanding 1 to 2 inches beyond repaired areas to blend seamlessly.
Matching the Stain Color
Test stains on the underside or inside leg of the table. Apply with a cloth and wipe off excess to avoid blotchiness. Use wood stain markers for small touch-ups. Let dry 24 hours before topcoating.
Blend sheen: Use Restor-a-Finish or toner after staining to smooth color transitions.
Applying a Durable Topcoat
Satin polyurethane is the most durable option for tables. Apply thin, even coats. Lightly sand with #220 paper between coats. Use an HVLP sprayer or foam brush to avoid brush marks.
Drying Time: Allow 24 hours between coats.
Handling Special Materials
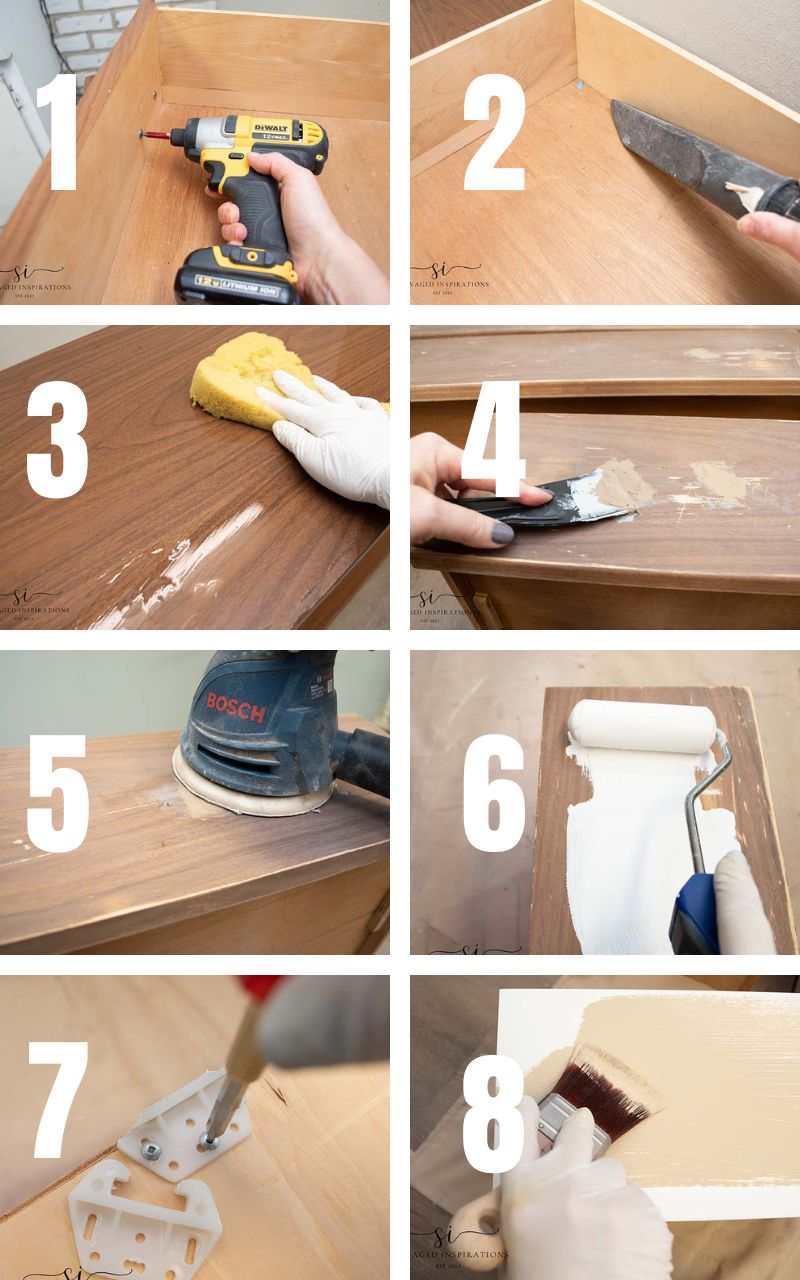
Repairing Water-Damaged MDF or Particle Board
These materials swell and crumble when wet, so repair is mostly cosmetic. Glue any cracks and clamp for 24 hours. Sand swollen areas down with 60 to 80 grit. Fill dents with high-performance wood filler. Prime and paint. Do not attempt to stain damaged MDF.
Limitation: Once the core is compromised, replacement may be the only long-term solution.
Restoring Veneer Without Sanding Through
Avoid aggressive sanding because veneer is often less than 1/32 inch thick. Use #0000 steel wool or light hand sanding only. For bubbles, use the glue injection method described earlier.
Preventing Future Water Damage
Even the best repair will not last without prevention.
Using Coasters and Trivets
Always use coasters under drinks. Keep twice as many coasters as regular users. Use trivets under hot or wet dishes.
Wiping Spills Immediately
Blot spills with a dry, absorbent cloth. Do not rub. Dry thoroughly with a second cloth.
Controlling Indoor Humidity
Use a dehumidifier in summer months. Use a humidifier in winter. Aim for 40 to 60 percent humidity year-round.
Maintaining the Finish
Reapply wax or oil annually. Inspect for wear every 6 months. Clean with mild soap and water, never harsh chemicals.
When to Call a Professional
Some repairs are best left to experts.
Antique tables over 100 years old may lose value with DIY fixes. Seek a conservator for valuable pieces.
Severe delamination or structural warping requires clamping jigs or veneer pressing equipment.
Extensive black staining with finish failure needs full stripping and bleaching skills.
Mold growth inside joints may require disassembly and deep cleaning.
Pro Insight: For heirlooms, minimal intervention preserves value. A professional can often repair invisibly.
Frequently Asked Questions About Fixing Water Damage on Wood Tables
Can I fix a water-damaged wood table without sanding?
Yes, white water rings can often be removed without sanding. Try using mayonnaise, vinegar and olive oil, or non-gel toothpaste. Apply the remedy, let it sit, then wipe clean. For dark stains that have penetrated the wood, sanding or bleaching will be necessary.
How long does it take to repair water damage on a wood table?
Minor repairs like white ring removal take 1 to 2 hours. Structural repairs like fixing warped tabletops or veneer bubbles take 2 to 3 days including drying time. Full refinishing can take 1 to 2 weeks when accounting for drying time between coats.
Does water damage permanently ruin wood furniture?
Not necessarily. Many water-damaged tables can be fully restored. White rings are usually reversible. Dark stains require more effort but often respond to oxalic acid bleaching. Warped tables can sometimes be flattened. Only tables with severely compromised cores, like swollen MDF, may be beyond repair.
What household items can remove white water rings from wood?
Mayonnaise, non-gel toothpaste, vinegar and olive oil mixture, and salt and olive oil paste all work for removing white rings. Apply any of these to the ring, wait 1 to 2 hours, then wipe clean. The oils penetrate the finish while mild abrasives or acids help break down the residue.
Should I use heat or chemicals to remove water stains?
Heat works well for white rings using the iron and cloth method. Set the iron to low heat with no steam. For dark stains, chemicals like oxalic acid or Barkeeper’s Friend are more effective than heat. Never use hair dryers or heat guns for drying because rapid heat causes cracking and worsens warping.
How do I prevent water damage on my wood table going forward?
Use coasters under all drinks and trivets under hot dishes. Wipe spills immediately, blotting rather than rubbing. Maintain indoor humidity between 40 and 60 percent. Reapply protective wax or oil annually and inspect the finish every 6 months.
Key Takeaways for Fixing Water Damage on Your Wood Table
Most water-damaged wood tables can be saved with patience and the correct method. Start with the least invasive fix, such as mayonnaise or toothpaste for white rings, and escalate to more intensive treatments like sanding or bleaching only when necessary. Always dry the table thoroughly before beginning repairs. Trapped moisture leads to mold, continued warping, or finish failure.
Match your repair method to the specific type of damage. White rings respond to oils and mild abrasives. Dark stains require oxalic acid bleaching. Bubbles and blisters need glue injection and clamping. Warping can sometimes be reversed with controlled moisture and weight.
Protect your restored table with coasters, trivets, and proper humidity control. Reapply protective finish annually to maintain the repair. With proper care, your table can look as good as new and last for generations.