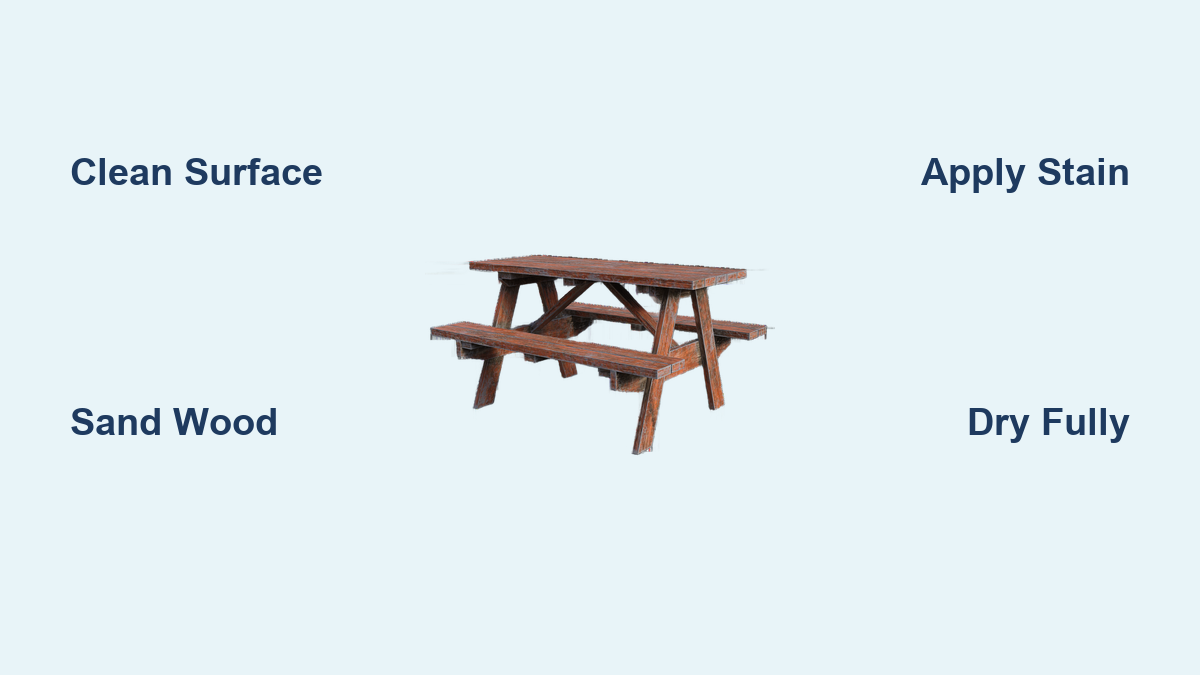
How to Stain a Picnic Table: Quick Steps
Nothing ruins a backyard gathering faster than a weathered, splintered picnic table. Cracked wood, faded color, and peeling finish don’t just look bad—they signal that your table is losing its protection against rain, sun, and rot. The good news is staining a picnic table is a beginner-friendly DIY project that can breathe new life into old outdoor furniture in just one day. With the right tools and technique, you can restore its beauty and extend its lifespan by years, all for about $30 in supplies.
This guide walks you through every step of how to stain a picnic table, from choosing the best oil-based stain to applying it without streaks or lap marks. You’ll learn how to prep wood properly, avoid common mistakes, and pick products that last. Whether your table is bare, grayed by sun, or covered in old finish, this process works. By the end, you’ll have a durable, weather-resistant surface ready for meals, games, and memories.
Choose the Right Stain or Paint for Your Picnic Table

Picking the correct product determines how long your finish lasts and how natural the wood looks. The two main categories each serve different needs.
Semi-Transparent Stains Show Natural Wood Grain
Semi-transparent stains let the wood grain show through while blocking UV rays and moisture. They penetrate deep into the wood, making them ideal for picnic tables exposed to sun and rain. One coat often suffices with high-quality options like Sherwin-Williams SuperDeck or Ready Seal. These products maintain the wood’s natural appearance while adding protection.
Solid Color Paints Offer Maximum Coverage
Solid-color paints completely cover the grain and offer maximum protection. Use these if you want bold colors like SW 6879 Daring or need to hide damaged wood. Always pair them with an oil-based primer for proper adhesion. Oil-based paints outperform latex options outdoors because they flex with the wood rather than cracking and peeling.
Top Stain Products to Consider
Several products consistently deliver professional results for exterior wood.
Ready Seal Exterior Stain and Sealer in Dark Walnut is marketed as foolproof. It prevents runs and blotching even when applied heavily, so you don’t need to wipe excess. Thompson’s Waterseal in Nutmeg Brown offers an affordable option that’s widely available at home centers. Sherwin-Williams SuperDeck Oil-Based Stain penetrates deeply in one coat and provides 2 to 3 years of protection.
Gather Essential Tools and Supplies
Skip shortcuts. The right tools ensure even coverage and professional results. Having everything ready before you start prevents mid-project trips to the store.
Must-Have Materials
You will need several key supplies to complete this project successfully.
Exterior wood stain or oil-based paint serves as your primary finish. Oil-based primer is necessary if you’re painting rather than staining. Heavy-duty cleaner or soapy water prepares the wood surface. Stain remover helps strip old finish if needed. Drop cloths protect grass and pavement from drips. Tack cloths or lint-free rags remove dust between steps. Medium and fine-grit sandpaper (120 and 220 grit) smooth the wood surface.
Application Tools That Make the Job Easier
The right brushes and pads help you reach every corner and contour.
A 1-inch Purdy XL Dale brush smooths large flat surfaces effectively. A small angle brush or foam brush reaches joints, legs, and corners. An exterior paint pad handles contours and curved areas. A paint tray and roller offer fast coverage on tabletops. A spray bottle wets down cleaner evenly. A palm sander speeds up sanding compared to hand-only work.
Buy enough stain to cover all sides including undersides, legs, and benches.
Clean and Prep the Wood Surface Properly

Proper prep is 80 percent of a flawless stain job. Dirty or damp wood leads to peeling, bubbling, and uneven absorption. This step sets the foundation for everything that follows.
Wash the Entire Table Thoroughly
Spray the table with heavy-duty cleaner or warm soapy water. Scrub every inch, especially joints and crevices, with a stiff brush. Grease, pollen, and mildew block stain penetration and cause uneven finish. Rinse thoroughly with a hose. Never stain immediately after rain or washing.
Wait until the wood is completely dry, which takes 10 to 15 minutes after using fast-drying cleaner or longer if wet from rain. Test by touching the surface with your dry hand. No moisture means you’re ready to proceed.
Sand the Wood When Needed
Good condition wood only needs light sanding with 220-grit to open pores for better adhesion. Rough or previously finished wood requires starting with 120-grit, sanding with the grain. Follow with 220-grit for smoothness. Sand until the surface feels even, then wipe away all dust with a tack cloth or damp rag. No dust means no bumps under the finish.
Strip Old Finish If Necessary
If paint is flaking or you’re switching from paint to stain, strip it first. Apply SuperDeck Stain and Sealer Remover with a brush. Let it sit per the label, usually 15 to 30 minutes. Scrub with a stiff brush and rinse thoroughly. Once bare wood is exposed, let it dry completely, then sand lightly before staining.
When to Use Primer
Skip primer if staining bare or stripped wood. If using oil-based paint, apply a coat of oil-based primer first and let it dry completely before painting. This ensures the paint adheres properly and lasts longer.
Apply the Stain Using Correct Technique
Timing, technique, and weather matter. Get this step right and your table will look professional. Rushing or ignoring these details leads to streaks, lap marks, and premature failure.
Check Weather Before Starting
Choose a day with no rain forecast for 24 hours. Temperature must be above 50 degrees Fahrenheit. Work in the shade, not direct sunlight. Sun dries stain too fast, causing lap marks and blisters. A calm, dry day produces the best results.
Prepare the Stain Properly
Stir thoroughly. Don’t just shake the can. Pigments settle at the bottom, and stirring ensures even color throughout. Do a test patch on the underside of a bench. Wait 15 minutes to see the final color and absorption. Adjust your approach if the color appears too dark or light.
Stain the Underside First
Lay drop cloths and flip the table upside down. Stain legs, supports, and underside first. Let dry for 2 hours before flipping back. This approach prevents missed spots and keeps you from touching wet areas as you work.
Start with Detailed Areas
Use a small angle brush or foam brush to coat joints, corners, end grains, legs, and braces. These areas absorb more stain and dry faster, so watch for drips. Apply carefully to avoid buildup in crevices.
Finish Large Surfaces Last
Switch to a 2.5-inch flat brush or exterior paint pad for tabletops and benches. Apply in long, even strokes with the grain. With Ready Seal, apply generously and don’t worry about wiping. It won’t streak. With traditional stains like Thompson’s, maintain a wet edge and overlap each stroke slightly to prevent lap marks. Wipe excess from corners and ends immediately with a rag.
One Coat Is Usually Enough
Semi-transparent oil stains typically need only one coat. A second coat deepens color but isn’t required for protection. Oil-based paint requires two coats with 6 to 8 hours of dry time between them. Check the product label for specific timing.
Let It Dry and Cure Completely
Rushing this step risks smudges, stains on clothes, and weak adhesion. Patience here pays off with a durable finish that lasts years.
Understanding Drying Timelines
The stain dries to the touch in about 2 hours. It’s safe to flip or move the table after 2 to 4 hours. Full cure for heavy use takes 24 hours. Don’t place cushions, dishes, or kids on the table too soon. Even if it feels dry, oil-based finishes need time to harden internally.
Return the Table to Its Place
Once cured, return the table to its spot. Avoid placing it under trees where sap and debris fall. Also avoid areas with constant puddles. Good drainage extends the life of your stain job.
Maintain Your Stained Picnic Table
A little care keeps your work looking fresh for years. Regular maintenance prevents premature replacement and keeps the table inviting.
Expect 2 to 3 Years of Protection
UV exposure and freeze-thaw cycles shorten life. Tables in full sun may need re-staining every 18 to 24 months. Tables in covered areas often last longer. Watch for signs that it’s time to refresh.
Annual Maintenance Routine Keeps It Looking New
Inspect the table each year for graying wood, water absorption, or cracking. Clean with soapy water and rinse thoroughly. If water soaks into the wood instead of beading, apply a new coat after cleaning and drying. Light sanding may be the only prep needed for subsequent coats. No need to strip unless the finish is peeling.
Avoid Common Staining Problems
These pitfalls ruin otherwise good stain jobs. Learn to recognize and prevent them before they happen.
Prevent Lap Marks and Streaks
Work in the shade to avoid rapid drying that causes lap marks. Maintain a wet edge with traditional stains. Use foolproof products like Ready Seal if you’re concerned about technique. Stir stain well before and during use to keep pigments distributed.
Stop Blotching Before It Starts
Don’t let puddles sit on end grains. Wipe excess immediately. Sand evenly because rough patches absorb more stain and appear darker. Test your technique on a small area first.
Properly Care for Your Brushes
Clean oil-based brushes immediately with mineral spirits. Rinse thoroughly, shape the bristles, and hang to dry. Proper care makes quality brushes last for years.
Dispose of Rags Safely
Oil-soaked rags can spontaneously combust. Lay them flat to dry outside, then store in a sealed metal container with water before disposal. This simple step prevents fire hazards.
Save Money by Staining Instead of Replacing
Replacing a picnic table costs $200 to $500. Polywood alternatives run even higher. A full DIY stain refresh costs just $30 in supplies. You’re not just saving money. You’re reducing waste and preserving functional furniture that still has years of life left.
Staining also lets you customize. Match your deck, go bold with a solid color, or keep it natural with a semi-transparent brown. The choice is yours.
Frequently Asked Questions About Staining a Picnic Table
How long does it take to stain a picnic table?
The actual application takes about 30 minutes per coat for a standard table. Plan for a full day including prep and drying time. Plan for 24 hours before heavy use.
Can I stain over old paint on a picnic table?
You need to strip old paint completely before staining. Paint creates a barrier that prevents stain from penetrating the wood. Use a stain remover to strip the old finish, then sand lightly before applying new stain.
What happens if it rains after staining my picnic table?
Protect the table from rain for at least 24 hours after applying stain. If rain hits wet stain, it will wash away unevenly and require reapplication. Check the weather forecast before starting your project.
Do I need to sand my picnic table before staining?
Sanding requirements depend on the wood condition. New or smooth wood needs only light 220-grit sanding to open pores. Rough or weathered wood requires 120-grit followed by 220-grit. Always remove all dust with a tack cloth before staining.
Can I use a roller to apply stain to a picnic table?
Yes, rollers work well for large flat surfaces like tabletops and bench seats. Use a brush for corners, joints, and legs. Combining both tools gives the best results.
How often should I restain my picnic table?
Expect to restain every 2 to 3 years. Tables in full sun may need attention every 18 months. Tables in covered areas can go longer. Check annually by sprinkling water on the surface. If the water soaks in instead of beading, it’s time to refresh.
Key Takeaways for Staining Your Picnic Table
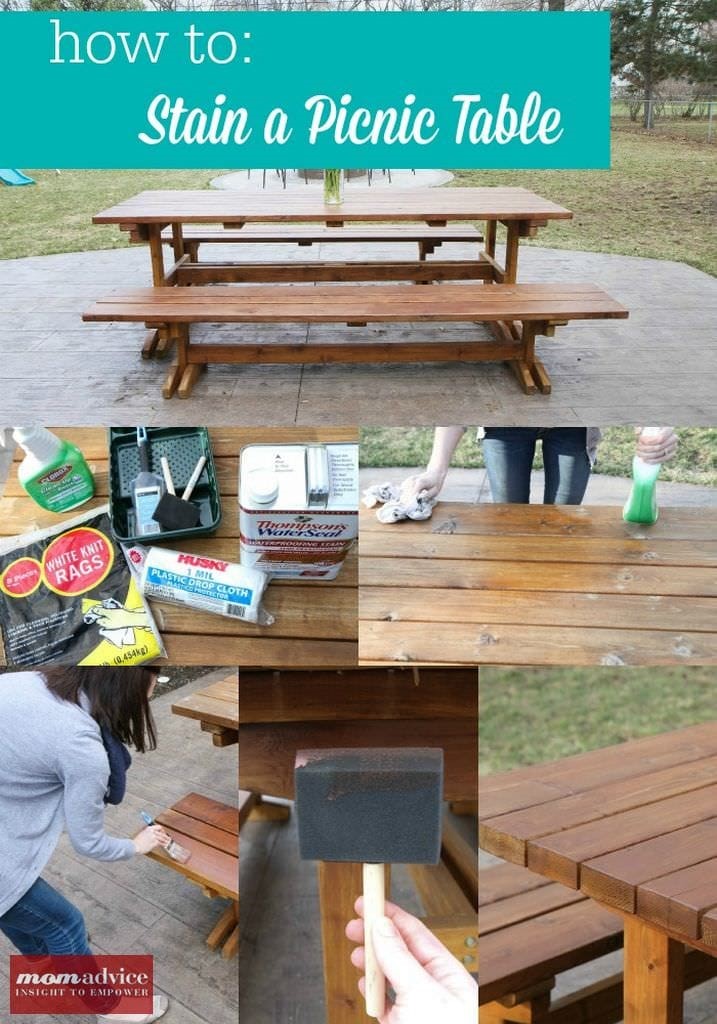
Staining a picnic table isn’t just maintenance. It’s an upgrade that protects against rot, enhances curb appeal, and creates a welcoming space for years. The most important steps are proper preparation, choosing quality oil-based products, and allowing adequate drying time. Work in dry shade, not direct sunlight. Clean and sand the wood thoroughly before applying any stain. Quality products like Ready Seal or SuperDeck deliver 2 to 3 years of protection in just one coat. Your table will thank you every summer when you gather around a beautiful, durable surface for meals and memories.