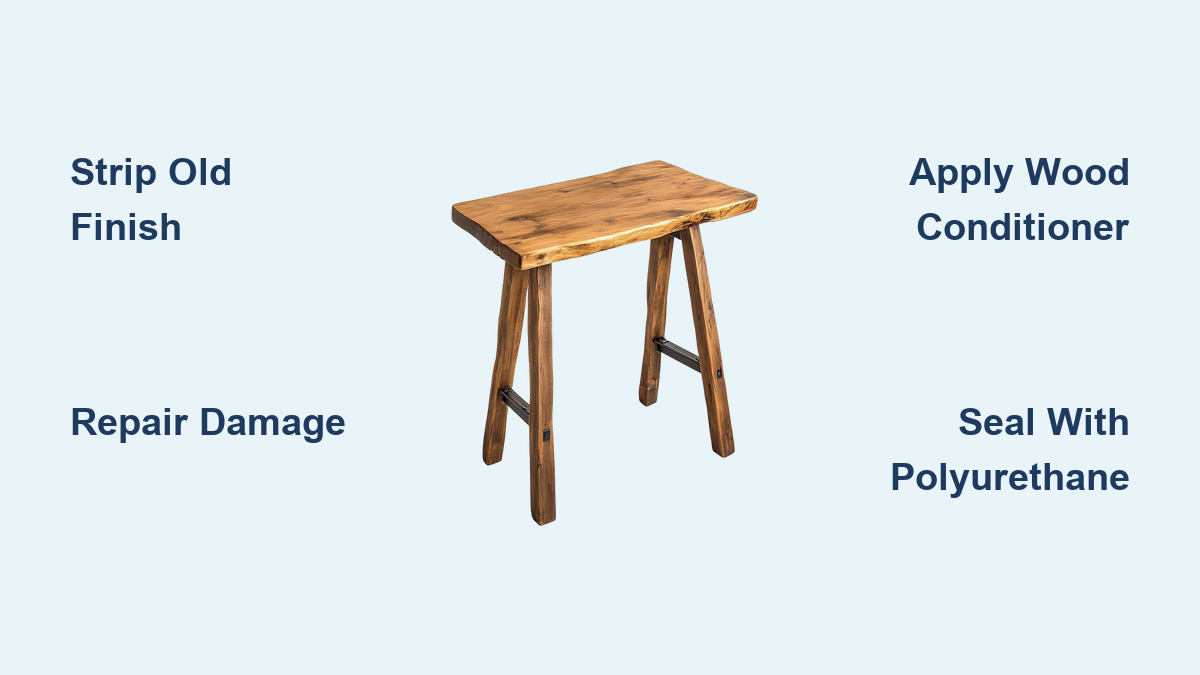
How to Renovate a Wooden Table
You’ve found a worn wooden table at a thrift store, inherited a family heirloom, or simply want to breathe new life into an old piece. With the right approach, renovating a wooden table can transform it from dull and damaged to stunning and functional without the cost of buying new. Whether it’s covered in scratches, stained from years of use, or has a peeling finish, most wooden tables can be restored to their former glory. The key is understanding your table’s material, following a systematic process, and using the right tools and finishes. In this guide, you’ll learn how to assess your table, strip the old finish, repair damage, apply a beautiful stain, and seal it for long-term durability.
Assess Your Table’s Material

Before making any changes, determine what kind of wood you’re working with. The material dictates whether full refinishing is possible or if you must take a gentler approach.
Identify Solid Wood vs. Veneer
Solid wood tables can be sanded, stripped, and refinished multiple times. They are ideal for renovation. Look for consistent grain that does not repeat across the surface, which indicates solid planks.
Veneer is a thin layer of real wood glued over particleboard or chipboard. It is common in mid-century and budget furniture. To spot veneer, check for:
- Repeating grain patterns that look like wallpaper
- Thin edges where the wood layer appears shallow
- A hollow sound when tapped
Critical Warning: Aggressive sanding can sand through veneer, exposing the substrate. If veneer is lifting or bubbled due to water damage, proceed with caution or consider surface-masking repairs instead.
Rule Out Laminate
Laminate mimics wood but is a plastic coating. It cannot be refinished with stain or traditional topcoats. If your table has a perfectly uniform, glossy surface with no grain texture, it is likely laminate, and refinishing is not possible without re-surfacing.
Gather Essential Tools and Safety Gear
A successful renovation starts with the right supplies and a safe workspace.
Set Up a Safe Work Area
Work in a well-ventilated space, preferably outdoors or in a garage. Lay down drop cloths or plastic sheeting to protect floors. Use sawhorses to elevate the table for easy access to all sides.
Safety gear is essential:
- Respirator or N95 mask, especially when stripping or sanding
- Nitrile gloves
- Safety goggles
- Long sleeves and closed-toe shoes
Prepare Your Toolkit
Here is what you will need:
Stripping: Chemical stripper, plastic scrapers, wire brush, steel wool
Sanding: Random orbital sander, sanding blocks, 80 to 400 grit sandpaper
Cleaning: White spirit, microfiber cloths, tack cloths
Repair: Wood filler, putty knife, Stanley blade
Finishing: Stain, wood conditioner, polyurethane or oil finish, foam brushes
Final Touch: Paste wax, Scotch-Brite pad, rotary buffer (optional)
Pro Tip: Label and organize your materials. Having everything ready prevents delays and keeps your workflow smooth.
Clean and Prep the Surface
Never skip cleaning. Grime, wax, and oils prevent proper adhesion of new finishes.
Remove Hardware and Deep Clean
Take off all knobs, hinges, or drawer pulls. Use an all-purpose cleaner or a cloth dampened with white spirit to wipe down the entire table, including the top, legs, edges, and underside.
Avoid water: Excess moisture can swell wood, especially with veneer over chipboard.
Let the table dry completely for at least 24 hours before moving to the next step.
Strip the Old Finish Completely
A failing finish, whether cracked, peeling, or cloudy, must be fully removed. Painting or staining over it leads to poor results.
Choose Your Stripping Method
For thick, multi-layered finishes, use chemical stripper. It is faster and safer for detailed areas.
For solid wood with light wear, manual sanding works, but it is labor-intensive.
Use Chemical Stripper (Recommended)
- Apply a thick coat of stripper with a chip brush in a small section.
- Wait 10 to 15 minutes until the finish bubbles.
- Scrape off with a plastic or dull metal scraper, always with the grain.
- Use steel wool for stubborn spots and carvings.
- Wipe residue with a rag soaked in white spirit.
- Repeat until all finish is gone.
- Let the wood dry for 24 hours.
Edge Detail Tip: Use a wire brush or Stanley blade for rounded edges and corners to avoid gouging.
Sand Instead (For Solid Wood Only)
- Start with 80-grit on a random orbital sander for large surfaces.
- Sand with the grain to avoid scratches.
- Progress through grits: 80 to 120 to 150 to 220.
- Wipe with a tack cloth after each stage.
- Finish with 220-grit for stain-ready smoothness.
Warning: Never skip grits. Jumping from 80 to 220 leaves deep scratches visible under the finish.
Repair Damage and Imperfections
Even heavily worn tables can be saved with proper repairs.
Fix Lifting Veneer
For small bubbles, place a brown paper bag over the area. Press with a hot iron for 10 to 15 seconds to re-activate adhesive. Clamp with wax paper and a flat board until cooled.
For large, detached edges, remove loose material. Apply wood filler to level the surface. Sand smooth with 220-grit once dry.
Reality Check: On chipboard substrates, full re-veneering is the only perfect fix. For DIY, filler and stain-masking work well.
Fill Dents and Cracks
Use wood filler that matches your wood tone:
- Press filler into gaps with a putty knife.
- Overfill slightly because shrinkage occurs as it dries.
- Let dry completely, following product instructions.
- Sand flush with 220-grit.
Pro Tip: For hairline cracks, use a furniture marker after staining to blend.
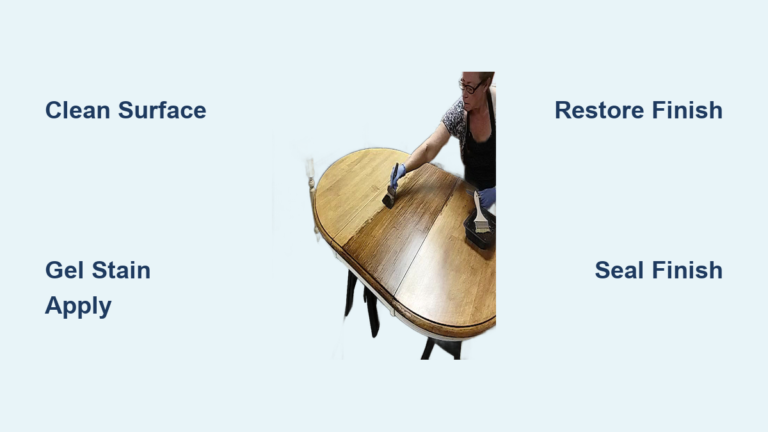
Apply Stain for a Uniform Color
Now your table is bare wood, and it is time to bring out its beauty with stain.
Condition Soft or Mixed Woods
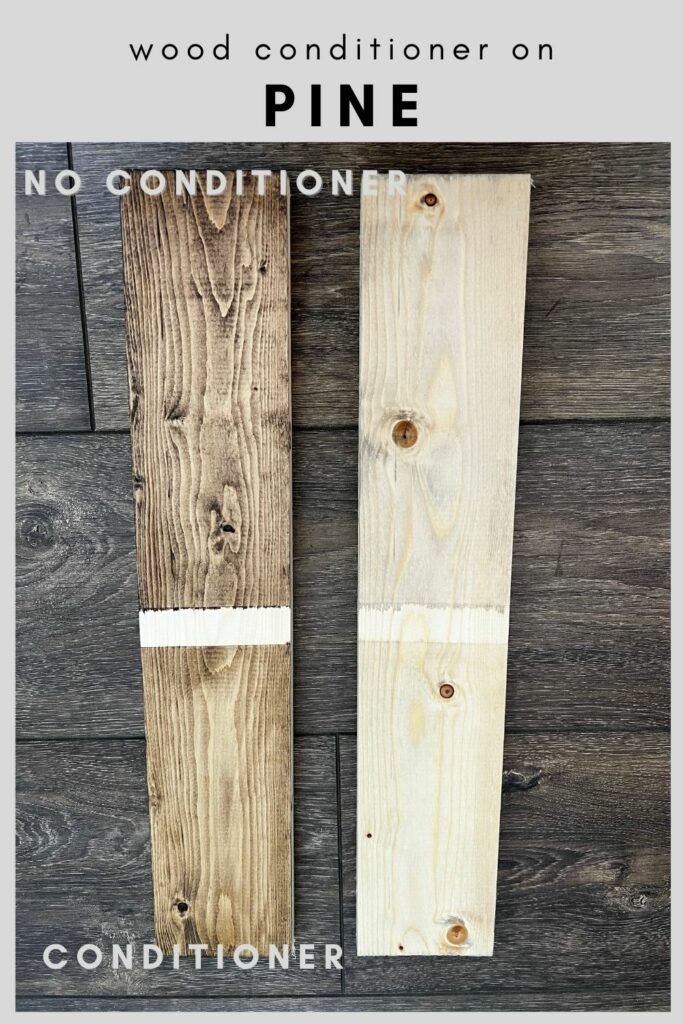
Pine, poplar, or mixed-wood tables absorb stain unevenly, causing blotchiness. Prevent this by applying wood conditioner before staining:
- Brush on evenly.
- Wait 15 to 30 minutes.
- Wipe off excess.
- Let dry fully, 1 to 2 hours.
Test and Apply Stain
- Test first: Apply stain to an inconspicuous area like the underside of an apron or leg. Oil-based stains darken as they dry, so wait 24 hours to judge the true color.
- Apply stain with a brush or rag, with the grain.
- Let sit 5 to 15 minutes. Longer time equals darker color.
- Wipe off excess immediately with a clean cloth.
- Let dry 6 to 12 hours.
- Apply a second coat if deeper color is desired, lightly sanding with 360-grit between coats.
Color Correction Tips:
- Too red or orange? Use a stain with grey or green undertones like “Aged Barrel.”
- Legs too light? Stain them darker first, then apply a unifying top coat.
- Filler spots showing? Use a furniture marker to blend.
Apply a Durable Protective Finish

Stain adds color, but the top coat protects against spills, heat, and wear.
Choose the Right Finish
Oil-Based Polyurethane provides a warm, vintage look and suits high-traffic areas. It takes 24 hours to dry and offers high durability.
Water-Based Poly or Polycrylic works well on light woods and will not yellow. It dries in 4 to 6 hours and offers high durability.
Hard Wax Oil gives a natural feel and enables easy repair. It takes 24 hours to dry and offers medium durability.
Teak or Danish Oil is food-safe and gives a rustic look. It takes 24 hours to dry but requires reapplication over time.
For dining tables: Use polyurethane because it is the most durable.
Apply Finish in Thin, Even Coats
- Use a foam brush or high-quality chip brush.
- Apply in long, even strokes with the grain.
- Avoid over-brushing to prevent bubbles.
- Pop bubbles immediately with a toothpick.
- Let dry 24 hours.
Sand Between Coats
After each coat, lightly sand with 320-grit or 220-grit for oil-based. Wipe clean with a tack cloth and remove all dust.
Apply 2 to 3 coats for full protection.
Warning: Never sand the final coat with 320-grit because it can wear through. Use a white Scotch-Brite pad for final smoothing instead.
Cure and Protect the Final Surface
The finish may feel dry, but it is not fully hardened.
Follow the Cure Timeline
- 48 hours: Light use is acceptable for books and decor.
- 7 to 10 days: Use placemats for hot or wet items.
- 30 days: Full cure. Now safe for drinks without coasters.
Rushing this step causes water rings and dents.
Add Wax for Extra Protection (Optional)
After the final coat cures, apply a thin layer of paste wax. Wait 90 minutes, then buff with a soft cloth or rotary buffer.
Benefit: Wax adds water resistance and a soft sheen, ideal for polyurethane finishes.
Avoid Common Renovation Mistakes
Even experienced DIYers make errors. Here is how to avoid them.
Sanding Over Old Finish
Leaving old finish behind causes poor adhesion and a patchy look. Always strip or sand to bare wood.
Skipping Wood Conditioner
On pine or mixed woods, this leads to blotchy, uneven stain. Always condition first.
Using Oil-Based Poly on Light Wood
It adds a yellow tint. For white or light oak tables, use water-based poly to keep the color true.
Rushing the Cure Time
Putting hot pans or wet glasses on uncured finish causes permanent damage. Wait 30 days for full hardness.
Handle Special Cases Like a Pro
Restore a Mixed-Wood Table
Different woods absorb stain differently:
- Condition the entire piece first.
- Stain lighter legs, which are often poplar or birch, with a warmer tone first.
- Apply a unifying neutral stain like Aged Barrel over the whole table.
- Touch up with furniture markers as needed.
Fix Water-Damaged Veneer
If re-veneering is not an option, try heat and pressure on small bubbles. Fill detached edges with wood filler. Use a darker stain to hide repairs.
Repair Cracked or Peeling Lacquer
This means the finish has failed. Do not patch. Strip the entire surface and refinish from bare wood.
Maintain Your Renovated Table
A well-finished table can last decades with proper care.
Daily and Long-Term Care
- Always use coasters and placemats.
- Dust regularly with a soft cloth.
- Clean spills quickly with a damp cloth and mild soap.
- Avoid harsh cleaners like ammonia or bleach.
Refresh the Finish
- Oil finishes: Reapply Teak or Danish oil when the wood looks dry.
- Polyurethane: Lightly sand and recoat if worn.
- Waxed surfaces: Re-buff with a clean cloth to restore shine.
Pro Tip: A fully refinished table with polyurethane can last 20 or more years with care. Rushed jobs often fail within months.
Frequently Asked Questions About Renovating a Wooden Table
Can I renovate a veneer table?
Yes, but with caution. Veneer is a thin wood layer over a substrate, and aggressive sanding canpenetrate it. Use chemical stripper instead of heavy sanding, and avoid any areas where the veneer is lifting or bubbled.
What is the best finish for a dining table?
Polyurethane, either oil-based or water-based, is the best choice for dining tables. Oil-based adds warmth and suits dark woods, while water-based stays clear and works well on light woods. Both provide excellent protection against spills and wear.
How long does it take to renovate a wooden table?
The process takes 1 to 2 weeks for most tables. This includes 24 hours for drying after stripping, 6 to 12 hours between stain coats, 24 hours between finish coats, and 7 to 10 days before the table can handle hot or wet items safely.
Why is my stain blotchy even after applying wood conditioner?
The conditioner helps but does not guarantee perfect results. Pine and poplar are naturally blotchy. Apply stain quickly and wipe off excess consistently. Testing on a hidden area first helps you adjust technique before committing to the full table.
Can I use a different stain color to cover repairs?
Yes, darker stains like Teak or Rosewood can mask filler spots and minor repairs. Use furniture markers to blend small imperfections after staining. For best results, match your repair approach to your final stain color.
When can I use my renovated table?
Light use is fine after 48 hours. Use placemats for 7 to 10 days. Wait 30 days before placing drinks directly on the surface without coasters to ensure the finish reaches full hardness.
Key Takeaways for Renovating Your Wooden Table

Renovating a wooden table is a rewarding project that transforms forgotten furniture into a centerpiece. The process begins with identifying your table material, as solid wood, veneer, and laminate each require different approaches. Gather proper safety gear and tools before starting, and always work in a well-ventilated area.
The critical steps are cleaning thoroughly, stripping to bare wood, repairing damage with filler, applying wood conditioner before staining softwoods, and sealing with a durable top coat like polyurethane. Skipping the wood conditioner on pine or mixed-wood tables causes blotchy stain results.
Most importantly, respect the cure timeline. Rushing to use the table before the finish fully hardens causes water rings and permanent damage. With patience and proper technique, your renovated table will last 20 years or more. Start with proper preparation, never skip the sanding steps, and let the finish cure fully. Your effort will pay off in a beautiful, durable table that tells a story.