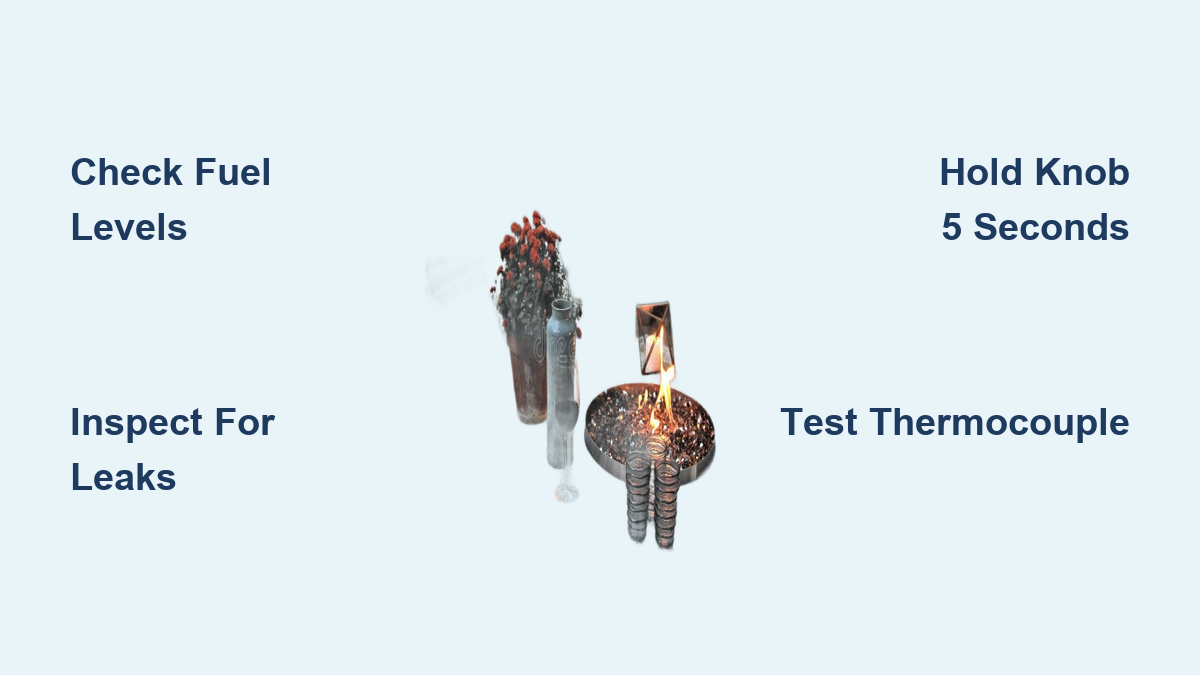
How to Start a Fire Table: Quick Steps
You’ve set up your fire table for a cozy evening outdoors, pressed the igniter, and nothing happens. This frustrating scenario is more common than you might think. Learning how to start a fire table correctly involves understanding fuel setup, ignition sequence, and safety protocols that prevent failed starts and dangerous situations. Whether you own a propane or natural gas model, the right approach makes all the difference between hassle-free enjoyment and repeated troubleshooting.
This guide walks you through every step from fuel verification to proper shutdown, including the critical thermocouple engagement that keeps your flame burning. You’ll discover pre-ignition checks, exact lighting procedures, flame adjustments, and troubleshooting solutions based on manufacturer standards. By the end, you’ll have the confidence to start your fire table safely every time.
Verify Fuel and Setup Before Ignition

Before attempting to light your fire table, confirming proper fuel levels and connection integrity is essential. Skipping these checks leads to failed ignition attempts and potentially dangerous gas buildup.
Check Propane Tank Status
Verify the propane tank is full and in good condition. Never assume a tank still contains fuel after storage, as propane evaporates over time. A lightweight tank indicates it’s empty. Inspect for dents, rust, or damaged valves before connecting. A compromised tank poses serious safety risks and should be replaced rather than used.
Open Tank Valve Correctly
Turn the tank valve counterclockwise until it stops completely. This fully opens the valve and allows gas to flow into the fire table’s gas line. Partial opening causes inconsistent pressure that prevents reliable ignition. The “lefty loosey” principle applies here.
Inspect Connections for Leaks
Examine the hose and regulator connection points between the tank and fire table. Check for cracks, wear, or loose fittings. Apply a soapy water solution to all joints. If bubbles form, gas is escaping. Tighten connections or replace faulty parts before proceeding with ignition.
Position and Inspect the Unit
Proper placement and thorough inspection before each use prevent accidents and ensure reliable performance. This is especially important after periods of storage.
Place on Level, Stable Surface
Set the fire table on a flat, non-flammable surface such as concrete, stone, or paver brick. Avoid wooden decks, grass, or unstable areas unless the manufacturer explicitly permits them. An unstable base increases tipping risk, particularly in windy conditions.
Conduct Post-Storage Inspection
After any storage period, examine the burner assembly, ignition system, and control knob for debris, spider nests, or moisture. Clean obstructions with a soft brush or compressed air. Confirm the igniter produces a spark when pressed. Remove any covers and inspect for trapped moisture or damage.
Access Control Panel and Prepare to Light
With fuel and placement confirmed, access the ignition controls and prepare for startup. Clear the area of flammable materials and ensure children and pets remain at a safe distance.
Open Lid and Locate Controls
Lift the fire table lid to expose the control panel. Most models house the control knob, igniter button, and burner assembly beneath this area. Keep the space clear of debris, and confirm everyone is positioned safely away from the ignition zone.
Turn Knob to Low Setting
Rotate the control knob counterclockwise approximately a quarter turn until it reaches the “Low” position. This initiates gas flow to the burner. Many ignition failures occur because the knob wasn’t turned far enough to allow proper gas delivery.
Ignite the Fire Table
Follow this precise sequence to generate a spark, ignite the flame, and activate the thermocouple. The thermocouple is the critical safety component that keeps gas flowing once the flame is established.
Depress Knob and Press Igniter
Fully press down the black control knob. While holding it down, repeatedly press the sparker button. You should hear a rapid clicking sound. Each click represents a spark attempting to ignite the gas. Keep your hand near the burner to feel for gas flow. If you smell propane, stop immediately and check for leaks.
Confirm Flame Ignition
Watch the burner area closely. If gas is flowing and the igniter is working, a flame should appear within seconds. If lighting fails, stop sparking, release the knob, and wait 30 seconds to let accumulated gas dissipate before retrying. Never continue sparking with unburned gas present.
Hold Knob for 3 to 5 Seconds
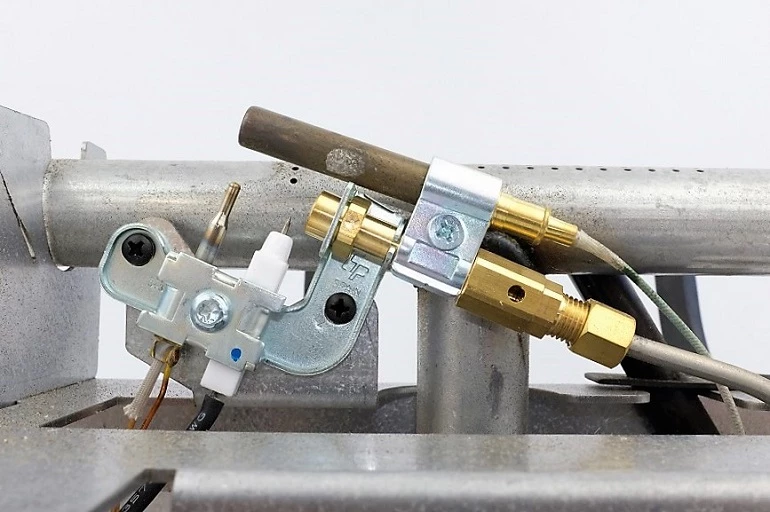
Once the flame ignites, keep the control knob fully depressed for 3 to 5 seconds. This duration heats the thermocouple, a safety sensor located near the flame. When hot, it generates a small electrical current that signals the gas valve to stay open. Releasing the knob too soon is the most common reason flames go out. In cold or windy conditions, hold for up to 10 seconds.
Adjust Flame Height to Your Preference

After successful ignition and thermocouple engagement, customize the flame height for your desired heat output and ambiance.
Increase Flame Counterclockwise
To raise the flame, turn the control knob counterclockwise. This opens the gas valve further, increasing gas flow and flame size. Adjust gradually to avoid sudden flare-ups. The maximum setting provides peak heat but consumes fuel faster.
Decrease Flame Clockwise
To lower the flame, turn the knob clockwise. This restricts gas flow, reducing flame size to a low, steady glow for ambiance or mild warmth. Always return to low before shutting off to prolong component life. Running on high for extended periods can cause sooting or overheating.
Shut Down Your Fire Table Safely
Proper extinguishing prevents gas leaks and protects your unit from damage. Follow this sequence every time you finish using the fire table.
Turn Knob to Off Position
Press the control knob inward and rotate it clockwise until it clicks into the “Off” position. The flame should go out immediately. If it doesn’t, turn the tank valve clockwise to cut the fuel supply.
Close Propane Tank Valve
After extinguishing the flame, close the propane tank valve by turning it clockwise. This removes pressure from the gas line and prevents slow leaks when the unit is idle. This step is especially important before long-term storage or if leaving the patio unattended.
Allow Cooling Time
Wait at least 15 to 20 minutes for the fire table to cool before covering or moving it. Trapped heat under a cover causes condensation, rust, or fire hazards. Use a manufacturer-approved, breathable cover for storage protection.
Troubleshoot Common Ignition Issues
Even with correct procedures, problems can occur. Use this guide to diagnose and resolve issues quickly without frustration.
Flame Dies When Knob Released
The thermocouple didn’t heat sufficiently. Repeat the ignition process and hold the knob for at least 5 seconds. Ensure the flame is directly touching the thermocouple tip. Clean any soot or debris blocking contact between the flame and sensor.
No Spark From Igniter
A dead battery, faulty wiring, or blocked sparker tip causes this issue. Replace the AA battery if applicable. Check wire connections under the control panel. Clean the sparker electrode with a dry cloth. Test for continuity if problems persist.
Gas Smell Without Ignition
Gas has built up from failed start attempts. Stop pressing the igniter immediately. Step away and wait 1 to 2 minutes for gas to clear. Check the tank valve and all connections. Never use a match to light the fire table, as this can cause an explosion.
Weak or Uneven Flame
Clogged burner ports or low fuel cause weak flames. Turn off the unit and let it cool completely. Use a needle or pipe cleaner to clear debris from burner holes. Confirm the propane tank is at least half full.
Follow Critical Safety Rules
Your safety and the safety of others depend on consistent adherence to operational guidelines. These rules apply every time you use your fire table.
Never Leave Unattended
Always supervise the fire table while the flame is lit. Even a small flame can ignite nearby fabrics, leaves, or furniture in windy conditions. Extinguish the flame before going inside or leaving the patio area.
Maintain Proper Clearance Zones
Keep at least 3 feet of clearance from walls, railings, umbrellas, and combustible materials. Overhead clearance for covered patios or trees must meet manufacturer specifications, typically 8 to 10 feet. Check your specific model’s requirements.
Schedule Annual Professional Maintenance
Before each season, inspect gas lines, clean the burner, and test the thermocouple. For complex issues or gas line modifications, hire a licensed professional. DIY repairs can void warranties and create serious safety hazards.
Frequently Asked Questions About Starting a Fire Table
Why does my fire table flame go out when I release the knob?
This happens because the thermocouple hasn’t heated long enough. The thermocouple is a safety sensor that must be heated by the flame for 3 to 5 seconds to generate enough electrical current to keep the gas valve open. Hold the knob depressed longer on your next attempt.
Can I use a match to light my fire table instead of the igniter?
No. Using matches or lighters is dangerous and can cause explosions if gas has accumulated. The built-in igniter system is designed for safe ignition. If the igniter isn’t working, troubleshoot the sparker or consult a professional rather than using open flames.
How do I know if my propane tank is empty?
A lightweight tank indicates it’s empty, as propane is heavier than air when liquid. You can also weigh the tank to check against its listed empty weight, or simply replace a tank that feels unusually light.
What should I do if I smell gas when trying to start my fire table?
Stop all ignition attempts immediately. Step away from the unit and wait 1 to 2 minutes for gas to dissipate. Check that the tank valve is fully open and all connections are secure. If the smell persists, turn off the tank valve and do not use the fire table until a professional inspects it.
How often should I inspect my fire table for safety?
Inspect your fire table before each use for visible damage, debris, or blockages. Conduct a thorough safety inspection at the start of each season. Schedule professional annual maintenance to check gas lines, the thermocouple, and internal components.
Key Takeaways for Starting Your Fire Table

Starting a gas fire table safely requires attention to three critical areas: proper fuel setup with leak-free connections, following the exact ignition sequence including the 3 to 5 second thermocouple hold time, and consistent safety practices like maintaining clearance zones and never leaving the flame unattended. By verifying fuel levels, opening valves fully, and holding the knob long enough to activate the thermocouple, you’ll achieve reliable ignition every time. Troubleshooting common issues like flame outs and weak sparks becomes straightforward once you understand how the safety components work together. Always consult your specific model’s manual for details tailored to your unit, and enjoy warm, worry-free evenings around your fire table.