How to Paint a Dining Table
Is your dining table looking worn, outdated, or completely mismatched with your current decor? You do not need to buy a replacement. Painting a dining table is one of the most cost-effective ways to transform a tired piece into a stunning focal point for your home.
This guide walks you through exactly how to paint a dining table that withstands daily family dinners, homework sessions, and holiday gatherings. You will learn proper prep techniques, product recommendations for lasting durability, and the critical curing steps that prevent damage from spills and everyday use.
Prep the Table Thoroughly
Proper preparation determines whether your paint job lasts years or peels within months. This phase is non-negotiable for high-use dining tables.
Disassemble the Table First
Remove any table leaves, extensions, and detachable legs before you begin. This gives you full access to edges, joints, and undersides for complete coverage. It also prevents parts from sticking together during painting and makes the piece much easier to handle and move around your workspace.
Deep Clean Every Surface
Dining tables accumulate years of grease, wax, and food residue, especially around edges and carved details. Apply a heavy-duty degreaser like Crud Cutter or a strong detergent solution directly to the surface. Scrub thoroughly with a damp rag, and use a drill with a brush attachment to reach tight corners and joint areas where grime builds up.
Rinse everything with clean water to remove all cleaner residue, then let the table air dry completely before moving forward.
Remove Invisible Oils with Mineral Spirits
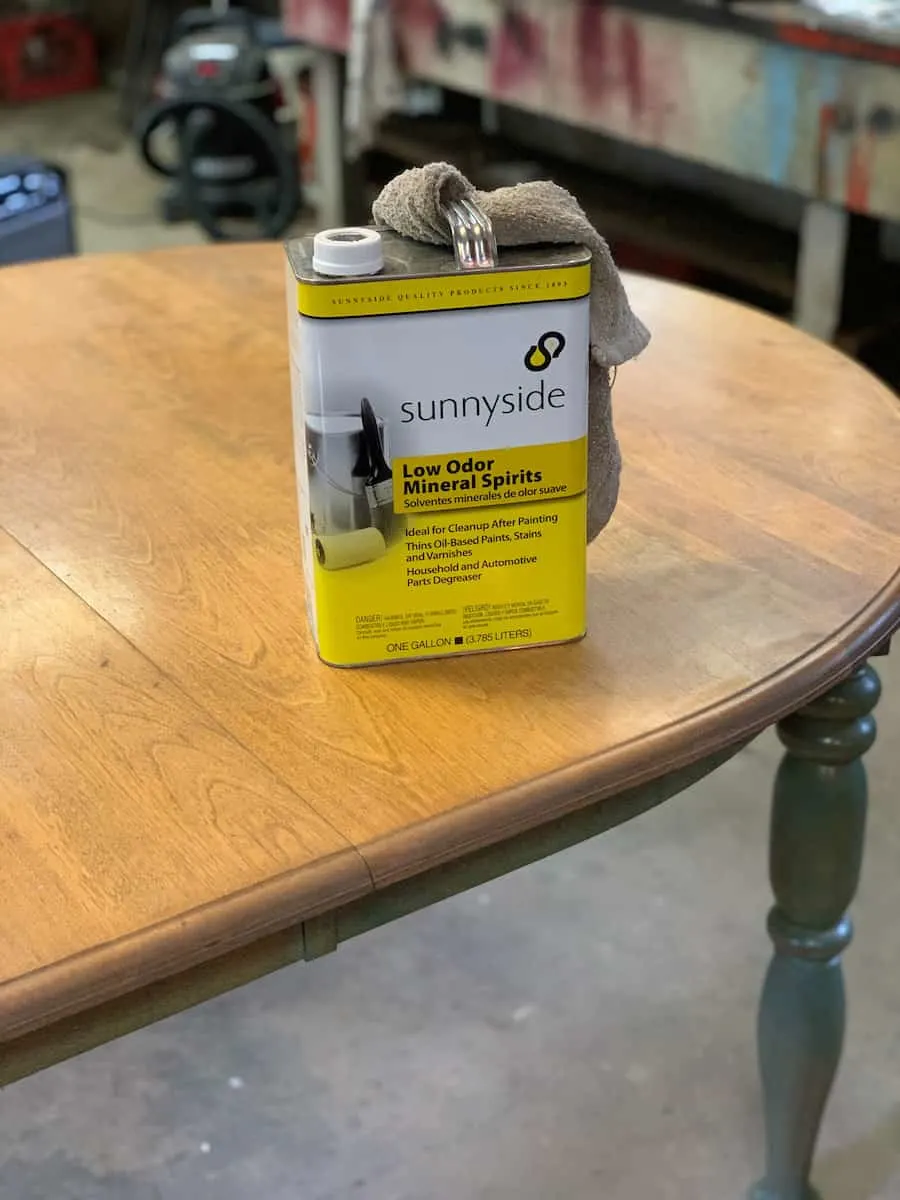
Even after thorough cleaning, invisible oils and waxes remain on the surface. Wipe every inch of the table with mineral spirits or denatured alcohol using a lint-free cloth. This final step ensures maximum paint adhesion and prevents the finish from peeling later.
Choose Your Surface Prep Method

Your table’s current finish determines which prep approach works best. You have three main options.
Sanding for Maximum Adhesion
If the table has a glossy finish, existing paint in poor condition, or visible damage, sanding is the most reliable method.
Use 150-grit sandpaper to scuff off the shine and create texture for paint to grip. Switch to 220-grit for a smooth, even surface. A random orbital sander works well on flat tabletop areas, while sanding sponges handle curves and detailed edges better.
After sanding, vacuum the entire piece thoroughly, then wipe with a tack cloth to remove all dust particles before painting.
Bonding Primer as a Shortcut
For tables in good condition with an intact finish, you can skip heavy sanding. Apply a high-bond primer like INSL-X STIX, which adheres to glossy surfaces without scuffing.
However, light scuffing with 220-grit sandpaper is still recommended even when using bonding primer. It significantly improves durability and ensures the paint grips properly.
Stripping for Severely Damaged Finishes
For tables with chipped, peeling, or water-damaged finishes, complete stripping may be necessary. Use a carbide scraper to remove thick varnish efficiently without harsh chemical strippers. After scraping, sand the bare wood starting at 150-grit and progressing through 240-grit for a smooth, even base ready for primer.
Prime for Maximum Durability

Primer locks in the surface, prevents stains from bleeding through, and ensures paint adheres properly. This step is critical for dining tables that face heavy daily use.
Block Tannin Bleed-Through
Pine, oak, and other common woods contain natural tannins that can seep through paint, causing ugly yellow or reddish-brown spots. Prevent this with a stain-blocking primer.
Apply AquaLock Primer in black for the best coverage under light or white paint. Shellac works well for spot treatment on specific areas. INSL-X Prime Lock Plus also provides excellent stain-blocking properties for full-table application.
Apply Bonding Primer Correctly
Even on raw wood, a bonding primer improves durability significantly. Use INSL-X STIX Waterborne Bonding Primer for all surfaces, including laminate and previously finished pieces.
Apply with a 4 to 6-inch roller for flat surfaces and a brush for legs and detailed areas. Use light coats on leaf edges to prevent them from sticking together when closed. Let the primer dry completely, which takes about 60 minutes for water-based products, then lightly sand with 220-grit and wipe with a tack cloth.
Repair Dents and Imperfections
Address flaws now, before any paint goes on, for a flawless final result.
Fill Scratches and Dings
Use plastic wood filler to fill dents, gouges, or screw holes. Apply with a putty knife, overfilling slightly since filler shrinks as it dries. Let dry completely, then sand flush with 220-grit sandpaper.
For deep repairs, apply filler in thin layers rather than one thick coat to avoid shrinking and cracking.
Sand and Re-Prime Repairs
After filling, sand the area smooth and apply a second coat of primer over repaired spots. Finish with a final light sand using a 220-grit foam pad and remove all dust with a tack cloth before proceeding to paint.
Paint the Table Like a Pro
With preparation complete, painting begins. Your application method depends on your tools and the finish you want to achieve.
Brush and Roller Method
This approach works well for most DIYers and provides excellent control.
Choose your paint based on your needs. Annie Sloan Chalk Paint requires minimal prep and dries quickly with a rustic matte finish. Benjamin Moore ADVANCE offers a smooth, durable furniture-grade acrylic. Fusion Mineral Paint is self-sealing and washable, requiring no top coat for most projects.
Apply the first coat using a synthetic brush for chalk paint or a high-quality flat brush for enamel paints. Roll flat surfaces with a fine-nap foam roller to avoid stippling. Paint in the direction of the grain for the smoothest appearance.
Let the first coat dry completely. Chalk paint dries in 30 to 60 minutes, while enamel may take up to 16 hours. Lightly sand with 220-grit to remove dust nibs or brush marks, then wipe clean.
Apply a second coat evenly. Pine and orange-toned woods often require three coats to fully cover undertones.
Spray Paint for Factory Finish
For ultra-smooth results, especially on chairs or intricately carved legs, a paint sprayer delivers professional-quality outcomes.
Set up a spray shelter like HomeRight Spray Shelter to contain overspray and protect your workspace. Thin Sherwin Williams Emerald Urethane Enamel with 15% water for better flow. Chalk paint typically does not need thinning.
Hold the sprayer 8 to 12 inches from the surface and move steadily to avoid runs. Apply two thin coats, allowing proper drying time between each.
Even sprayers leave slight texture. Lightly sand with 220-grit after the final coat dries for a glass-smooth finish.
Oil-Based Paint for Maximum Durability
For families with children and heavy daily use, oil-based paint offers the hardest, most scuff-resistant finish available.
Use in a well-ventilated area due to strong fumes. Expect longer dry times, up to 24 hours between coats. Clean brushes with mineral spirits.
Seal for Heavy Use

Sealing protects your painted table from water, heat, and everyday wear. This step is essential for dining tables.
When Sealing Is Required
Chalk paint and standard latex always require a top coat. Urethane enamel and mineral paint are often self-sealing. Stained tops must be sealed to prevent damage.
Best Sealers for Dining Tables
| Sealer | Best For | Sheen | Cure Time |
|---|---|---|---|
| Gator Hide | High-traffic tables | Satin | 7 days |
| Chalk Paint Lacquer | Chalk paint protection | Matt or Gloss | 14 days |
| Hard Wax Oil | Natural look, food-safe | Satin | 3 to 7 days |
| Water-Based Poly | General use | Clear | 3 to 5 days |
Apply Sealer Correctly
Stir the sealer gently. Shaking creates bubbles that ruin the finish. Apply with a flat brush, roller, or blue sponge applicator in long, even strips to avoid missed spots. Let dry 1 to 2 hours, then apply a second coat.
For hard wax oil, apply, wait 15 minutes, then buff off excess with a lint-free cloth.
Cure Before Use
This is where most DIYers make mistakes. Using the table too soon ruins the finish permanently.
Understanding Cure Time
Dry to touch happens within hours, meaning you can apply the next coat. Recoat window varies by product, up to 16 hours for some enamels. Full cure takes 3 to 14 days depending on the specific product.
Wait Before Placing Items
Do not use placemats, coasters, or tablecloths during cure. These can stick permanently to the finish. Avoid placing hot dishes or heavy objects until fully cured. Do not stack chairs on the table.
Most finishes reach usable hardness in 3 to 5 days, but maximum durability takes up to 2 weeks.
Handle Special Cases
Paint a Pine Table Without Bleed-Through
Pine contains strong yellow-orange tannins that bleed through light paint. Use black stain-blocking primer like AquaLock or shellac. Apply two to three paint coats to cover undertones completely. Seal with Gator Hide for long-term protection.
Paint Laminate Without Peeling
Laminate is slick and non-porous, making paint adhesion difficult. Clean thoroughly with mineral spirits first. Use INSL-X STIX bonding primer designed specifically for laminate. Follow with Benjamin Moore ADVANCE or Fusion Mineral Paint for best adhesion.
Fix Bleed-Through After Painting
If brown or reddish spots appear after painting, stop immediately. Apply shellac or stain blocker over affected areas. Let dry completely, then repaint and seal.
Achieve Your Desired Finish

Rustic Look with Chalk Paint
Apply with a brush using cross-hatch strokes for texture. Do not sand between coats. Seal with Matt Lacquer for a vintage feel.
Smooth, Modern Finish
Use a sprayer with urethane enamel. Thin paint 15% for better flow. Sand lightly between coats with 220-grit or higher.
Two-Tone Design
Paint the base and legs in a bold color like Fusion C Black. Stain the top with Dixie Belle White Magic or natural oak. Seal the top with Hard Wax Oil for water resistance and enhanced grain.
Maintain Your Painted Table
Clean Safely
Wipe spills immediately with a damp cloth. Use mild soapy water for regular cleaning. Avoid bleach, ammonia, or abrasive scrubbers that damage the finish.
Protect the Surface
Use coasters and placemats. Avoid plastic-backed tablecloths until fully cured. They can fuse permanently to paint.
Touch Up Easily
Save leftover paint in a small jar for future touch-ups. Spot-fix chips or scratches with a fine brush as needed.
Frequently Asked Questions About Painting a Dining Table
How long does it take to paint a dining table?
Active working time spans 2 to 3 days. However, you should plan for up to 2 weeks before heavy daily use to allow for full cure time.
Do I have to sand before painting a dining table?
Sanding provides the best adhesion, but you can skip it using a high-bond primer like INSL-X STIX. Light scuffing with 220-grit is still recommended for maximum durability.
What is the best paint for a dining table?
Fusion Mineral Paint and Benjamin Moore ADVANCE work well for most projects. For maximum durability, use Sherwin Williams Emerald Urethane Enamel or oil-based paint.
Can I paint a dining table without primer?
Primer is strongly recommended. It prevents stain bleed-through, improves paint adhesion, and creates a more durable finish that resists chips and peels.
How long should I wait before using my painted dining table?
Wait 3 to 5 days for basic use. For full hardness and durability, wait up to 2 weeks before placing heavy items or using it for daily meals.
Can I paint over a laminate dining table?
Yes. Clean thoroughly with mineral spirits and use INSL-X STIX bonding primer specifically formulated for slick surfaces. Follow with a quality furniture paint.
Key Takeaways for Painting Your Dining Table
Painting a dining table requires thorough preparation more than expensive products. Clean, sand or prime with bonding primer, then paint with thin coats. The secret to durability lies in proper sealing and patience during the curing process.
Choose the right products for your usage needs. Families with children benefit from urethane enamel or oil-based paint with maximum block resistance. DIYers seeking a rustic look achieve beautiful results with chalk paint and lacquer.
Your painted table can last for years with proper maintenance. Clean spills immediately, use coasters, and store leftover paint for touch-ups. The effort you invest now pays off in a beautiful, functional piece that becomes the centerpiece of your home for years to come.