How to Make a Router Table: Quick Steps
Building your own router table is one of the most impactful upgrades you can make in a woodworking shop. Whether you are a weekend hobbyist or a full-time craftsman, a custom router table gives you precision, safety, and versatility that a handheld router alone cannot match. The good news? You do not need a machine shop or years of experience. This guide walks you through how to make a router table from scratch, covering material selection, construction techniques, and professional finishing touches.
You will learn how to build a stable, dust-efficient, and highly functional router table that rivals commercial models, all for less cost and with full customization. Whether you want a portable trim router setup or a heavy-duty stationary workstation with drawers, dust collection, and micro-adjustable fences, this step-by-step breakdown ensures success.
Choose the Router Table Design That Fits Your Shop
Before cutting any wood, decide what kind of router table suits your needs. The design impacts materials, time, and functionality.
Portable Trim Router Tables
Ideal for small shops or mobile use, these are built fast using one sheet of plywood and melamine. They support palm routers for edge profiling, rabbets, and light dado work. Lightweight and compact, they are perfect if space is tight.
Best for: DIYers, apartment woodworkers, or those using trim routers.
Mid-Range Custom Tables
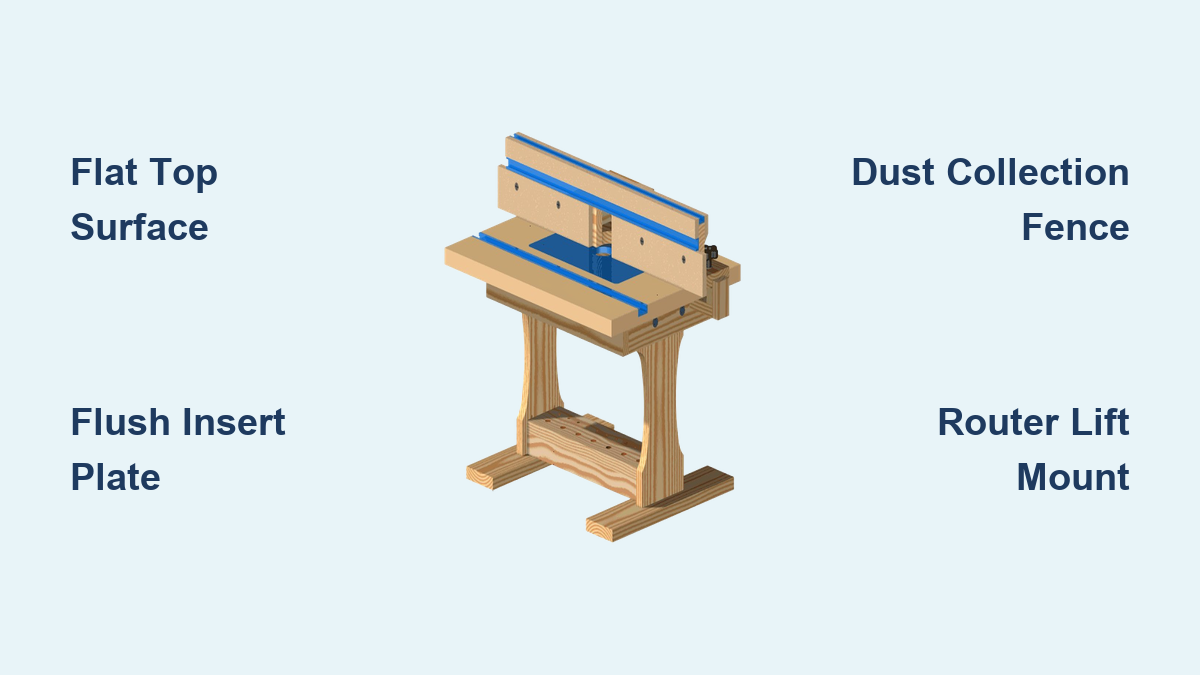
These offer a balance of size, support, and features. A typical 36 by 24 inch footprint provides ample space for large panels. They often include T-tracks, dust ports, and adjustable fences. You can mount full-size routers and add a router lift later.
Best for: Serious hobbyists who want professional results without cabinet-level complexity.
Ultimate Stationary Systems
Built like shop furniture, these feature cabinet bases, cast iron or thick MDF tops, full drawer storage, and integrated dust collection. They are heavy, stable, and designed for daily use with large bits and power feeders.
Best for: Production shops or woodworkers who demand maximum precision and organization.
Gather Materials and Hardware for Your Build
Your choice of materials determines durability, flatness, and ease of use. Stick to proven combinations from the start.
Tabletop Surface Options
The top must be smooth, flat, and resistant to wear.
• Melamine over MDF or Plywood: Most popular. Use 3/4 inch MDF or Baltic Birch as a substrate, laminated with white or black melamine. Provides a slick surface for workpieces to glide.
• Cast Iron: Premium option. Heavy, vibration-damping, and ultra-flat, but expensive and requires rust prevention.
• Solid MDF: Budget-friendly and stable. Sand and seal edges to reduce dust. Avoid particleboard.
Pro Tip: Bond melamine to substrate with contact cement, not wood glue. Apply two coats to both surfaces, wait until tacky, then press together. Clamp with center screws to prevent warping. Trim to size after 24 hours.
Structural Frame Materials
Use 3/4 inch Baltic Birch plywood for cabinet sides, stretchers, and dividers. It is void-free, strong, and machines cleanly. Actual thickness is approximately 0.718 inch, so factor this into joinery calculations. Reinforce joints with pocket screws for fast, strong assembly. Add hardwood edge banding to melamine edges.
Essential Hardware List
| Component | Recommended Type |
|---|---|
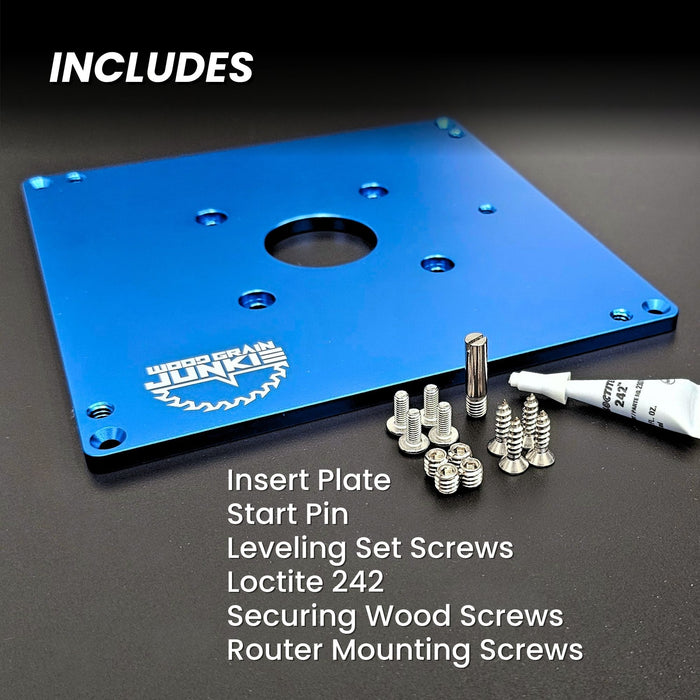
| Insert Plate | Aluminum commercial plate or DIY melamine disc |
| Router Lift | Rockler Pro Lift, Jessup, or Milescraft |
| T-Tracks | 5/16 inch threaded aluminum |
| Fasteners | Insert nuts, toilet bolts, star knobs, pocket screws |
| Adhesives | Wood glue, Weldbond, CA glue |
| Dust Port | 2.5 inch plastic hose connector |
Build a Flat, Durable Tabletop with Precision Insert Opening
This is the most critical phase. Accuracy here affects everything else.
Laminate and Finish the Top
- Cut MDF or plywood to final size.
- Apply contact cement to both substrate and melamine sheet.
- Align carefully, press down, and clamp with screws through the center.
- Let cure 24 hours, then trim edges on a table saw.
- Glue on hardwood edge banding, then flush-trim with a router.
Cut the Insert Opening
Precision prevents wobble and tear-out.
- Trace the Plate: Place your insert plate on the table. Mark center and outline.
- Draw Recess Box: Inside the outline, draw a smaller rectangle to create a lip for the plate to sit on.
- Drill Relief Holes: At each corner of the inner box, drill a 1/2 inch hole to allow jigsaw blade entry.
- Route the Recess: Attach straightedge fences with double-sided tape along the outer line. Use a flush-trim bit with top-bearing. Rout clockwise around the opening, removing material in passes.
- Cut Inner Section: Use a jigsaw to remove the center through the relief holes.
Visual Cue: The recess should leave a clean, flat lip. No chipping or uneven depth.
Level the Insert Plate
Even 1/64 inch high or low causes snags.
- Place the insert into the recess.
- Install leveling screws at each corner underneath.
- Adjust screws until a straight edge shows no gap across table and plate.
- Secure with anchor screws or insert nuts from below.
Alternative: For simple tables, drill a large central hole and use removable melamine discs with bit-specific holes.
Construct a Sturdy Base Cabinet with Storage
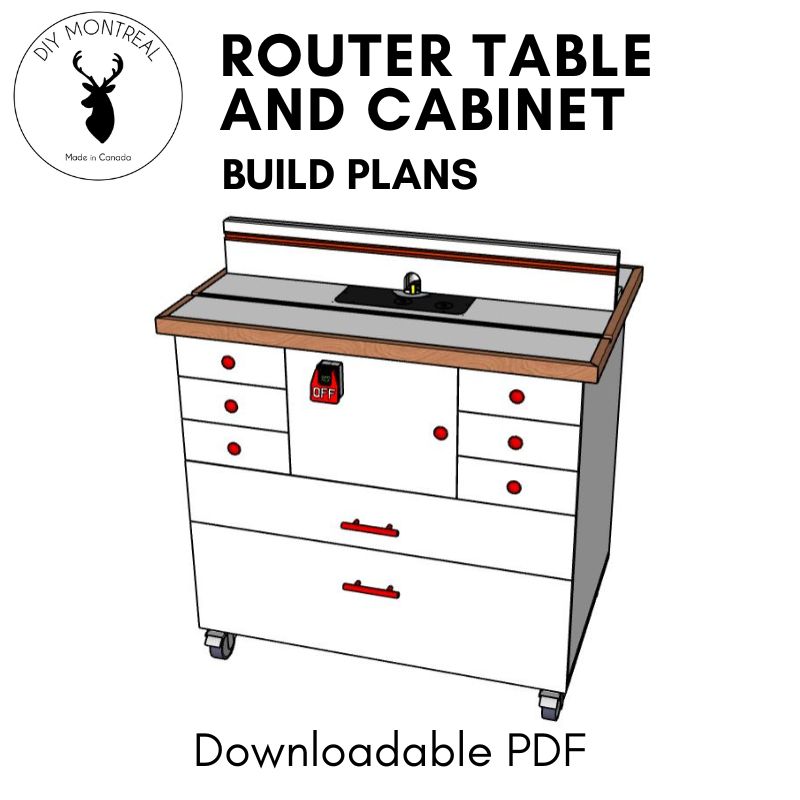
A rigid base prevents vibration and supports accessories.
Assemble the Frame
- Cut side panels, top, bottom, and dividers from 3/4 inch plywood.
- Drill pocket holes on all mating edges using a Kreg Jig.
- Assemble bottom to sides first, then install center divider as alignment guide.
- Clamp tightly and pre-drill drawer slide locations.
Avoid Bowing: Use spacer blocks between panels during assembly. A center clamp counters outward pressure when driving middle screws.
Install Drawers
Add storage for bits, wrenches, and jigs.
- Build drawer boxes from 1/2 inch plywood.
- Install over-extension drawer slides using spacers for perfect alignment.
- Mount drawer fronts with 1/8 inch gaps using playing cards as spacers.
- Temporarily secure fronts with hot glue, then screw from inside.
Upgrade: Add Blum Tip-On push-to-open mechanisms.
Add Mobility
Mount total lock casters to the base corners. These lock both wheel and swivel for easy movement and rock-solid stability when locked.
Build and Mount a Dust-Collecting Fence

The fence ensures straight, repeatable cuts and enables dust collection.
Fabricate a Flat, Rigid Fence
- Laminate two 3/4 inch plywood strips.
- Use small triangular spacers between layers during glue-up to ensure perfect flatness.
- Embed a T-track into the front face using it as a spacer while gluing.
- Secure track with Weldbond glue and clamp with dowels for 24 hours.
Add Dust Collection
- Drill a 2.5 inch hole in the back fence piece using a hole saw.
- Overlap front and back pieces so the back extends behind the bit.
- Glue a plastic dust port into the hole with Weldbond.
- Connect to shop vac via 2.5 inch hose.
Key: The fence must create a sealed chamber around the bit for effective dust pull. Misalignment means poor collection.
Mount Fence to Table
- Install T-tracks into the table surface along the front edge.
- Cut dados or use surface-mounted tracks.
- Attach fence using 5/16 inch toilet bolts, washers, and star knobs.
- Drill bolt holes in fence base slightly oversized for micro-adjustment.
Pro Tip: Test fence alignment by running a spiral bit. Zero dust means perfect seal and airflow.
Install Your Router with Optional Lift
How you mount the router affects usability and precision.
Direct Mounting
- Invert your router and place it under the insert plate.
- Trace the base and drill mounting holes.
- Secure with screws through counterbores in the melamine.
Limitation: Adjusting bit height requires reaching underneath.
Install a Router Lift
A lift lets you adjust bit height from above the table.
- Choose a dual-gear lift for micro-adjustment.
- Mount lift to insert plate or directly to table.
- Attach router to lift plate.
- Use ejector button to pop out throat plate for bit changes.
Compatibility Note: Some lifts fit specific routers without adapters.
Add Bit Storage
Build slide-out trays inside the cabinet. Drill holes with Forstner bits to hold 1/4 inch and 1/2 inch shank bits. Tape multiple plywood layers to achieve correct depth for friction fit.
Set Up Effective Dust Collection
A clean table is a safe, efficient table.
Use a Dust Bucket System
- Install a dust collection bucket under the table.
- It captures chips falling through the bit hole and connects to the fence port.
- Creates split airflow. Vacuum pulls from both fence and table underside.
Enhance Airflow
Install 3D-printed air exchange vents to pull air sideways and down. Route clearance holes for bucket mounting wings. Test with a spiral flush trim bit. If dust escapes, realign the fence.
Warning: Poor dust collection leads to buildup, overheating, and fire risk.
Add Pro-Level Upgrades

Take your table from functional to professional.
3D-Printed Accessories
• Cord holders for on/off switch and router power cord
• Routing templates for insert openings and dust ports
• Pull guides for consistent drawer handle placement
Miter Slots and T-Tracks
- Use a sacrificial CA glue strip to prevent tear-out.
- Route slots using a template and straight bit.
- Insert aluminum T-tracks with slight pressure.
Function: Enables miter gauges for crosscuts and featherboards for safety.
Power Feeder
For long boards or aggressive cuts:
- Drill and tap four holes into the tabletop.
- Mount a power feeder.
- It swings out when not in use.
Caution: Use tap drill size correctly. Breaking a tap in hardwood is a nightmare.
Safety and Electrical
Install a paddle switch with emergency stop. Route cord through a slot in the cabinet. Use a hidden female outlet mounted inside for a clean look.
Assemble and Test Your Router Table
Put it all together and verify performance.
Build Order
- Build base cabinet and install drawers and casters.
- Laminate and trim tabletop.
- Cut insert opening and level plate.
- Mount tabletop to base using insert nuts.
- Install T-tracks on table and fence.
- Mount fence, connect dust hose.
- Install router or lift.
- Add accessories.
Performance Benchmarks
Test your table with these checks:
• Flatness: No light passes under a straight edge across table and insert.
• Vibration: No shaking during operation, even with large bits.
• Dust Collection: Spiral bit test leaves no visible chips.
• Adjustment: Micro-adjust crank changes cut depth visibly.
Fix Common Router Table Problems
Fence Screws Bind
Fix: Route small notches under screw slots or shift holes slightly. Use oversized holes and star knobs for wiggle room.
Insert Plate Not Flush
Fix: Adjust leveling screws. If too low, shim the lip. If too high, sand recess. Check for uniform depth around entire opening.
Tear-Out During Cuts
Fix: Use sacrificial CA glue strips or double-sided tape with scrap wood guides. Support workpiece fully and use sharp bits.
Cabinet Bows During Assembly
Fix: Disassemble, remeasure, and re-clamp with spacer blocks. Cut stretchers to exact panel thickness.
Keep Your Router Table Performing at Its Best
Regular maintenance keeps your table performing like new.
• Clean regularly: Wipe melamine and MDF with a dry cloth.
• Lubricate: Light machine oil on router lift gears every 6 months.
• Inspect: Check drawer slides, casters, and fence bolts monthly.
• Rust prevention: If using cast iron, apply Boeshield T9 after cleaning.
Final Thoughts on Building Your Own Router Table
Building a router table is not just about saving money. It is about creating a tool tailored to your specific workflow. With the right materials, precise joinery, and attention to dust collection and safety, your DIY router table will outperform many store-bought models. Start simple if you are new, then upgrade over time. Once you have routed your first flawless edge with a featherboard guiding the cut, you will wonder how you ever worked without it.
Frequently Asked Questions About Making a Router Table
What is the best material for a router table top?
Melamine over MDF or Baltic Birch plywood is the most popular choice. It provides a slick, durable surface that allows workpieces to glide smoothly. The melamine resists wear and makes cleanup easy.
Do I need a router lift for my router table?
A router lift is not strictly required, but it is highly recommended for stationary tables. It allows you to adjust bit height from above the table rather than reaching underneath. This makes bit changes faster and adjustments more precise.
How much does it cost to build a router table yourself?
A basic portable router table can be built for under 100 dollars. A mid-range custom table with storage typically costs 200 to 400 dollars. High-end stationary systems with router lifts and premium features can reach 600 to 1000 dollars or more.
What size router table is best for a home shop?
A 36 by 24 inch tabletop provides a good balance of workspace and shop footprint for most home woodworkers. Larger tables offer more support for big panels, but they take up more space and are harder to move.
How do I ensure my insert plate is flush with the table?
Use leveling screws at each corner of the insert opening. Place a straight edge across the table and plate, then adjust the screws until no gap shows. Secure from below with insert nuts once level.
Can I use a trim router in a router table?
Yes, portable trim router tables are specifically designed for palm or trim routers. They are lightweight, compact, and ideal for edge profiling and light dado work. They are perfect for small shops or woodworkers with limited space.